
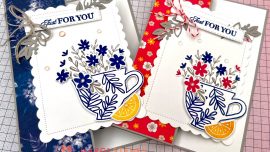
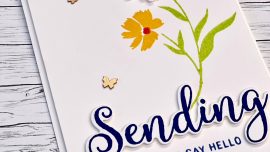
Flowering Fields Designer Series Paper and Stitched Rectangles dies are perfect partners for this simple design.
In Flowering Fields Paper, you’ll find an abundance of colour with gouache hand-painted tulips and complementary patterns. The Rectangle dies, ‘lift’ the card and provide added dimension. Finish the card with a greeting on a Tailor Made Tags die-cut and pretty bow. Card Done & Dusted!
All April tutorials feature products available from either the Mini Catalogue or Annual Catalogue. In the designs, I’ve ensured that many of the products used are carrying over into the new 2022-2023 Annual Catalogue.
This card is the first of our April Class cards. I designed this month’s cards featuring both Designer Series Paper and Dies to highlight how they work brilliantly together. In some cases the paper is the hero, in others, it is the die and/or stamp set. You’ll be able to see the difference as we move from Card #1, to Card #2 and Card #3.
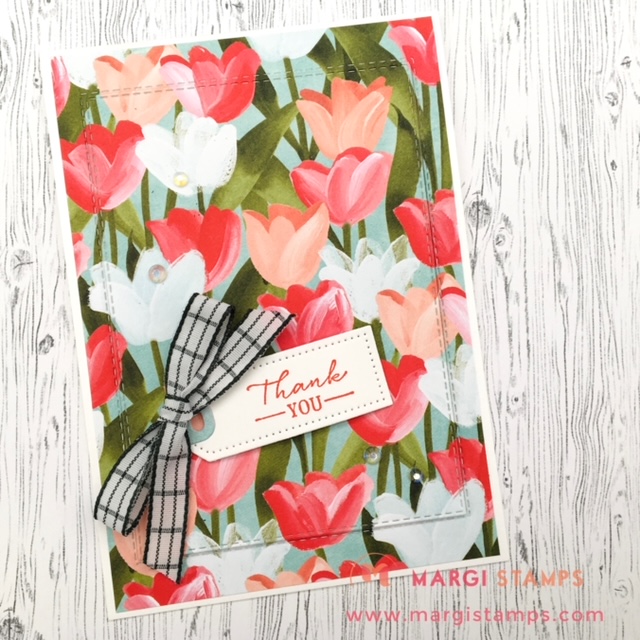
Welcome to your Make it with Margi April Tutorial Card #1. Please read on for all class kit dimensions and step by step directions.
If you are not in my class groups, you are welcome to enjoy these designs and adapt for your own creativity. You might like to join one of my online or in person class groups and receive your pre-cut card kit. If you live in Australia, you are more than welcome to join my classes or shop with me using my 24/7 Online Store. I would love to hear from you.
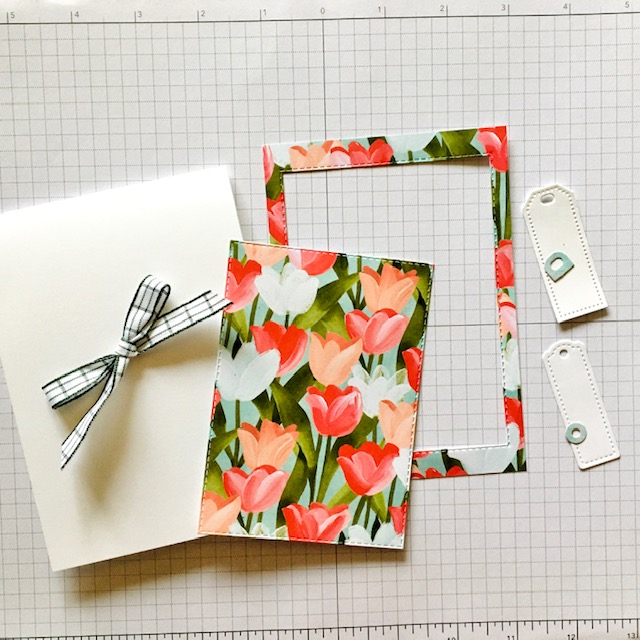
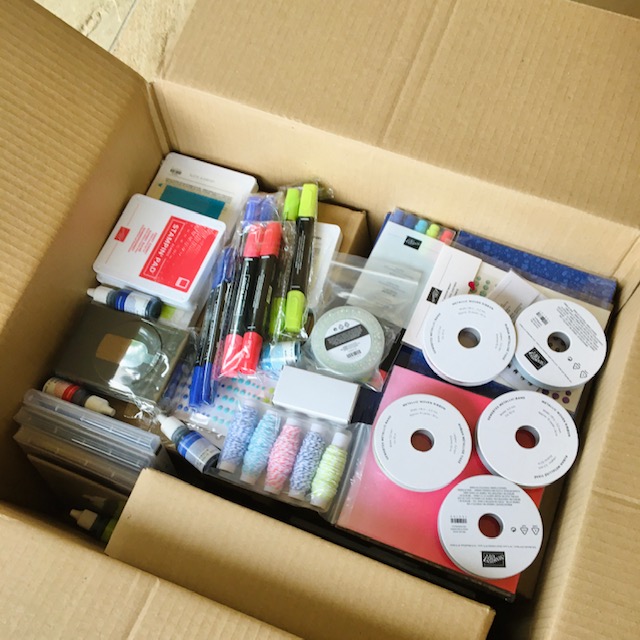
Ingredients for our Flowering Fields & Stitched Rectangles Card
Let’s step through the ingredients used for our card. Some are in the Annual and some in the January-June 2022 Mini Catalogue.
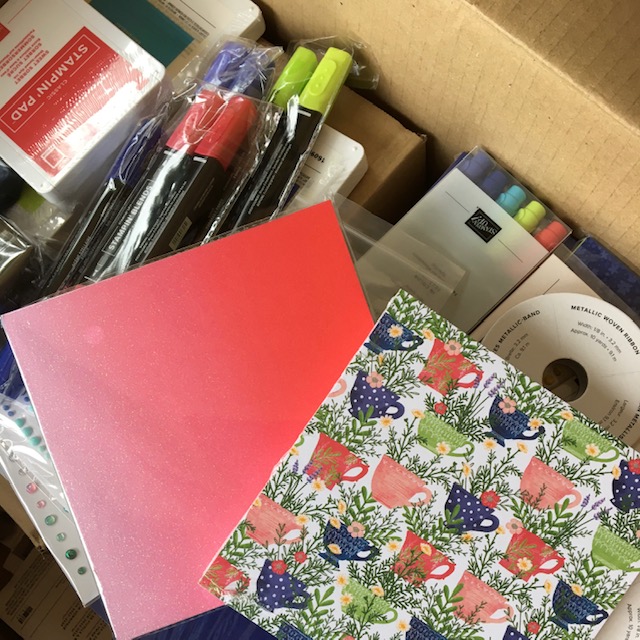
Flowering Fields Designer Series Paper
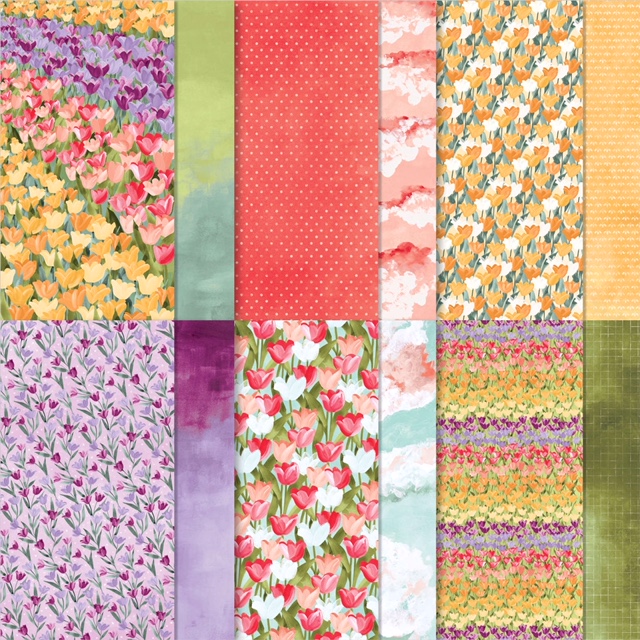
It’s bright and pretty with an abundance of colour in the gouache hand-painted tulips and complementary patterns. The designs are scaled perfectly for cardmaking, so you can send these delightful tulips to all your friends!
Click HERE for the product link in my 24/7 Online Store
Stitched Rectangles
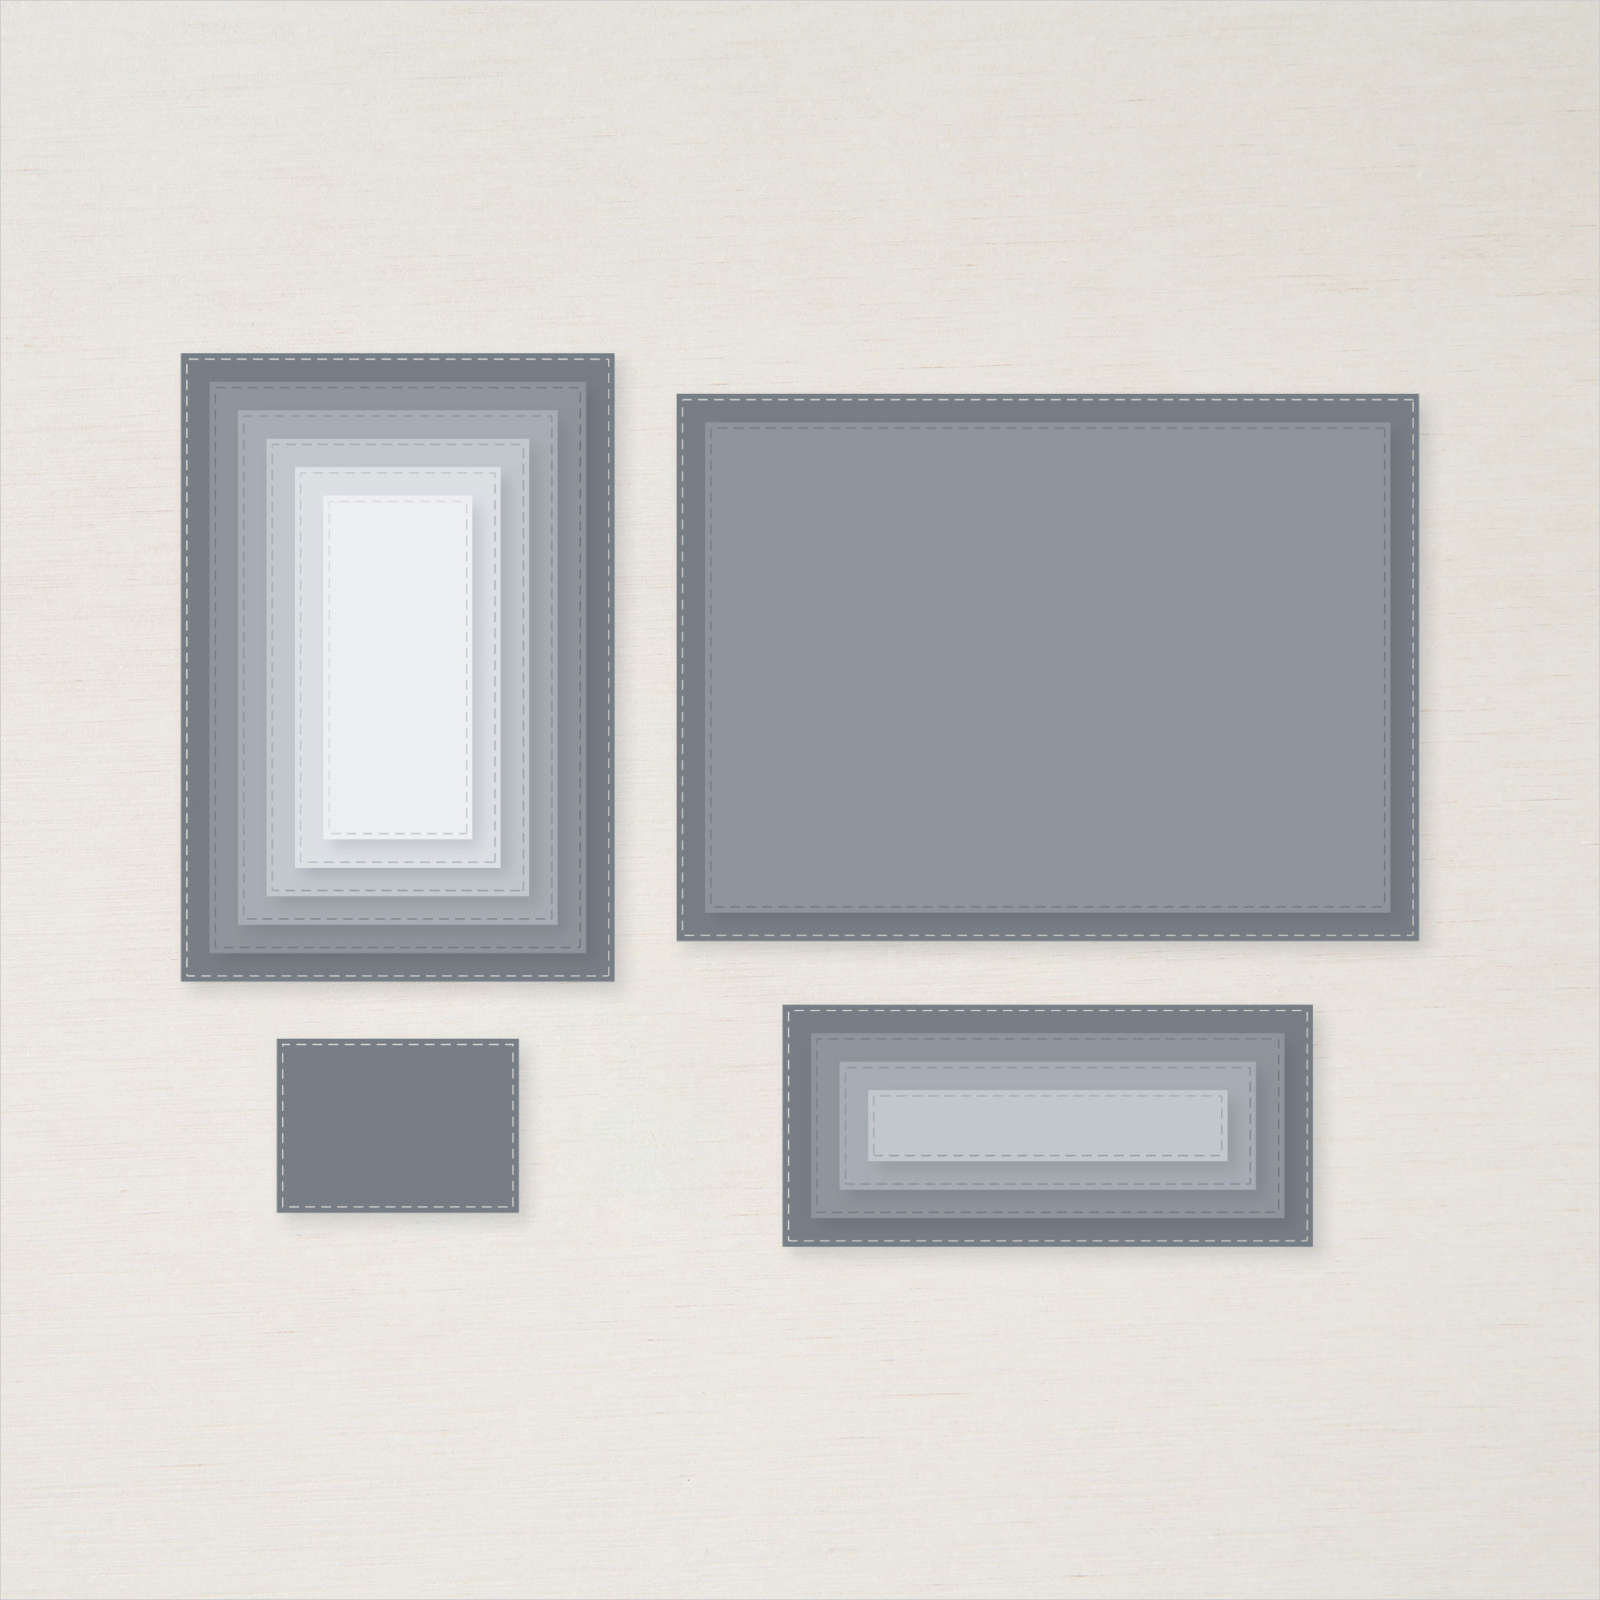
Create custom die-cut rectangles in record time using the Stitched Rectangles Dies. The dies are perfect for creating cards for any occasion.
Click HERE for the product link in my 24/7 Online Store
Tailor Made Tags 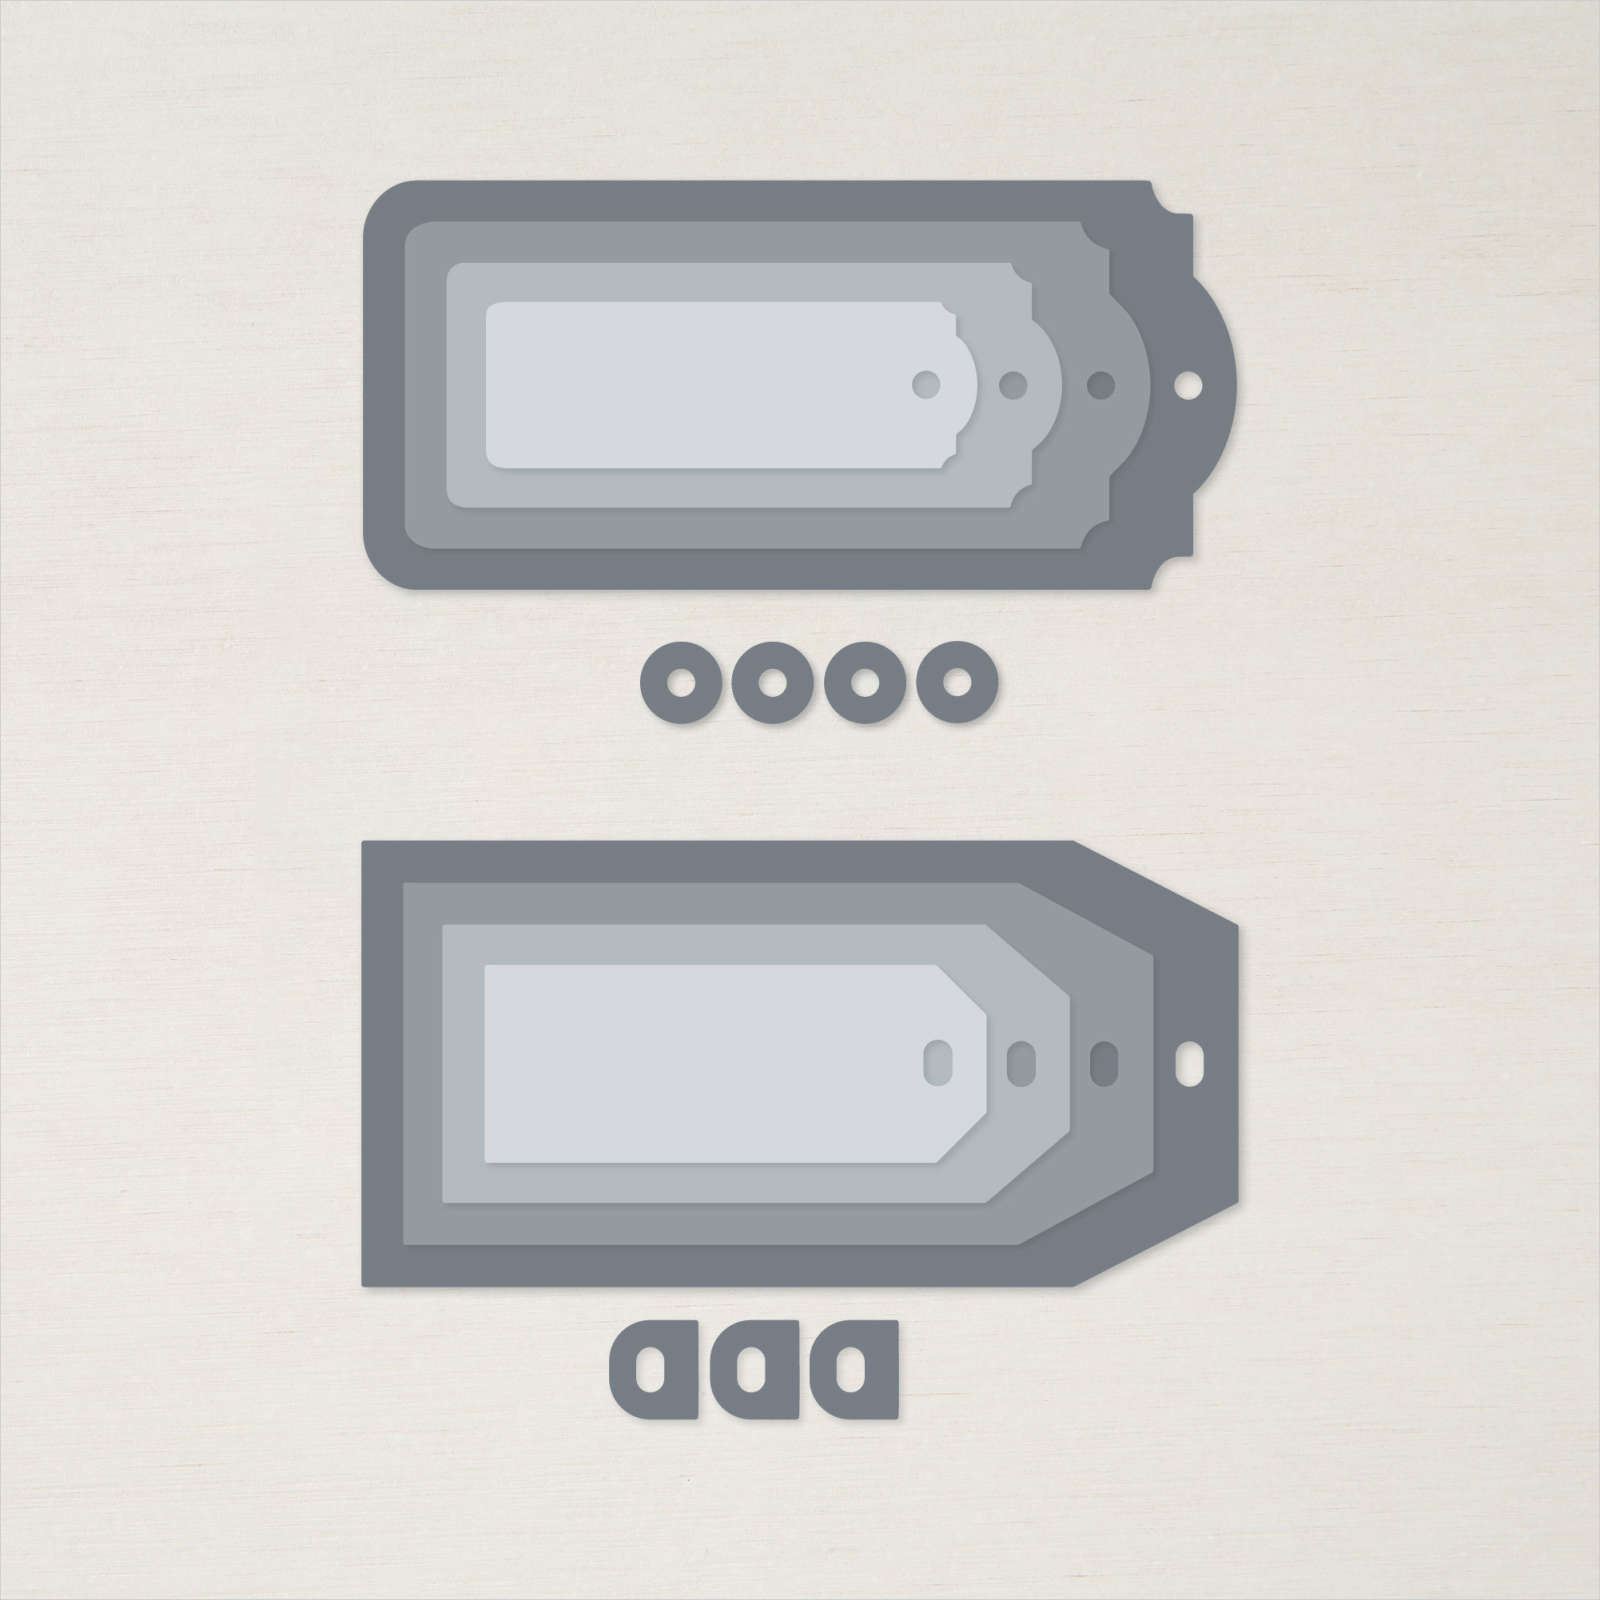
Easily add die-cut tags to your next papercrafting project with these Tailor Made Tags Dies. Mix, match, and layer tags in different sizes and colours. Create tags for any occasion you need: birthday cards, goodie bags, gift packages. Stamp sentiments from your favourite stamp sets, then cut out. It’s that easy to create custom tags!
Click HERE for the product ink in my 24/7 Online Store.
Flowering Fields & Stitched Rectangles Card
Here is your class kit.
SUPPLIES
- Stamp Sets, Dies & Punches: Stitched Rectangles Dies, Tailor Made Tags Dies. Various Stamp Set options for greeting and stamping on the inside of the card: Grassy Grove, Quiet Meadow, Flowering Tulips, Forever Fern and Nature’s Harvest.
- Papers: Flowering Fields DSP, Basic White Cardstock.
- Inks: Calypso Coral or Poppy Parade, Petal Pink.
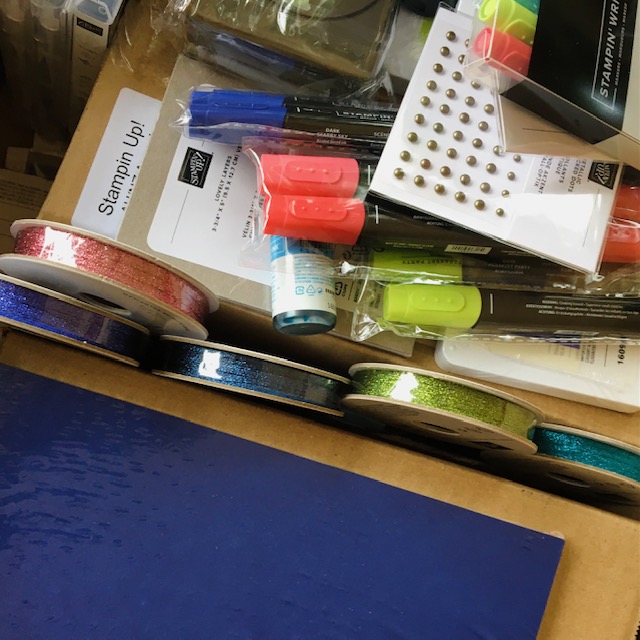
- Other: Iridescent Rhinestone Basic Jewels, Evening Evergreen Windowpane Check Ribbon, Multipurpose Liquid Glue, Mini Dimensionals, Take your Pick Tool, Paper Trimmer, Grid Paper (great for lining up your creations!), Cut & Emboss Machine.
HERE is the direct link to all current products in my 24/7 Online Store.
DIMENSIONS
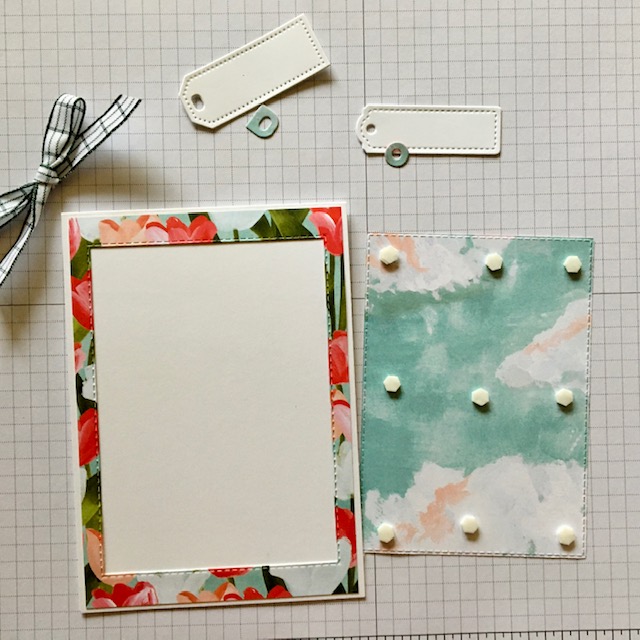
- Card Base: Basic White Thick 29.7 x 10.5 cm scored at 14.85 cm.
- Layering Paper. Flowering Fields DSP 14.5 x 10.1 cm, Scraps Basic White and Flowering Fields DSP.
Step by Step Directions
- Burnish card base along score line.
- Adhere ‘outside’ rectangle DSP to Basic White card base using Multipurpose Liquid Glue or Tear & Tape. In your kit, I die cut the DSP measuring 14.5 x 10.1 cm with the second largest Stitched Rectangles die.
- Apply Mini Dimensions to the back of the ‘inside’ Stitched Rectangle and adhere to the centre of the card.
- Choose your greeting and the tag, depending on the size of the greeting. I used ‘HELLO’ from Forever Fern Stamp Set & Thank You from Grassy Grove Stamp Set for the samples. Choose whichever tag size works for you. You might like to use the other tag for another card.
- Adhere the small ‘re-inforcer’ die-cut to the tag and stamp your greeting. Here are the samples:
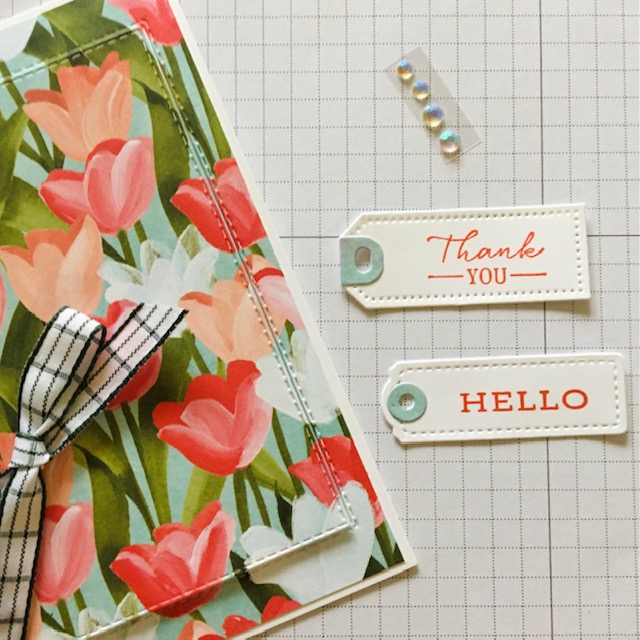
- Adhere stamped tag to your card front with Mini Dimensionals.
- Adhere bow with Mini Glue Dot.
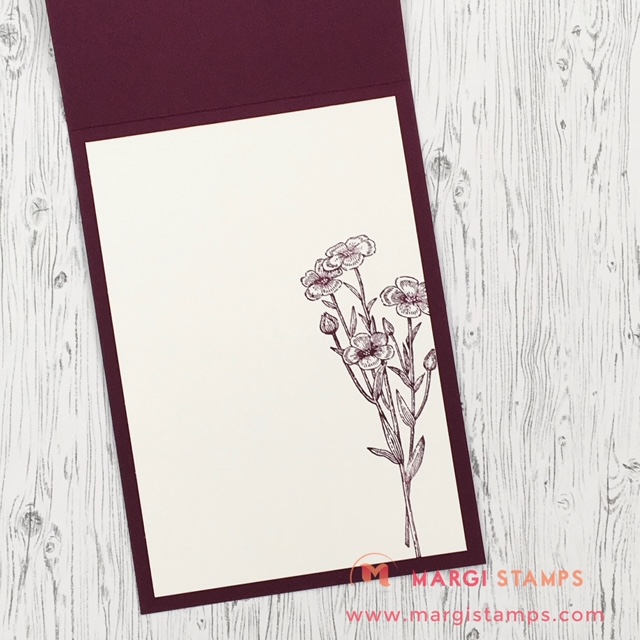
- For the inside of the card, stamp any basic flower with Petal Pink ink. I used one of the stamps from Quiet Meadow Stamp Set. (See alternate sample below)
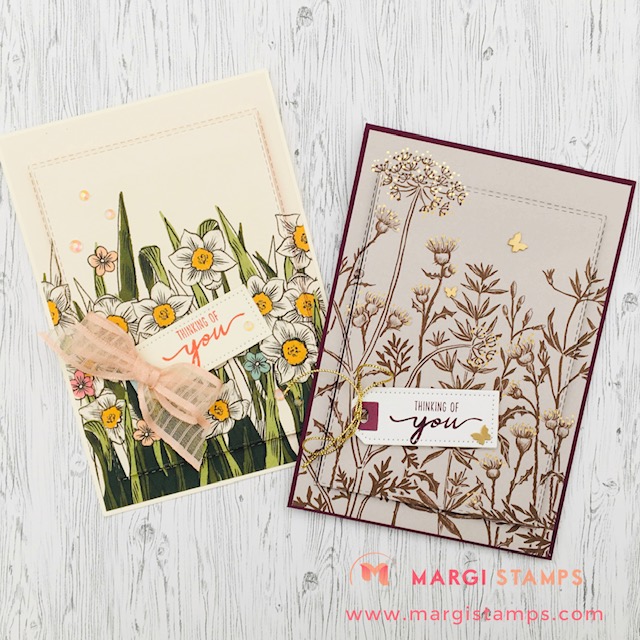
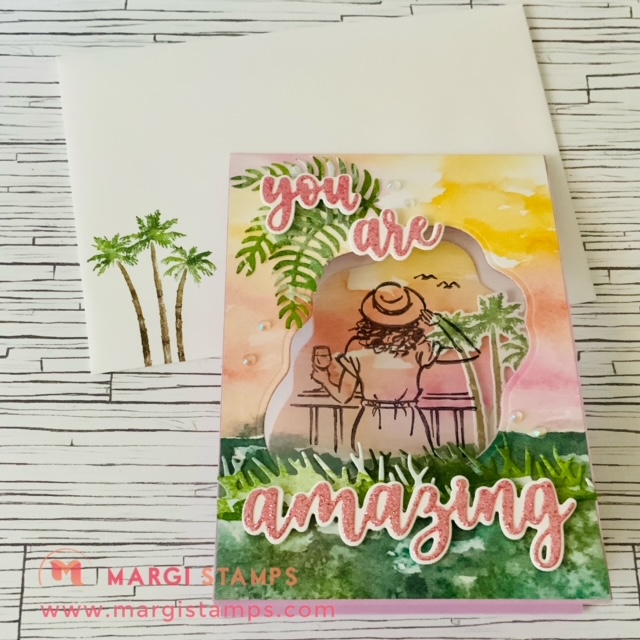
Other Samples using the same Card Design
CREATIVE WOW TUTORIAL: HERE IS THE APRIL 2022 SNEAK PEEK
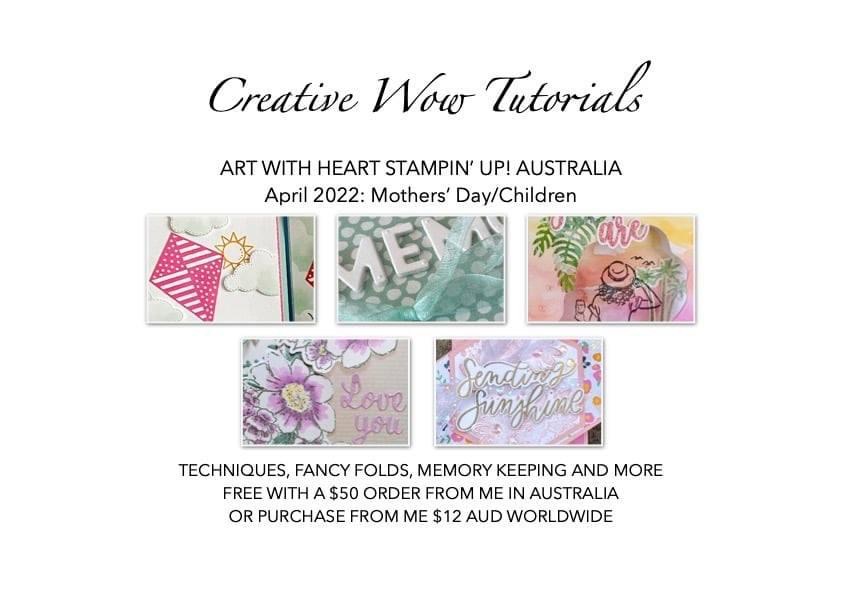
And here is snapshot of my Tent Fold creation featured in the April Tutorial:
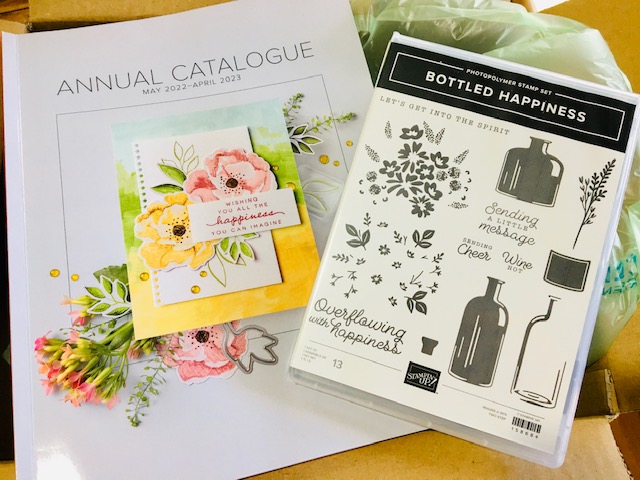
2022-2023 Annual Catalogue
Our new 2022-2023 Catalogue launches on 3 May 2022. It’s fabulous and I will be showcasing new products in my next posts. All April tutorials feature products available from either the Mini Catalogue or Annual Catalogue Many of the products used are carrying over into the new 2022-2023 Annual Catalogue.
If you are in my class groups or have ordered from me in the last 12-18 months, I have your catalogue for you. Otherwise please be in touch to get your catalogue, as there is nothing quite like having your own paper copy to browse through. The online version will be available from 3 May 2022.
Here are a few sneak peeks for you.
JOIN MY TEAM
Join just for yourself to get a discount, and/or build a business, be part of my team and meet friends who love to craft. The choice is yours, and I’m only too happy to chat with you OR, you might like to hop on over to my JOINING PAGE
Here’s a quick look at the offer.
- Choose $235 product for a $169 ($66 for FREE).
- FREE Shipping
- FREE Business Kit, including current catalogues.
- The opportunity to order from any existing catalogue at 20% discount, receive your copy of the upcoming 2022-2023 Annual Catalogue.
- And, include Pre-order Items from the upcoming 2022-2023 Annual Catalogue from 1 April, 2022.
JOIN MY CLASSES:
Please contact me if you would like to join my paper-crafting classes. I run several class groups.
You might like to arrange a private class for you and your friends, or you might like to join my online/virtual class with prepared class kits and PDF/web Tutorials.
Please chat to me about your ideas or queries.
Have Fun Crafting. Enjoy the samples and your own wonderful creativity.
Facebook page is:
https://www.facebook.com/margistamps/
Pinterest site is:
https://www.pinterest.com.au/margisank/
Stampin’ Up! 24/7 Online Store is HERE
My Stampin’ Up! website is HERE
My blog website is:http://www.margistamps.com/
……… till next time, stay safe, have fun!
![]()
LOVE IT. LIVE IT. SHARE IT
