
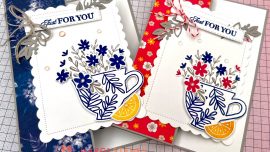
Please enjoy these options using Brady Cox’s original design and Sending Smiles Bundle by Stampin’ Up! We will be making the middle card in the Class Tutorial. My “stepped up” cards include Tea Boutique DSP and In Color Glimmer Paper, die-cut with Adhesive Sheets. You might like to try these as well.
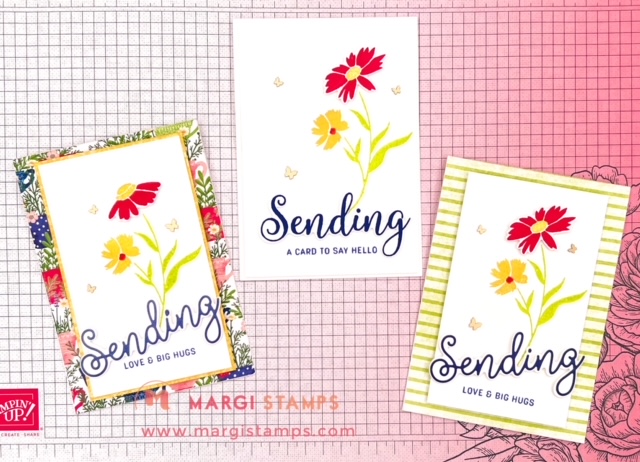
The cards on the left and right are my stepped-up versions of the original design and incorporate Tea Boutique DSP into the design. The In-Colors in the DSP are a perfect match for our card design, while the greetings are versatile and work for many occasions.
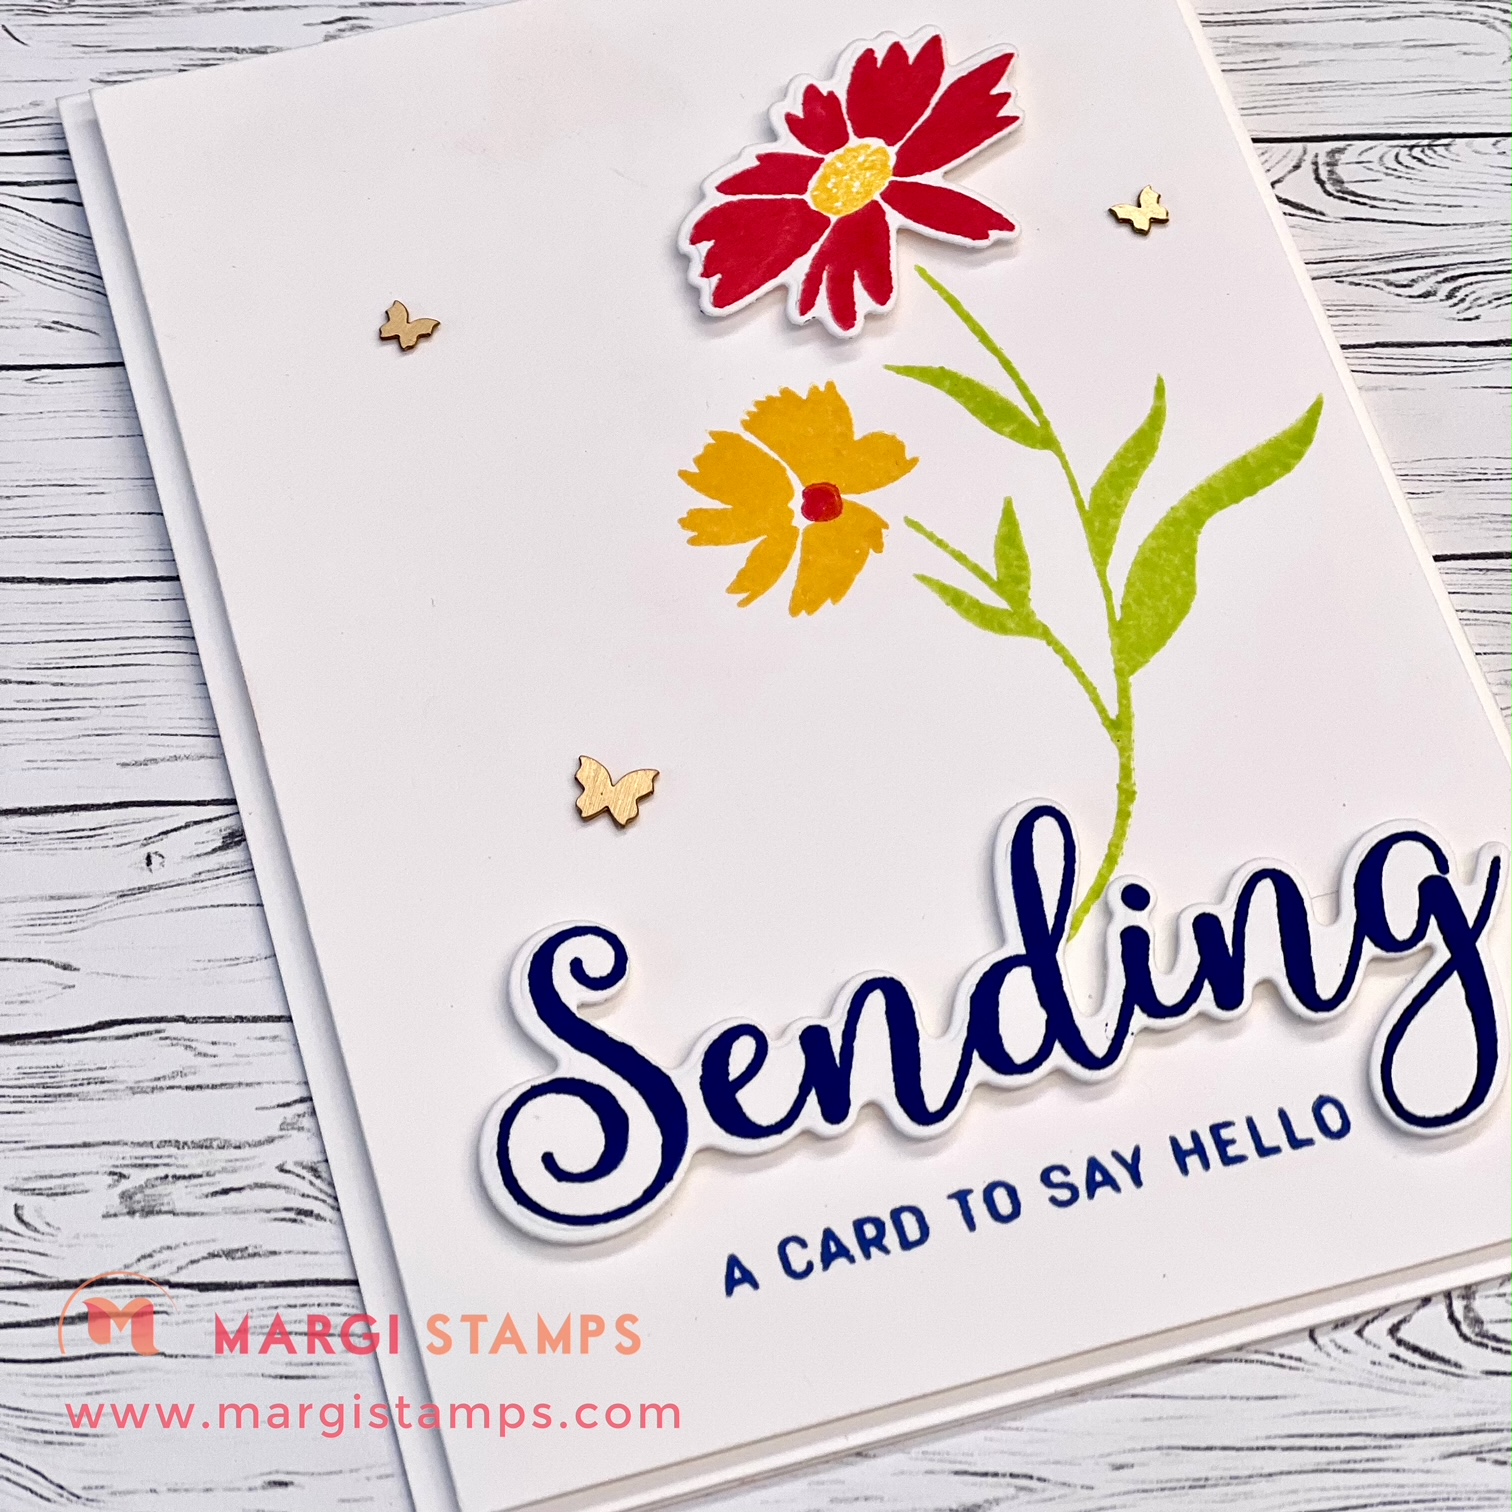
This card is the first of our May Class cards. It is a classic design and can be made ultra simple with no die-cuts or, stepped up with die-cuts and DSP. We’ve added Brushed Brass Butterflies for the WOW factor.
In Card #2 we use the He’s the Man Suite to make a “classic” blokes card. The Suite includes He’s all That Bundle, He’s The Man Specialty DSP and Rustic Metallic Adhesive-Backed Dots. HERE is the link to our He’s The Man Suite card.
In Card #3 we are pairing Tea Boutique DSP and Cup of Tea Bundle to make a different Z Fold card. The alternate DSP is Sun Prints. HERE is the link to our Cup of Tea Bundle Z Fancy Fold card.
Sending Smiles Bundle Class Card #1
Welcome to your Make it with Margi May Tutorial Card #1. Please read on for all class kit dimensions and step by step directions.
If you are not in my class groups, you are welcome to enjoy these designs and adapt for your own creativity. You might like to join one of my online or in person class groups and receive your pre-cut card kit. If you live in Australia, you are more than welcome to join my classes or shop with me using my 24/7 Online Store. I would love to hear from you.
Ingredients for our Sending Smiles Bundle Card
Let’s step through the ingredients used for our card. Some are in the Annual and some are in the Mini Catalogue. We are using 4 of the 5 new In Colours.
Sending Smiles Bundle
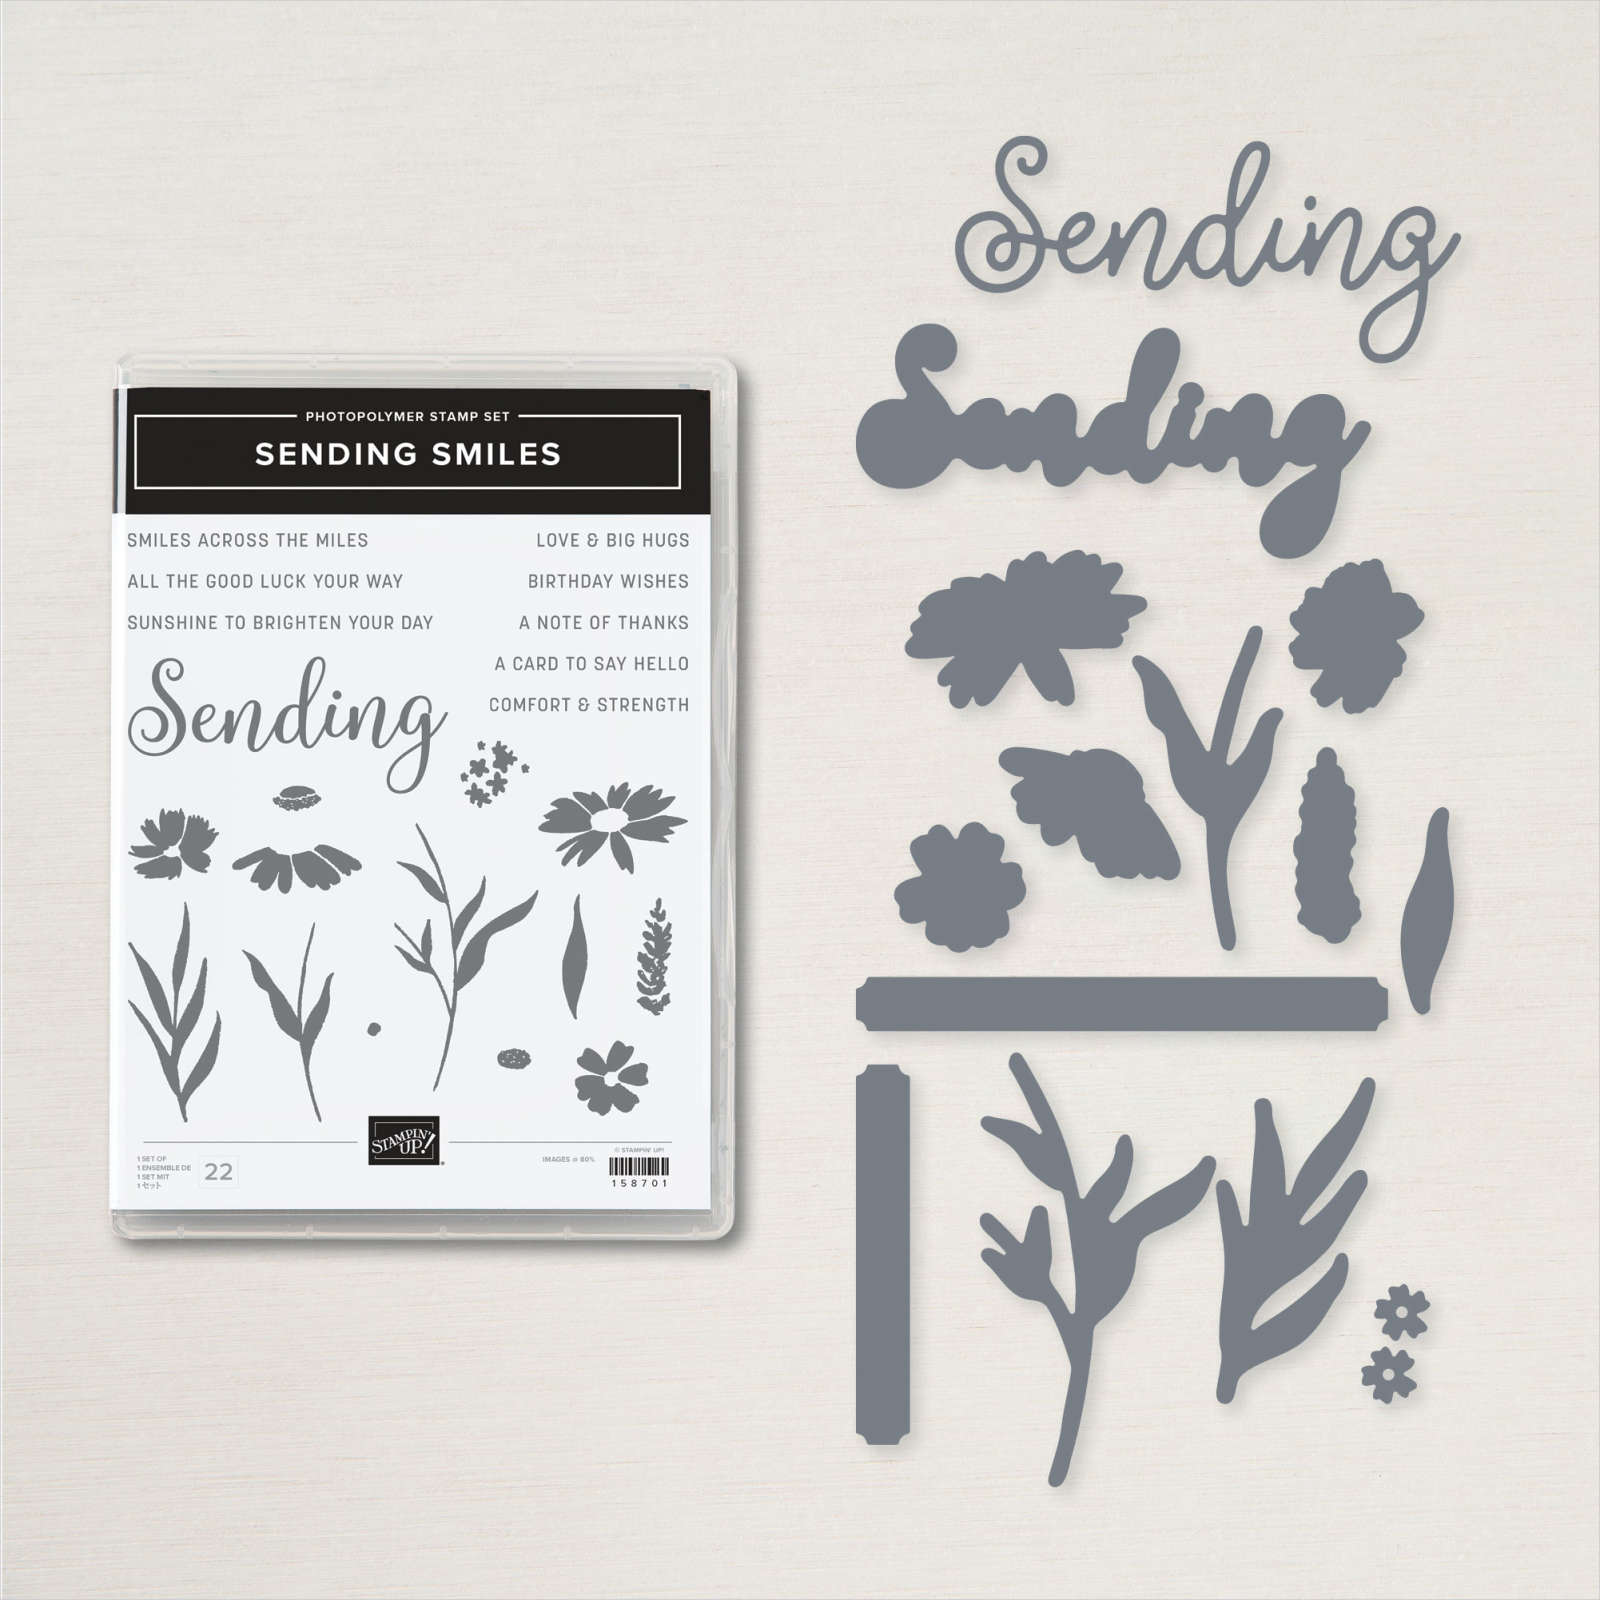

Looking for an all-inclusive bundle that celebrates life’s moments, big or small? The Sending Smiles Bundle is for you! From birthdays to hellos, big hugs to sunny smiles, you can create meaningful cards, notes, and more to convey your love. The stamp and dies coordinate so that the smaller sentiments fit inside the die-cut labels. Layer the stamp and die floral pieces together for beautifully versatile designs.
Click HERE for the product link in my 24/7 Online Store
SUPPLIES
- Stamp Sets, Dies & Punches: Sending Smiles Bundle.
- Papers: Basic White and Basic White Thick Cardstock.
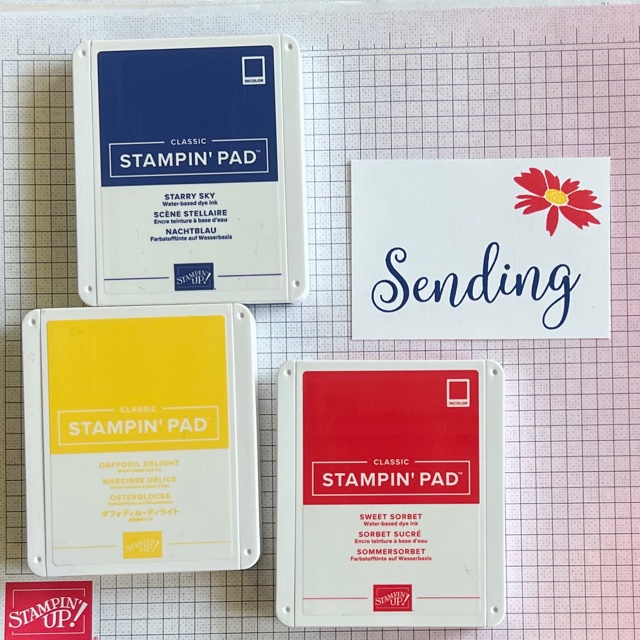
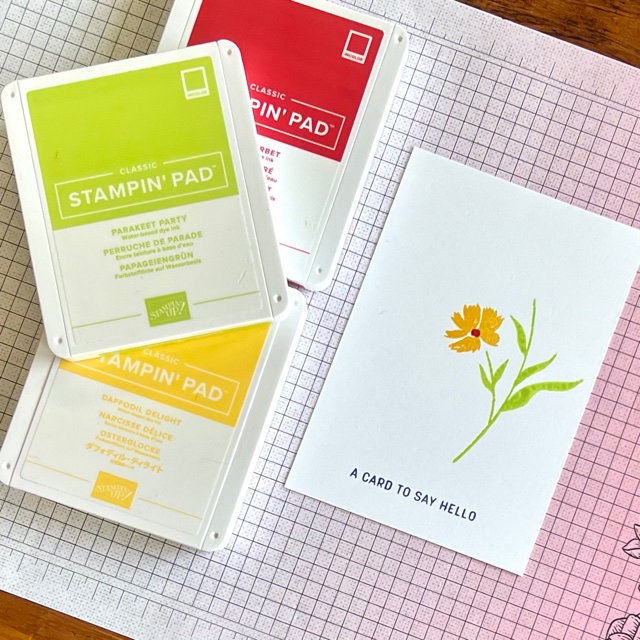
- Inks: Daffodil Delight, Orchid Oasis, Parakeet Party, Starry Skies & Sweet Sorbet.
- Other: Brushed Brass Butterflies, Mini Dimensionals, Multipurpose Liquid Glue, Take your Pick Tool, Paper Trimmer, Grid Paper (great for lining up your creations!), Cut & Emboss Machine.
HERE is the direct link to all current products in my 24/7 Online Store.
DIMENSIONS
- Card Base: Basic White Thick cardstock, 29.7 x 10.5 cm scored at 14.85.
- Layering Cardstock: Basic White cardstock, 14.4 x 10.0 cm and , Basic White 10.5 x 7.5 cm.
Step by Step Directions
- Stamp ‘Sending’ in Starry Sky, stamp largest flower in Sweet Sorbet, stamp flower centre in Daffodil Delight.
- Die cut these elements.
- On Basic White card front layer, stamp chosen greeting in Orchid Oasis ink approximately 1.2 cm up from the bottom.
- Stamp flower stem in Parakeet Party, smaller flower in Daffodil Delight and flower centre in Sweet Sorbet.
- Adhere ‘Sending’ and ‘flower’ die-cuts to card front layer with Mini Dimensionals.
- Adhere adhesive back Brushed Brass Butterflies.
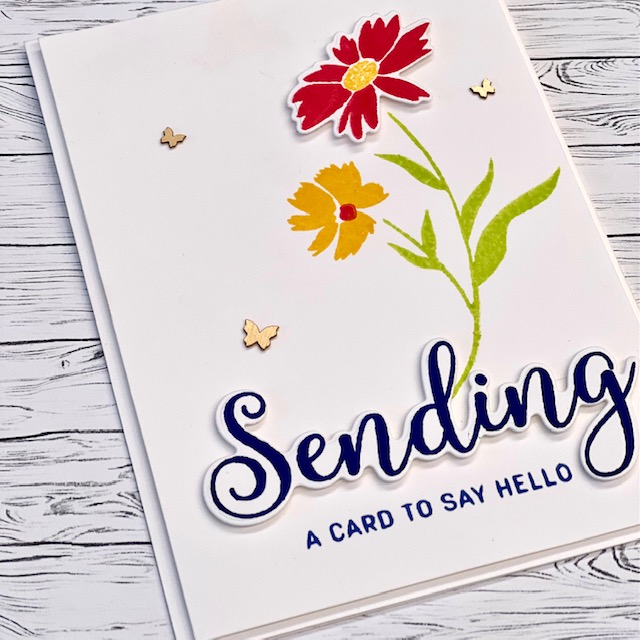
- On the inside of the card, stamp smaller flower stem in Parakeet Party, middle sized flower in Sweet Sorbet and flower centre in Daffodil Delight.
Other Samples using Sending Hello Bundle and Tea Boutique Designer Series Paper.
How pretty is the Tea Boutique Designer Series Paper! I have used both the “A” and “B” sides of the paper. One side is covered by bright and flamboyant tea cups and foliage and is a great background for our bold stamp design. The other is a classis stripe. You might also notice that the “Sending” is different on the alternate cards. I have used the more intricate ‘sending’ die, to die-cut another layer using In Colour Glimmer Paper and Adhesive Sheets.
JOIN MY TEAM
JOIN MY TEAM to earn, save and share and meet fun crafty people along the way.
Join just for yourself to get a discount, and/or build a business, be part of my team and meet friends who love to craft. The choice is yours, and I’m only too happy to chat with you OR, you might like to hop on over to my JOINING PAGE
- Choose $235 product for a $169 ($66 for FREE).
- PLUS from 3 May – 31 May 2022, FREE 2022-2024 In Color products, including In Color Grid Paper, In Color Ink Pad Collection, In Color Cardstock, and In Color 6 x 6 Designer Series Papers Assortments. That’s an additional $116.50 value of products just for joining my team!
- FREE Shipping * FREE Business Kit, including current catalogues.
- The opportunity to order from any existing catalogue at 20% discount,
- And, include Pre-order Items from the upcoming July-December 2022 Mini Catalogue.
- HERE is the link
JOIN MY CLASSES:
Please contact me if you would like to join my paper-crafting classes. I run several class groups.
You might like to arrange a private class for you and your friends, or you might like to join my online/virtual class with prepared class kits and PDF/web Tutorials.
Please chat to me about your ideas or queries.
Have Fun Crafting. Enjoy the samples and your own wonderful creativity.
Facebook page is:
https://www.facebook.com/margistamps/
Pinterest site is:
https://www.pinterest.com.au/margisank/
Stampin’ Up! 24/7 Online Store is HERE
My Stampin’ Up! website is HERE
My blog website is:http://www.margistamps.com/
……… till next time, stay safe, have fun!
![]()
LOVE IT. LIVE IT. SHARE IT.

