
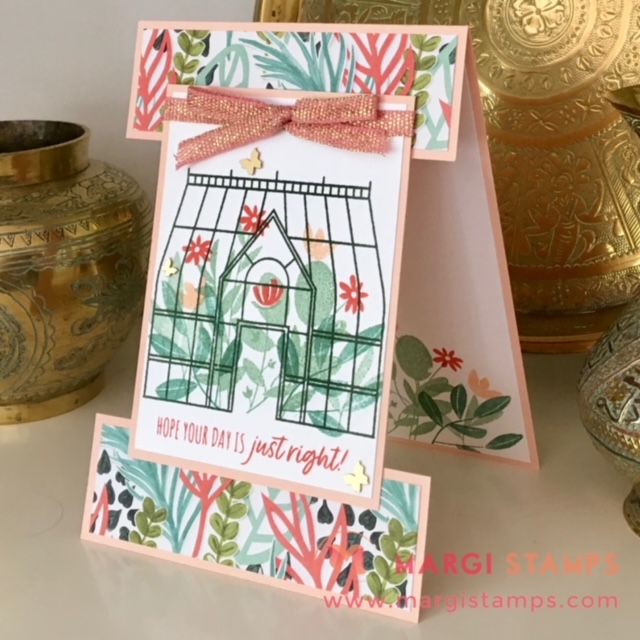
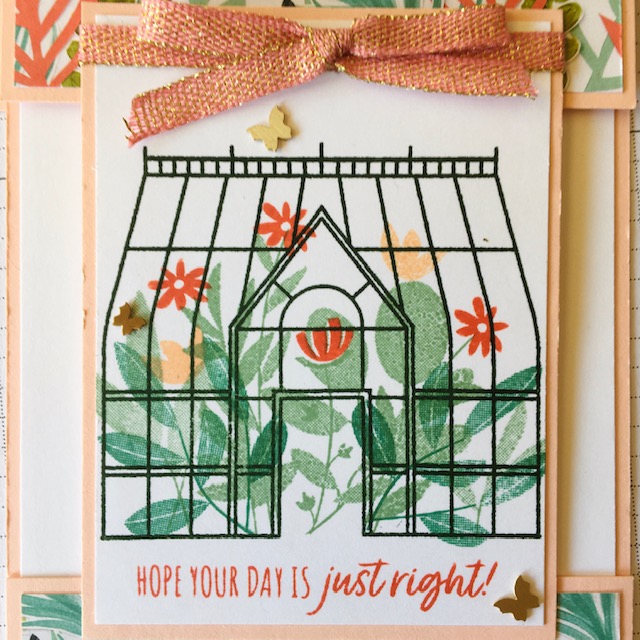
This Fancy Fold card design is perfect to show off the stamped Garden Greenhouse images. We’ve added extra flair with Artfully Composed Paper, Flirty Flamingo Ribbon and Brushed Butterflies. It’s a special, pretty card to give to friend or loved one.
Welcome to your Make it with Margi March Tutorial Card #2. Please read on for all class kit dimensions and step by step directions.
If you are not in my class groups, you are welcome to enjoy these designs and adapt for your own creativity. You might like to join one of my online or in person class groups and receive your pre-cut card kit. If you live in Australia, you are more than welcome to join my classes or shop with me using my 24/7 Online Store. I would love to hear from you.
Ingredients for our Garden Greenhouse Fancy Fold Card
Let’s step through the ingredients used for our card. Some are in the Annual and some in the January-June 2022 Mini Catalogue.
Garden Greenhouse Bundle
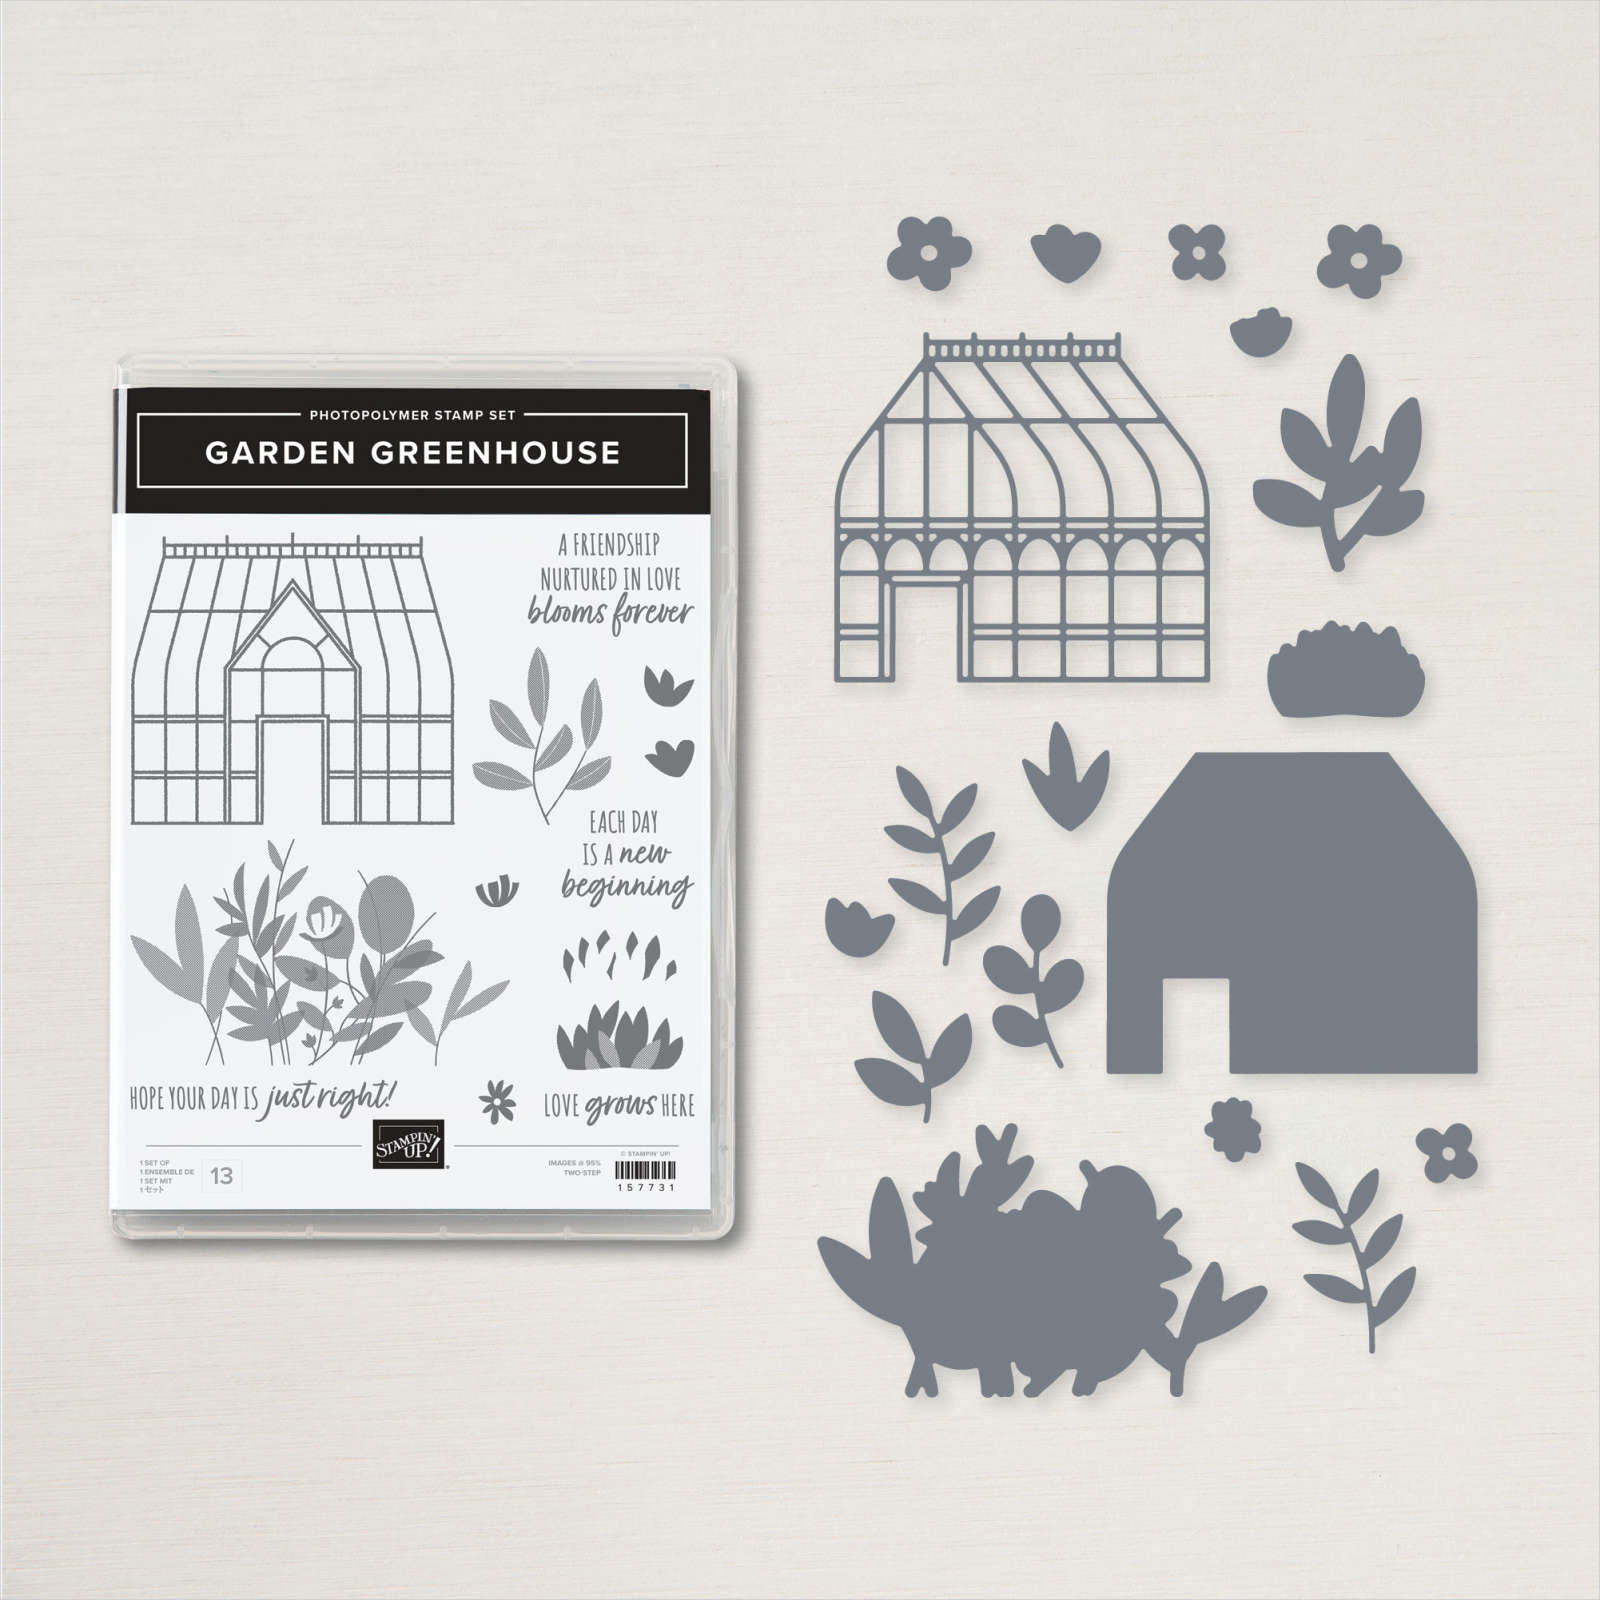 Make beautiful things grow with the Garden Greenhouse Bundle. The bundle includes the Garden Greenhouse Stamp Set and the Greenhouse Dies. Stamp the greenhouse and plants images, then use the coordinating dies to cut them out quickly and easily.
Click HERE for product link in my 24/7 Online Store
Artfully Composed Designer Series Paper
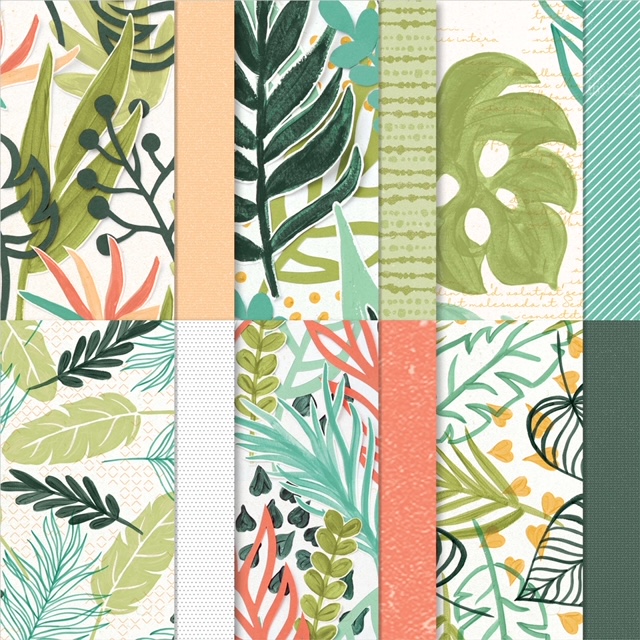
We have used the bright, happy colours in the DSP for our garden scene. The paper is bright and bold and a lush botanical theme to our project.
Invoke the feeling of paradise with the Artfully Composed 12″ x 12″ (30.5 x 30.5 cm) Designer Series Paper. One side of the printed designs includes a combination of hand-painted tropical plants and greenery with leaves that were cut out of paper and photographed for a unique layered look. The other side of the paper includes small print patterns like stripes, polka dots, and scripty writing. Cut paper down to card front size for backgrounds, strips, layers, or paper elements. For extra artistry, fussy-cut leaves to collage and layer!
Click HERE for product link in my 24/7 Online Store
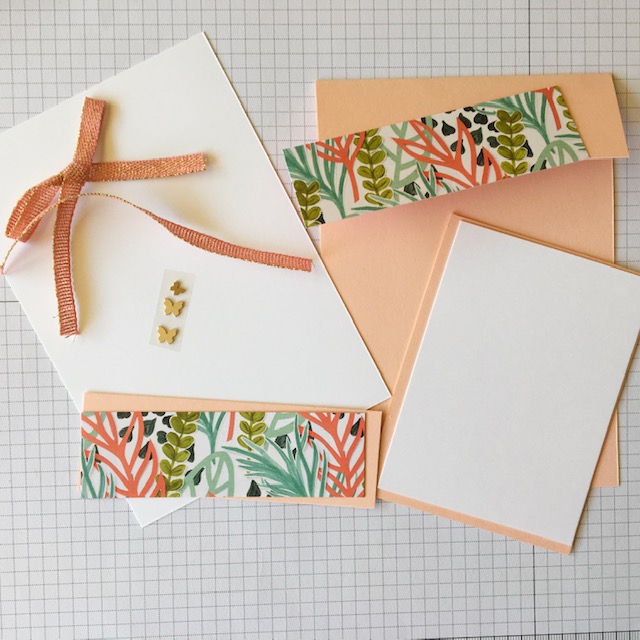
Garden Greenhouse Fancy Fold Kit
Here is your class kit.
SUPPLIES
- Stamp Sets, Dies & Punches: Garden Greenhouse Bundle. (Please see other card examples below)
- Papers: Artfully Composed Designer Series Paper, Petal Pink and Basic White cardstock.
- Inks: Calypso Coral, Evening Evergreen, just Jade, Mint Macaron, Petal Pink.
- Other: Flirty Flamingo Gold Metallic Ribbon, Brushed Brass Butterflies, Multipurpose Liquid Glue, Mini Glue Dots, Tear & Tape Adhesive, Take your Pick Tool, Paper Trimmer, Grid Paper (great for lining up your creations!)
HERE is the direct link to all current products in my 24/7 Online Store.
DIMENSIONS
- Card Base: Petal Pink cardstock cut to standard card base 29.7 x 10.5 cm, scored at 14.85 and then cut at 3.5 cm (bottom piece) and 7.9 cm (middle piece).
- Layering Paper. Artfully Composed DSP 10 x 6 cm cut into two pieces each 10 x 3 cm. (then your patterns will match!), Basic White 10 x 7.4 cm (middle panel of card front) and Basic White 14.4 x 10 cm (inside of card).
Step by Step Directions
- Burnish card base along score line.
- Adhere DSP to each 3.5 cm panel. Set the bottom one aside and do not glue the back of the Petal Pink card base!

- Stamp the centre panel of Basic White measuring 10 x 7.4 cm. (I’ve included the finished view below). Here are the stamping directions: stamp greeting on the bottom of the panel in Calypso Coral ink, stamp the outline of the garden greenhouse in Evening Evergreen ink, stamp large leafy cluster in Mint Macaron, stamp the smaller leaf sprig twice in Just Jade and various flower shapes in Calypso Coral and Petal Pink. Can you see that one of the Calypso Coral flowers ‘fits’ inside the large leaf cluster?
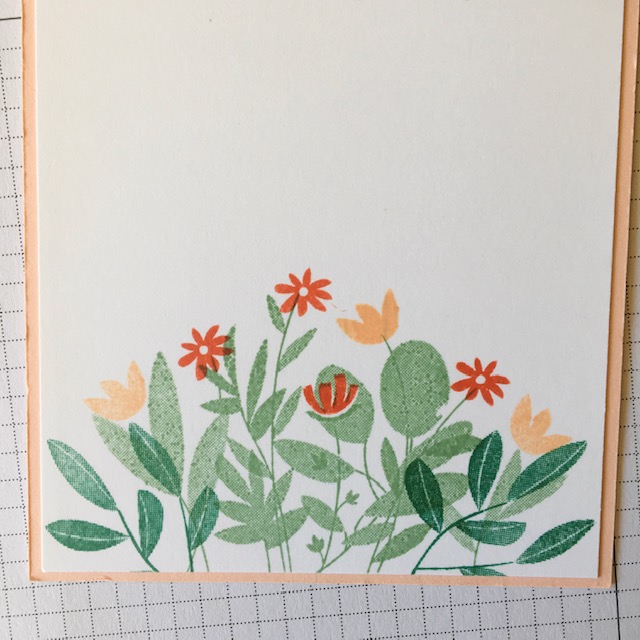
- Stamp the card insert in the same manner, and adhere to card base. Here is an example for you.
- Now we will go back to your card front! Adhere the stamped centre piece of Basic White to the piece of Petal Pink Cardstock measuring 10.5 x 7.9 cm
- Using Tear & Tape, adhere strip of Flirty Flamingo Ribbon to top the the panel, ensuring that no adhesive tape extends below the ribbon line on the back of the panel. (or you’ll see it on the inside of the card). Here is the finished view to give you an idea of the positioning.

- Tape both the top and bottom of the panel. Remove the top tape. Do not remove the bottom tape at this stage!
- Position and adhere the top of the panel to the folded card base. My overlap is about 1.5 cm.
- Position the bottom panel on the card base. You might like to hold it in place with a couple of paper clips. Do not adhere it to the card base!
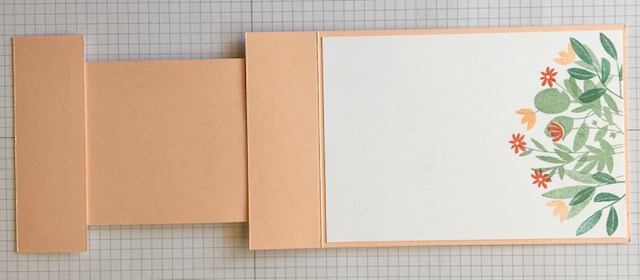
- Remove tape from the bottom of the panel, fold your card shut and adhere the bottom of the panel to the bottom of the positioned card front. Here a view of the inside of the card, when completed and folded out flat.
- Adhere tied bow to card front using Mini Glue Dots,
- Adhere adhesive backed Brushed Brass Butterflies.
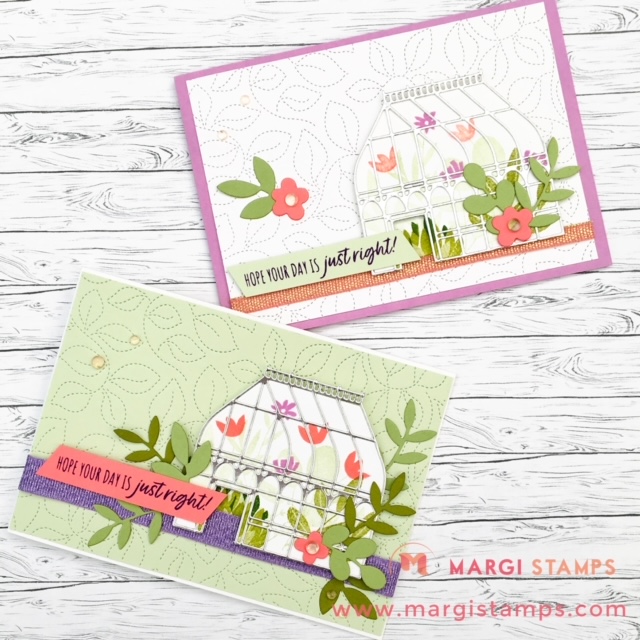
Garden Greenhouse Bundle Samples
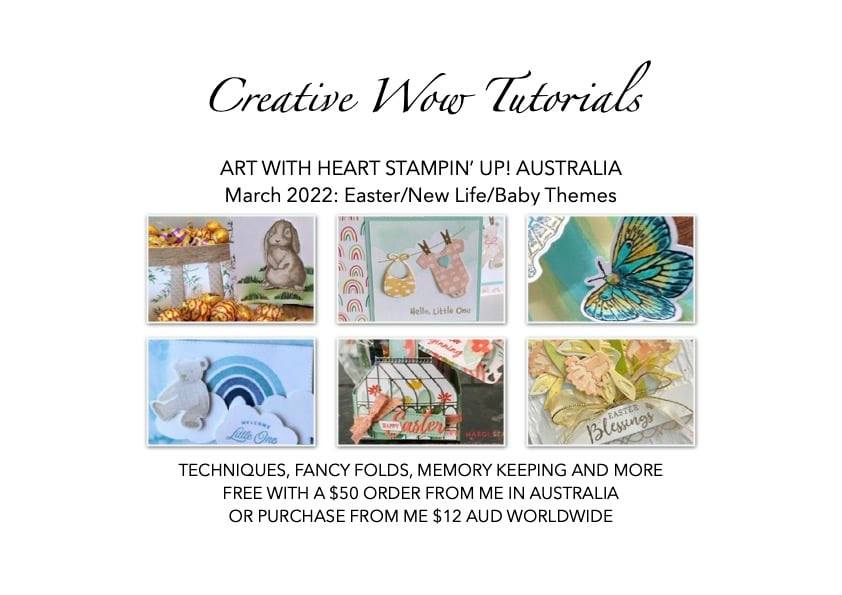
Please enjoy these other Garden Greenhouse Samples. The directions for the my Easter Basket and Gift Tag are included in the March Creative WOW Tutorial. You can see the full Sneak Peek below. Please contact me if you like this tutorial.
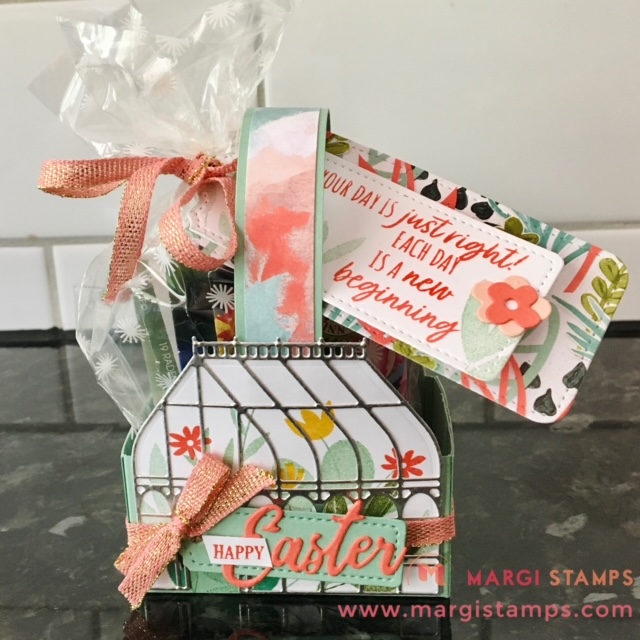
CREATIVE WOW TUTORIAL: HERE IS THE MARCH 2022 SNEAK PEEK
JOIN MY TEAM
Join just for yourself to get a discount, and/or build a business, be part of my team and meet friends who love to craft. The choice is yours, and I’m only too happy to chat with you OR, you might like to hop on over to my JOINING PAGE
Here’s a quick look at the offer.
- Choose $235 product for a $169 ($66 for FREE).
- FREE Shipping
- FREE Business Kit, including current catalogues.
- The opportunity to order from any existing catalogue at 20% discount and view the upcoming 2022-2023 Annual Catalogue.
- And, include Pre-order Items from the upcoming 2022-2023 Annual Catalogue from 1 April, 2022.
JOIN MY CLASSES:
Please contact me if you would like to join my paper-crafting classes. I run several class groups.
You might like to arrange a private class for you and your friends, or you might like to join my online/virtual class with prepared class kits and PDF/web Tutorials.
Please chat to me about your ideas or queries.
Have Fun Crafting. Enjoy the samples and your own wonderful creativity.
Facebook page is:
https://www.facebook.com/margistamps/
Pinterest site is:
https://www.pinterest.com.au/margisank/
Stampin’ Up! 24/7 Online Store is HERE
My Stampin’ Up! website is HERE
My blog website is:http://www.margistamps.com/
……… till next time, stay safe, have fun!
![]()
LOVE IT. LIVE IT. SHARE IT

