
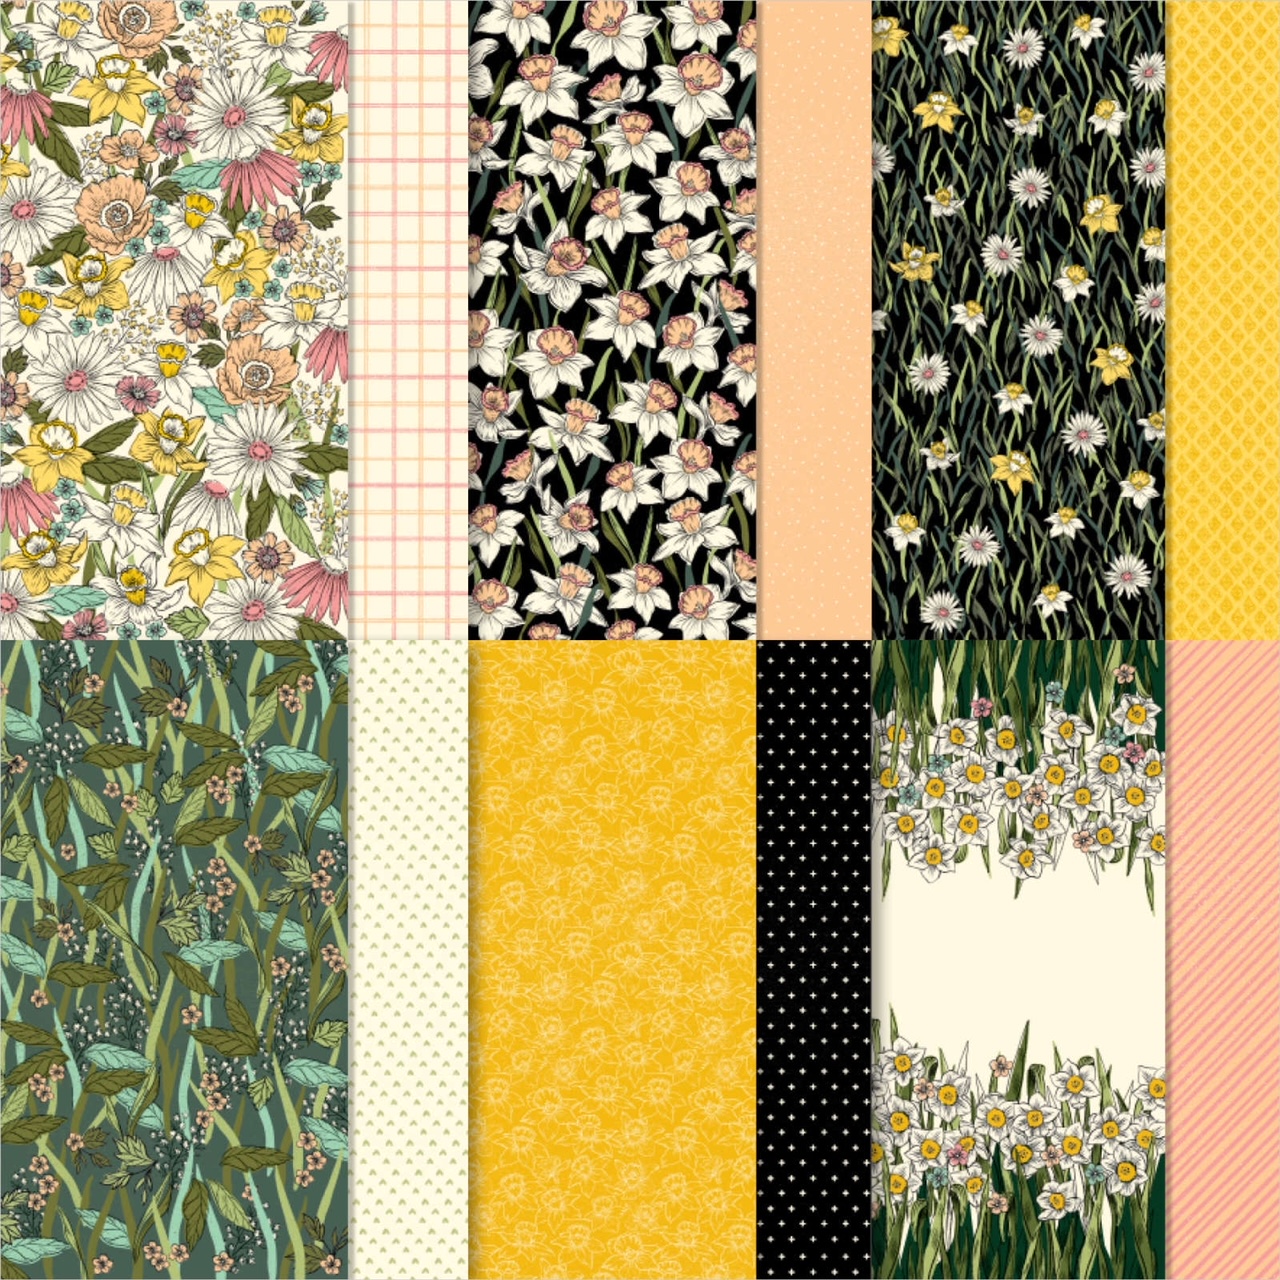
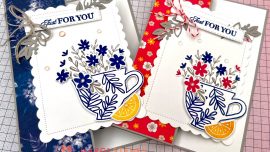
Sale-a-Bration Daffodil Afternoon Designer Series Paper is perfect for our little Note Card and Envelope (kit) and Easter Treats (own supplies).
Welcome to your Make it with Margi March Tutorial Card #1. Please read on for all class kit dimensions and step by step directions.
If you are not in my class groups, you are welcome to enjoy these designs and adapt for your own creativity. You might like to join one of my online or in person class groups and receive your pre-cut card kit. If you live in Australia, you are more than welcome to join my classes or shop with me using my 24/7 Online Store. I would love to hear from you.
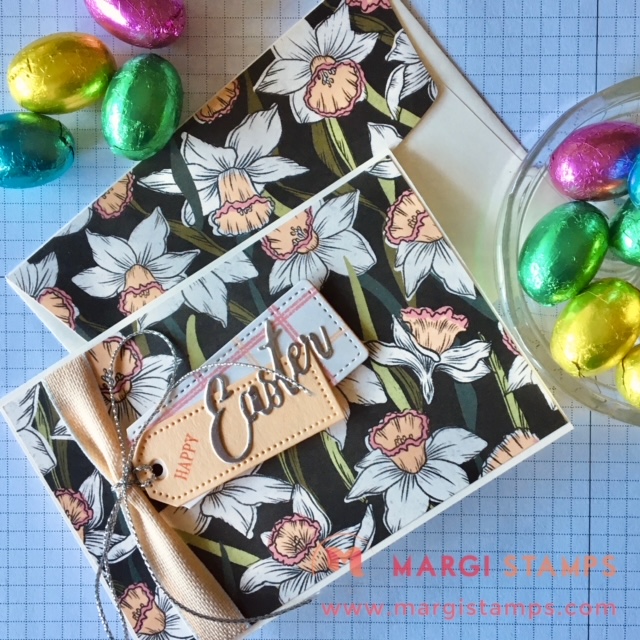
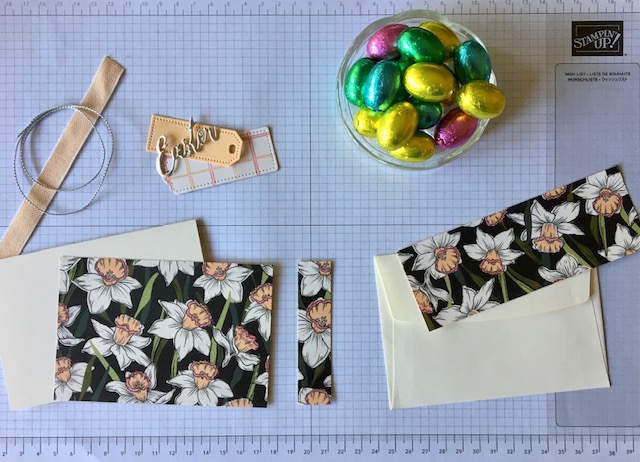
Daffodil Afternoon DSP Easter Note Card & Envelope
Ingredients for our Easter Note Card & Envelope
Let’s step through the ingredients used for our card. Some are in the Annual, some in the January-June 2022 Mini Catalogue and some are in the Sale-a-Bration Brochure (until March 16).
Daffodil Afternoon DSP
Word Wishes Dies
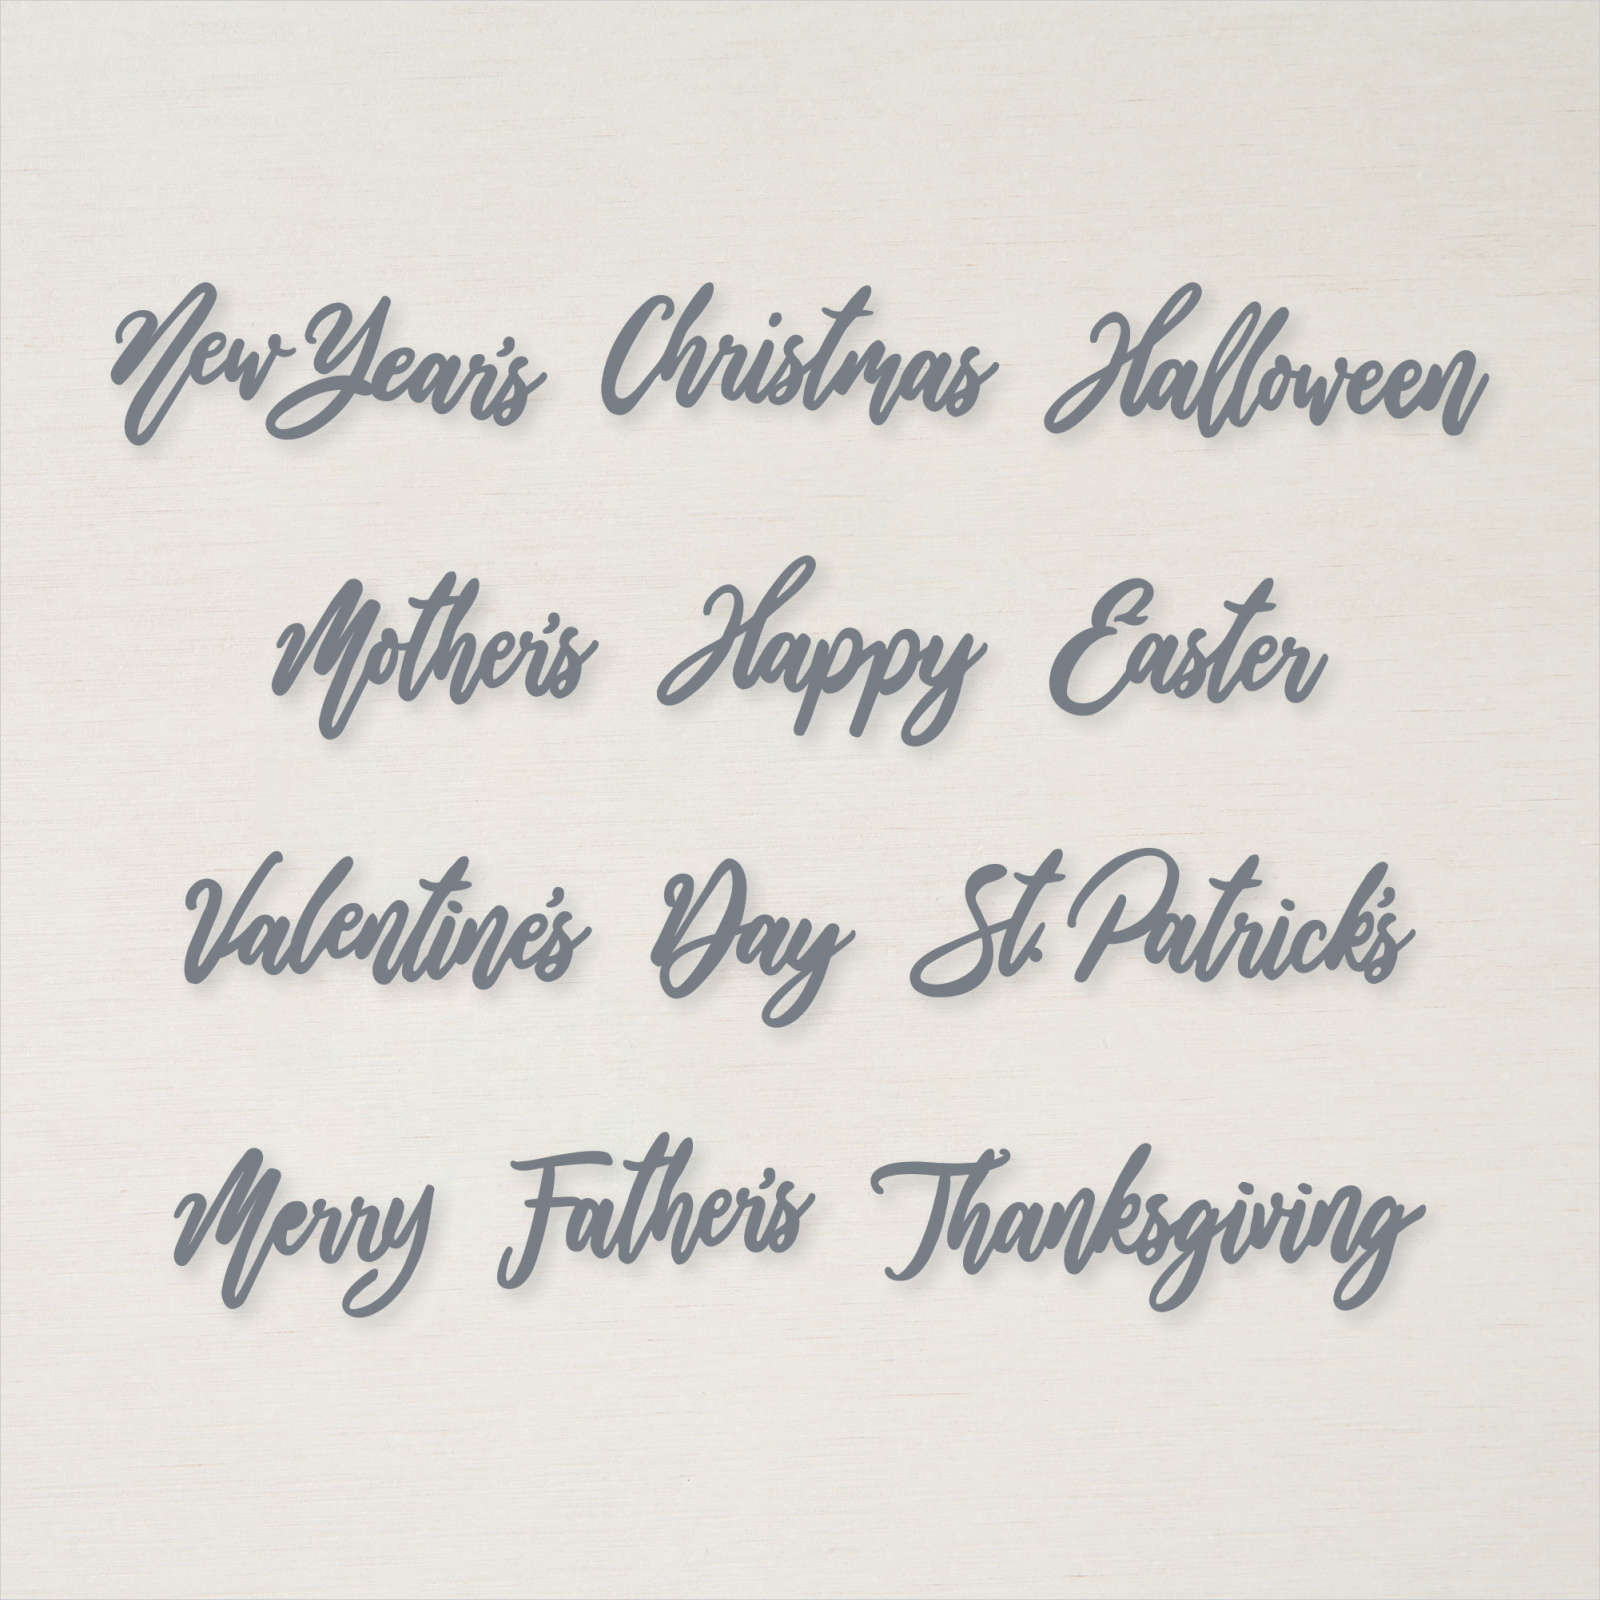
This set of dies is great for a variety of greetings.
Click HERE for Word Wishes Dies in my 24/7 Online Store
Note Cards and Envelopes

These packs of Note Cards & Envelopes are our unsung heroes. They are perfect for a small note with the folded card measuring 5′. The cards are scored ready for folding and come with matching envelopes. We are using the Very Vanilla for this kit.
Click HERE for Very Vanilla Note Cards & Envelopes in my 24/7 Online Store
Tailor Made Tags Dies
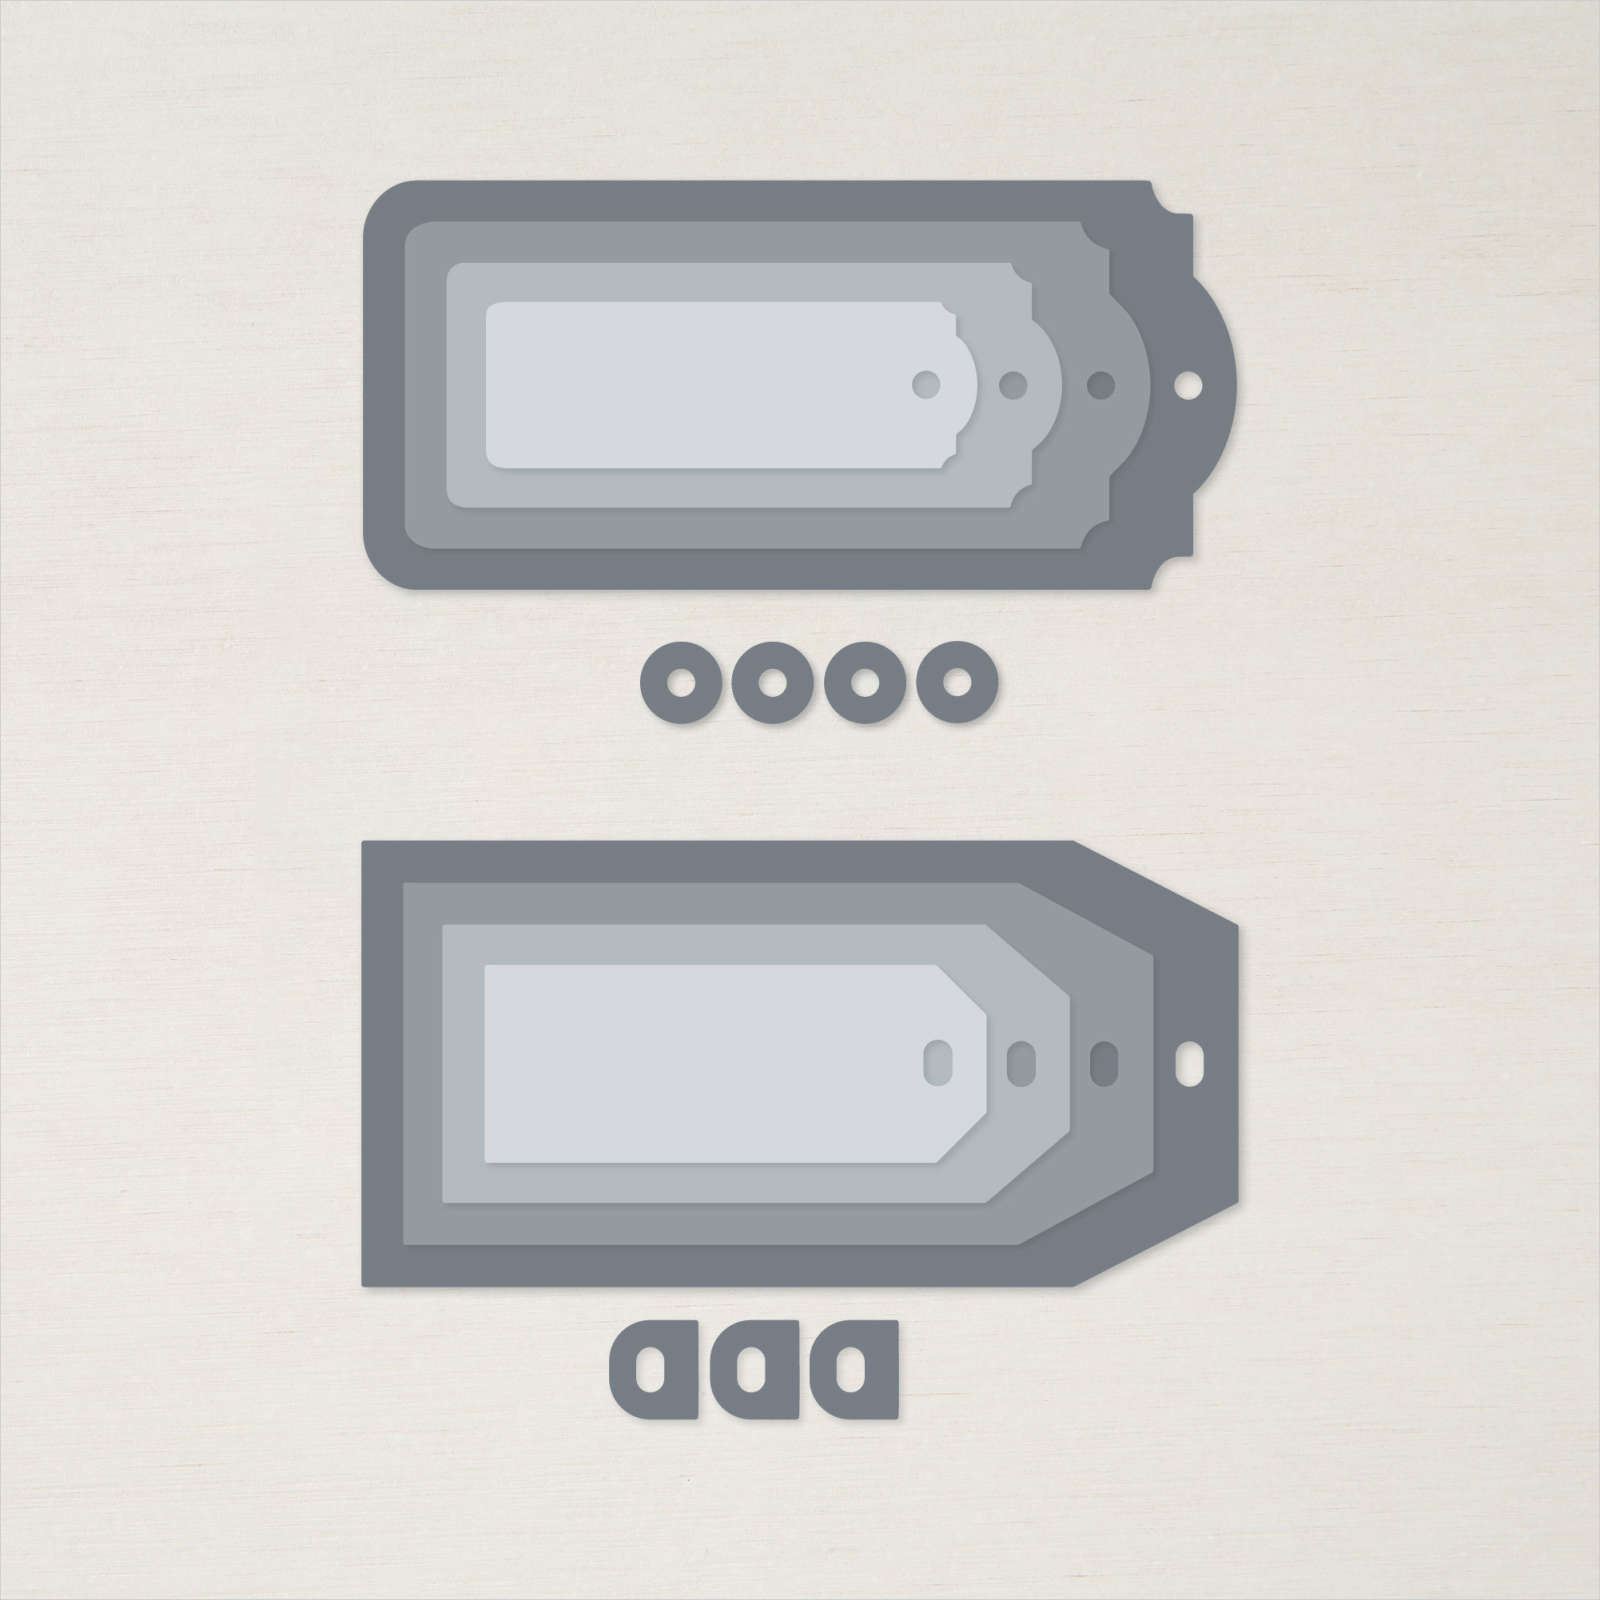 This set of dies are one of my go-to sets for a quick, easy and effective greeting layer.
Click HERE for Tailor Made Tags in my 24/7 Online Store
Daffodil Afternoon DSP Easter Note Card & Envelope Kit
Here is your class Kit
SUPPLIES
- Stamp Sets, Dies & Punches: Timeless Tulips Stamp Set for the “Happy”, Word Wishes Dies, Tailor Made Tags Dies
- Papers: Daffodil Afternoon DSP (SAB), Pale Papaya and Very Vanilla Note Cards & Envelopes, Silver Foil Specialty Paper.
- Inks: Calypso Coral.
- Other: Pale Papaya & White Ribbon, Simply Elegant Trim (silver cord), Adhesive Sheets, Mini Dimensionals, Multipurpose Liquid Glue, Mini Glue Dots, Tear & Tape, Take your Pick Tool, Trimmer, Mini Cut & Emboss Machine.
HERE is the direct link to all current products in my 24/7 Online Store.
DIMENSIONS
- Card Base: The note cards are pre-scored. Folded Card measures 5″ x 3 1/2″ (12.7 x8.9 cm)
- Layering DSP. Daffodil Afternoon DSP 12.3 x 8.5cm, plus additional DSP and Pale Papaya cardstock for the the tags.
- Trim for Envelope: DSP 6″ x 2″ for be adhered and then trimmed to size.
Step by Step Directions
- Burnish card base along score line.
- Adhere Pale Papaya Ribbon to DSP as shown. I have place mine about 1 cm from the left hand side of the DSP.
- Adhere DSP to card front.
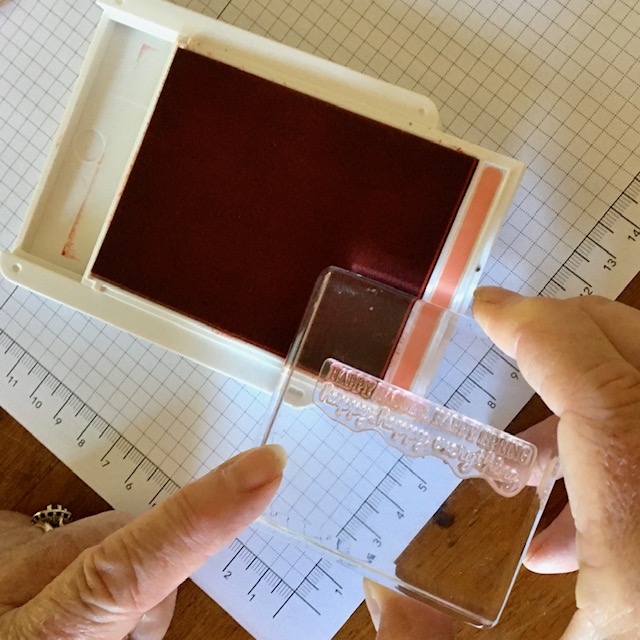
- Stamp ‘Happy’ on Pale Papaya Tag (see photo below) I used the word ‘Happy’ from one of the Timeless Tulips stamps. The stamp is ‘HAPPY EASTER, HAPPY SPRING happy, happy everything. While it’s not Spring in the Southern Hemisphere, the size and font of the HAPPY were perfect for this design. I could align my stamp to the stamp pad so only the ‘HAPPY’ was inked.
- Adhere this Pale Papaya layer to the DSP Tag layer as shown in the main photo. You will need to leave room at the top for part of the DSP for part of ‘Easter’ greeting. The ‘Easter’ supplied in the kits has been die cut with Adhesive Sheets backing so it will adhere fuss-free to your project.
- Peel the back of the ‘Easter’ and adhere to Tag
- Loop silver cord through holes on tag die-cuts
- Tie the silver cord to Pale Papaya ribbon with a bow. Trim the cord as required.
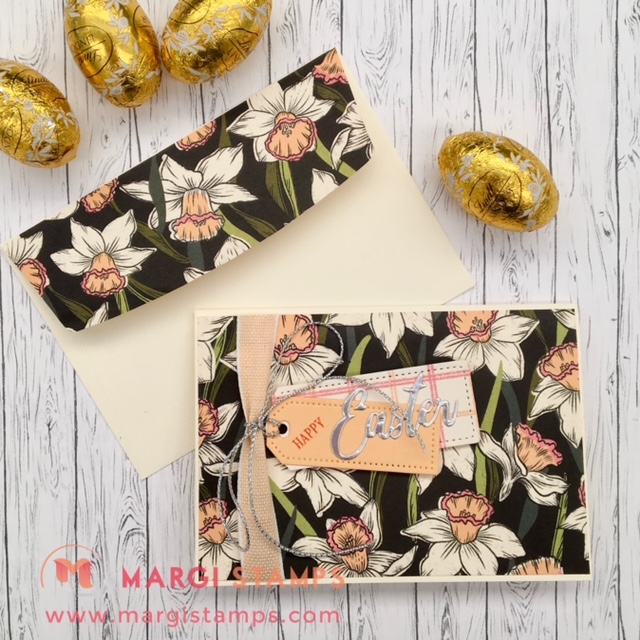
- Stamp any foliage or greeting on the inside of your notecard or trim with DSP.
- Adhere DSP to back of envelope and trim off the edges. I find the easiest way is to apply Multipurpose Liquid Glue to the outside of the envelope flap. Adhere DSP by aligning the edge of the DSP with the envelope fold line. Then turn the envelope over so that you can see the inside of the flap and trim off the excess DSP. You can run your scissors along the line of the envelope flap. Here is the finished view.

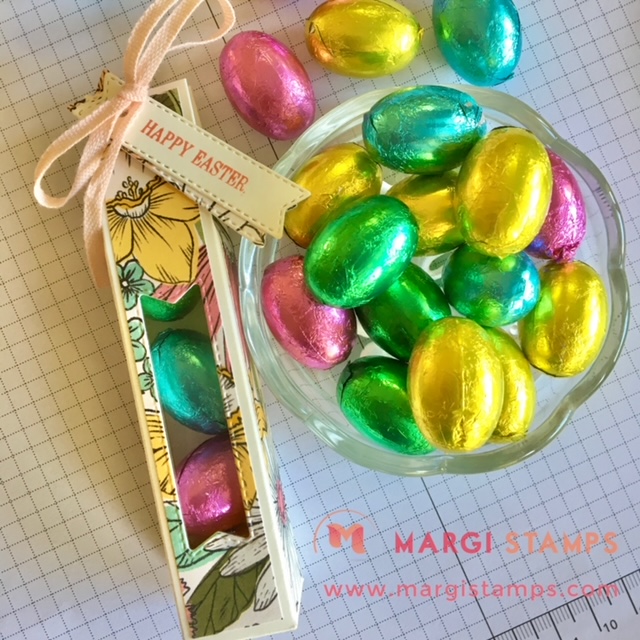
EASTER TREAT
My goodness these little treats were fun and simple to make. You might like to make these treats using your own supplies.
Here are the directions for the Easter Treat. You could use these for Easter of any other little treat, lip balm, gloss, etc.
SUPPLIES
- Stamp Sets, Dies & Punches: Timeless Tulips Stamp Set (HAPPY EASTER) , Tasteful Labels Dies and Hole Punch (retired)
- Papers: Daffodil Afternoon DSP (SAB), Very Vanilla cardstock, Window Sheets
- Inks: Calypso Coral.
- Other: Cotton Ribbon Combo Pack, Multipurpose Liquid Glue, Tear & Tape, Take your Pick Tool, Trimmer, Cut & Emboss Machine
HERE is the direct link to all current products in my 24/7 Online Store.
DIMENSIONS
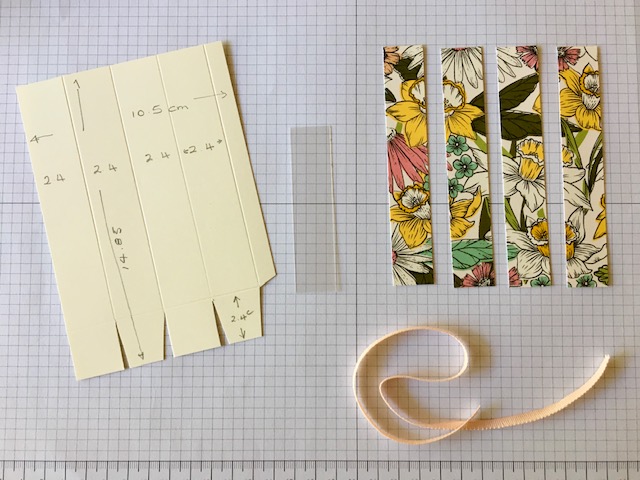
- Tube Base: 1/4 sheet A4, 14.85 x 10.5 cm.
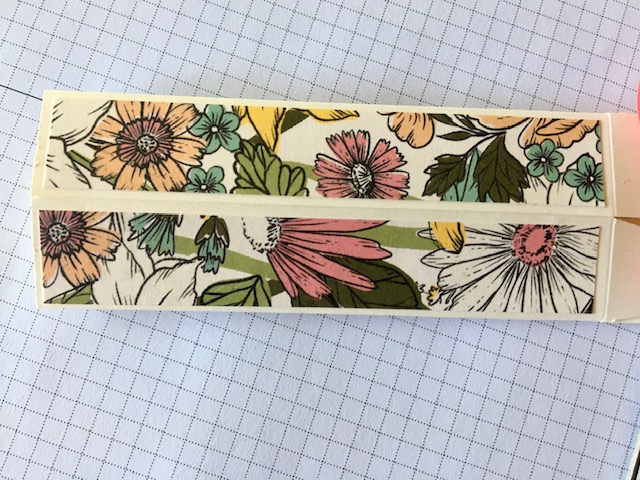
- Layering DSP: Daffodil Afternoon DSP 12 x 8 cm cut into four 2 cm strips. if you cut like this, your patterns will match!
- Window Sheet: 10 x 2 cm
Step by Step Directions
-
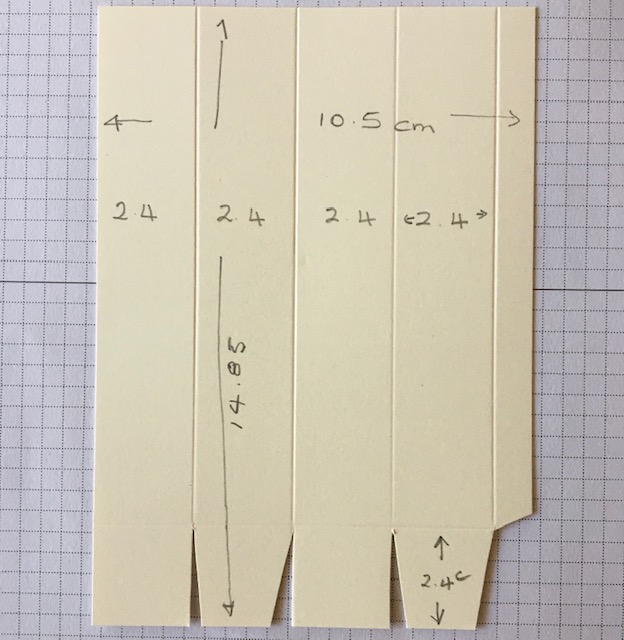
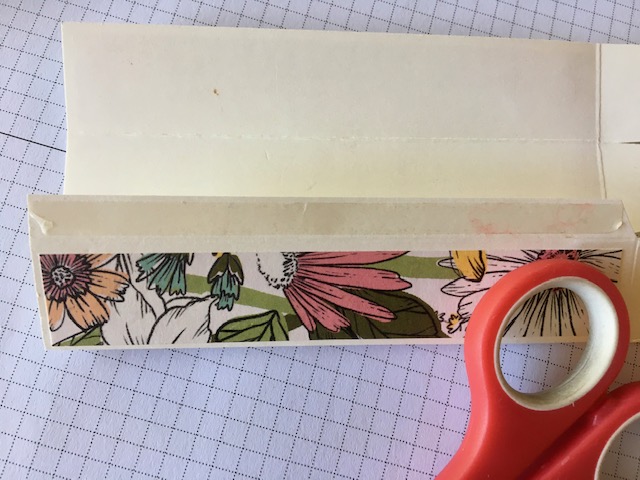
- Very Vanilla 14.85 x 10.5, scored on the short side (10.5cm) at 2.4, 4.8, 7.2 and 9.6 cm. The remainder is the seam.
- Rotate and score on the long side at 2.4 cm.
- Trim as shown
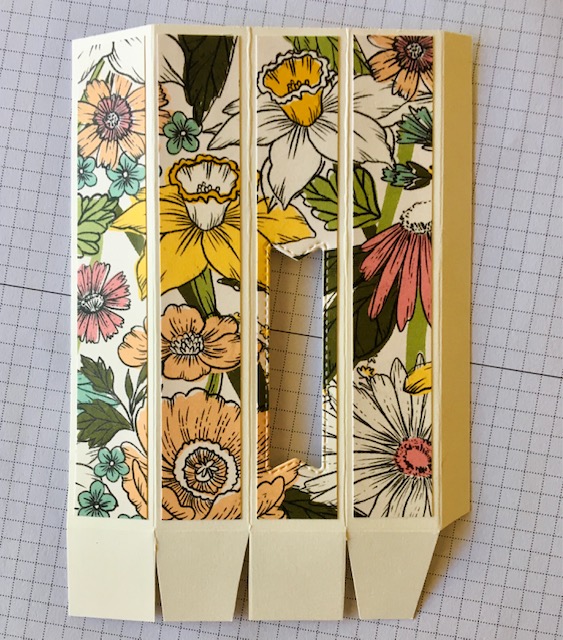
- Adhere DSP strips, if you keep the middle of DSP piece to be die-cut free of glue, you can use this for the tag greeting layer.
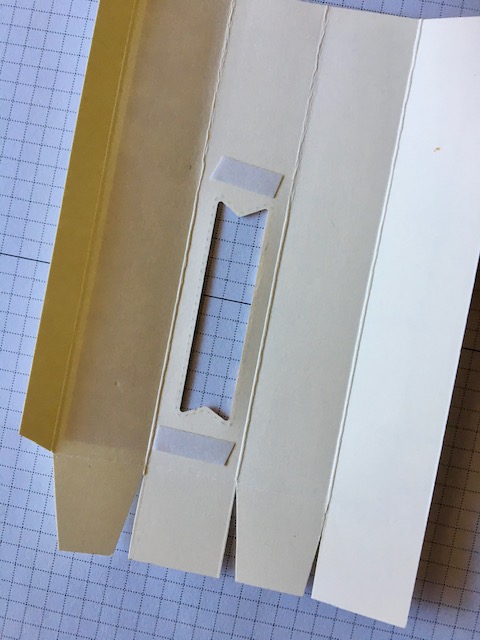
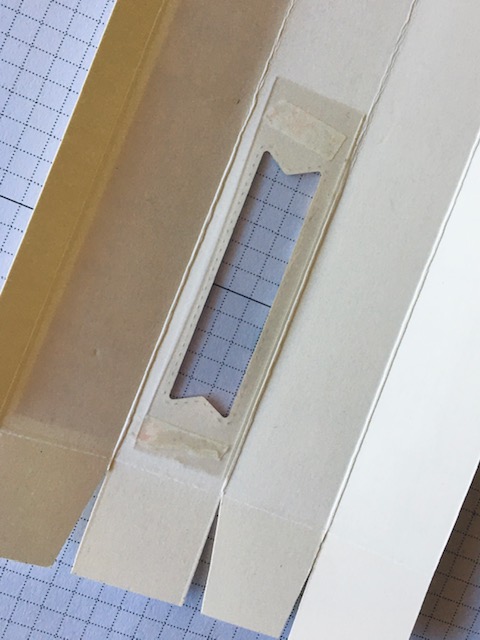
- Using the Tasteful Label die die cut a window from the front of the tube. See photo below. Retain die cut.
- Adhere Window Sheet to the inside with Tear and Tape at the top and bottom of the window. There is no room on the side.
- Apply Tear and Tape to the seam. Fold your tube flat and adhere your side seam.
- Adhere the bottom flaps, making sure that your tube is square.
- Punch holes in the front and back of your tube.
- FOR THE TAG. If you can separate the DSP layer from the Very Vanilla cardstock form the die cut, then you can use this. Otherwise cut Very Vanilla cardstock and DSP tags. Stamps greeting on Very Vanilla piece. Once again, I used HAPPY EASTER, HAPPY SPRING etc, but this time I stamped HAPPY EASTER. Hole punch both pieces.
- Fill your tube with eggs. I used four little eggs from an ALDI pack.
- Thread Mini Combo ribbon though the holes on the top of tube, thread the ribbon through your tags and tie off with a simple bow.
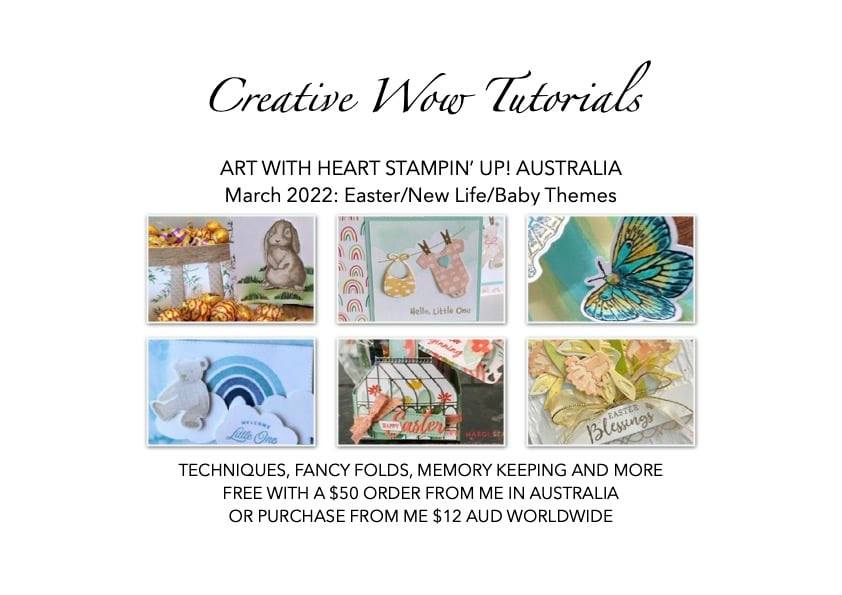
CREATIVE WOW TUTORIAL: HERE IS THE MARCH 2022 SNEAK PEEK
JOIN MY TEAM
Join just for yourself to get a discount, and/or build a business, be part of my team and meet friends who love to craft. The choice is yours, and I’m only too happy to chat with you OR, you might like to hop on over to my JOINING PAGE
Here’s a quick look at the offer.
- Choose $235 product for a $169 ($66 for FREE).
- FREE Shipping
- FREE Business Kit, including current catalogues.
- The opportunity to order from any existing catalogue at 20% discount and view the upcoming 2022-2023 Annual Catalogue.
- And, include Pre-order Items from the upcoming 2022-2023 Annual Catalogue from 1 April, 2022.
JOIN MY CLASSES:
Please contact me if you would like to join my paper-crafting classes. I run several class groups.
You might like to arrange a private class for you and your friends, or you might like to join my online/virtual class with prepared class kits and PDF/web Tutorials.
Please chat to me about your ideas or queries.
Have Fun Crafting. Enjoy the samples and your own wonderful creativity.
Facebook page is:
https://www.facebook.com/margistamps/
Pinterest site is:
https://www.pinterest.com.au/margisank/
Stampin’ Up! 24/7 Online Store is HERE
My Stampin’ Up! website is HERE
My blog website is:http://www.margistamps.com/
……… till next time, stay safe, have fun!
![]()
LOVE IT. LIVE IT. SHARE IT.
