
It’s Summer and the weather is hot! Maybe you’re like me and dreaming of a tropical getaway complete with Palm Trees, beach scenes and a coconut or two!
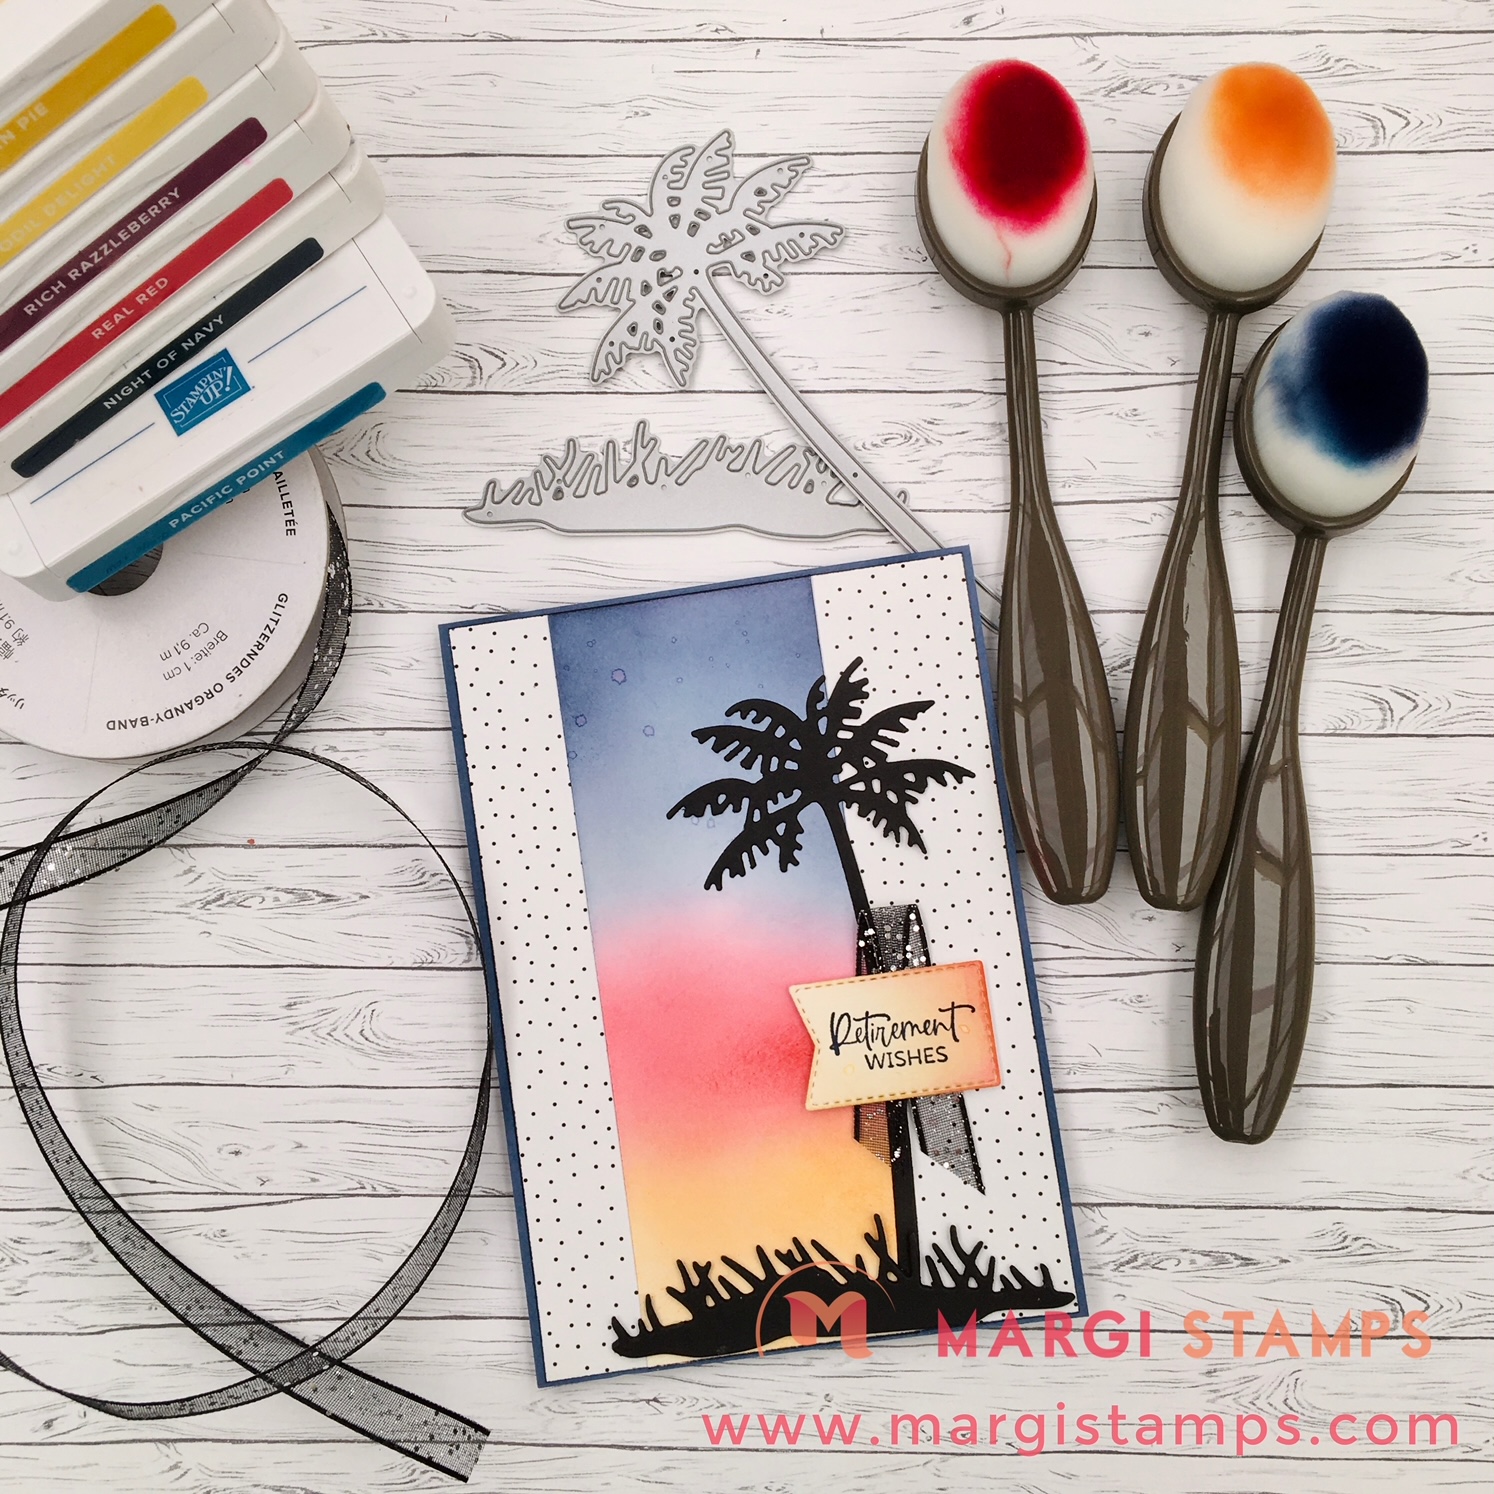
I’ve created this card design (with a little help from the Mini Catalogue) using our Paradise Palms Bundle and colouring with our Blending Brushes and Ink Pads.

In our previous card, Abstract Beauty & Pierced Blooms, we used stunning paper, ribbon and stitched die-cuts for the WOW factor. You can read more HERE
In this Tutorial we are using Blending Brushes colouring and Basic Black die-cut palm silhouette shapes for the WOW.
Key Ingredients for Paradise Palms & Colouring with Blending Brushes Card
Paradise Palms Bundle
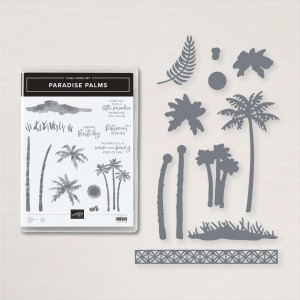
The bundle has it all; a great stamp set, with palm trees of various sizes, background scene elements and versatile greetings. The dies co-ordinate with the stamp set to die-cut stamped images or, they can be used on their own to create Palm Tree scenes. There is also a lovely border image, which will be great to add some additional zing!
HERE is the product link in my 24/7 Online Store
Blending Brushes
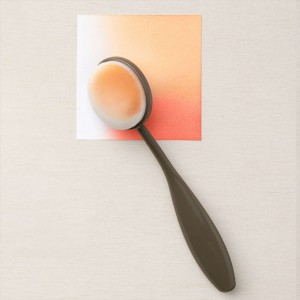
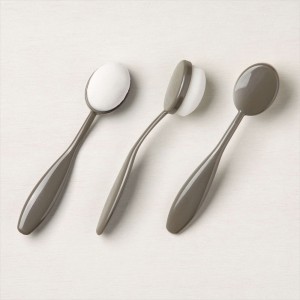
Blending Brushes come in packs of three and make colouring a breeze! Each brush is composed of gazillions of velvety soft bristles, to help you achieve a subtle and even finish. If you don’t have Blending Brushes, you might like to use your old Stampin’ Sponges or Sponge Daubers. You will just need a lighter touch. in any case remember to start blending off the paper and then work your way in!
HERE is the product link in my 24/7 Online Store
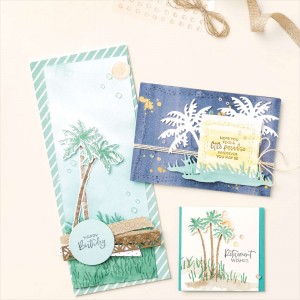
Paradise Palms & Colouring with Blending Brushes Card Kit
Here is your class kit.
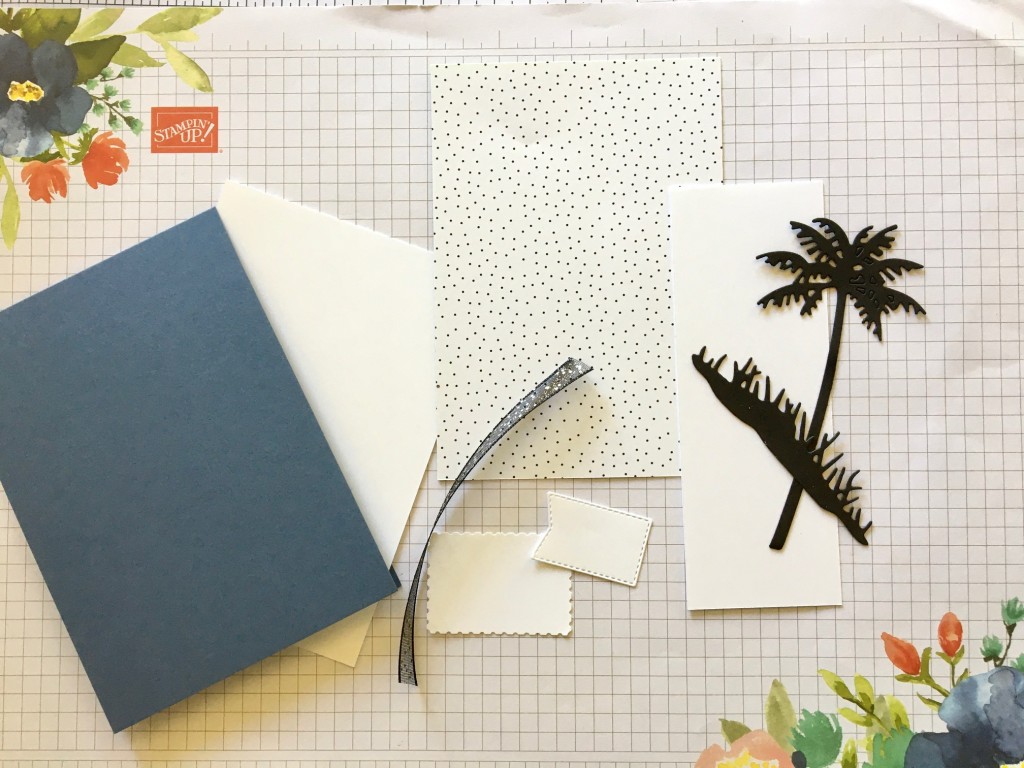
Supplies
- Stamp Sets, Dies & Punches: Paradise Palms Bundle, Layering Circles Dies (for masking the card insert), Tasteful Labels Dies, Rectangular Postage Stamp Punch (alternate greeting layers)
- Papers: Pattern Party DSP, Basic Black, Basic White and Misty Moonlight cardstock
- Inks: Daffodil Delight, Night of Navy, Pacific Point, Pumpkin Pie, Real Red & Rich Razzleberry
- Other; Black Glittered Organdy Ribbon, Multipurpose Liquid Glue, Tear & Tape, Mini Dimensionals, Take your Pick, Trimmer, Cut & Emboss Machine.
HERE is the link to all products used.
Dimensions
- Card Base: Misty Moonlight 29.7 x 10.5cm scored in half.
- Layering DSP and Cardstock: Pattern Party 14.6 x 10.1cm (5 3/4″ x 4″), Basic White 14.6 x 5.25cm and scraps for greetings. I’ve included two greeting pieces; one die-cut using Tasteful Labels dies and the other punched using Rectangular Postage Stamp Punch for a larger greeting.
- Other: Black Glittered Organdy Ribbon
Step by Step Directions.
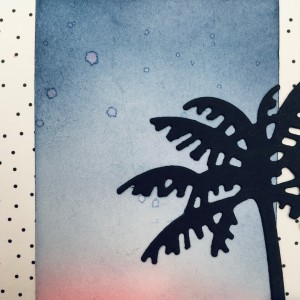
Colour your scene from blue at the top, moving through reds and orange to yellow at the base of the strip. (Remember you can add colour but you can’t take it off- so be a little light handed to begin with.)
- On the piece of Basic White cardstock measuring 14.6 x 5.25 cm and starting at the top colour with Pacific Point and one of your Blending Brushes. (I keep one for blue/greens) Apply colour lightly, in a circular motion and starting off the paper, gradually coming onto the paper and extend down about 5 cm. This will be top of your dusk sky.
- Then deepen the colour with a little Night of Navy. I applied the Night of Navy around the top edges.
- Using a different Blending Brush, apply a little Rich Razzleberry below and slightly overlapping, the Pacific Point/Night of Navy. (I keep one of my Blending Brushes for reds). Then apply Real Red to darken this section.
- Using another Blending Brush, apply Daffodil Delight to the bottom of the strip and then Pumpkin Pie to complete your scene and join with the red coloured section.
Voila! You’ve coloured your scene.
You might notice a few little dots/stars in the sky. I flicked a tiny bit of water onto the coloured strip. The tiniest amount of water will give this effect! I did this after I had layered up the card front. You could do this at any time.
Here are some views of the finished card….so that you can see the colour graduations and the ‘water flicks’.

Let’s finish the card front!
- There are two greeting pieces to choose from depending on the size of your greeting. Stamp your chosen greeting on either of the greeting pieces. I stamped one of the greetings from Paradise Palms using Night of Navy Ink but you could also use Memento Black.
- Wait till the ink dries, and blend a little colour on the greeting piece using your Blending Brush and Daffodil Delight and/or Pumpkin Pie.
- Adhere coloured scene strip(14.6 x 5.25cm) to dotty DSP and adhere all to card base.
- Adhere black Palm Tree to card front with Multipurpose Liquid Glue
- Adhere black Grass to card front. (You could a few mini glue dots or multipurpose liquid glue)
- Tack the ribbon in place with Tear & Tape
- Adhere Greeting Layer with Mini Dimensionals

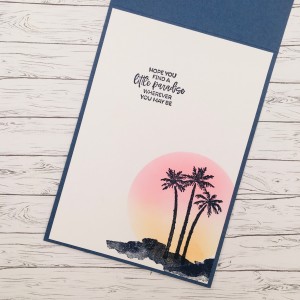
Inside of Card
- Stamp chosen greeting and/or scene.
Here is my sample.
- I made a mask by die-cutting a circle from a piece of cardstock about the same size as my card insert. I placed this mask over my Basic White card insert and “sponged through” the mask circle using Real Red, Pumpkin Pie and Daffodil Delight This became my sky and background for the Palm Tree grove. I removed this circle mask.
- I then stamped the Palm grove, and hill/sand images using Night of Navy ink
- The greeting is also from Paradise Palms Bundle.
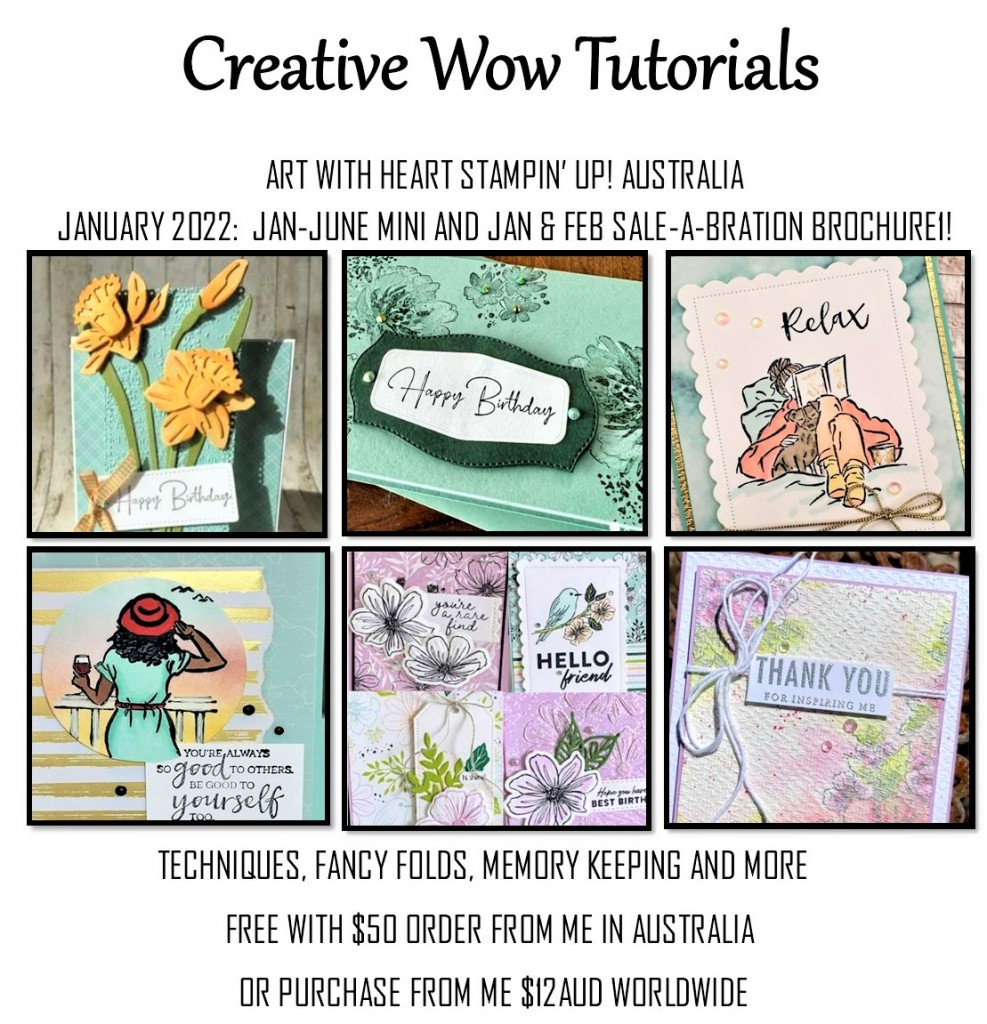
Creative WOW Tutorial: Here is the January Sneak Peek
Join My Team – Sale-a-Bration
Join just for yourself to get a discount, and/or build a business, be part of my team and meet friends who love to craft. The choice is yours, and I’m only too happy to chat with you OR, you might like to hop on over to my JOINING PAGE.
Here’s a quick look at the offer!
* NOW-Choose $235 product for a $169 spend ($66 for FREE) (incl. January-June 2022 Mini Catalogue)
* From January 4, choose an additional TWO FREE stamp sets form any current catalogue
* FREE Shipping
* FREE Business Kit, including current catalogues.
* And the opportunity to order from any existing catalogue at 20% discount.
Join My Classes
Please contact me if you would like to join my paper-crafting classes. I run several class groups. You might like to arrange a private class for you and your friends, or you might like to join my online/virtual class with prepared class kits and PDF Tutorials.
Please chat to me about your ideas or queries.
Have Fun Crafting. Enjoy the samples and your own wonderful creativity.
My business Facebook page is HERE
My Pinterest site is HERE:
My Stampin’ Up Online Store is HERE
My Stampin’ Up website is HERE
My blog website is HERE:
……… till next time, stay safe, have fun!
![]()
LOVE IT. LIVE IT. SHARE IT.
