
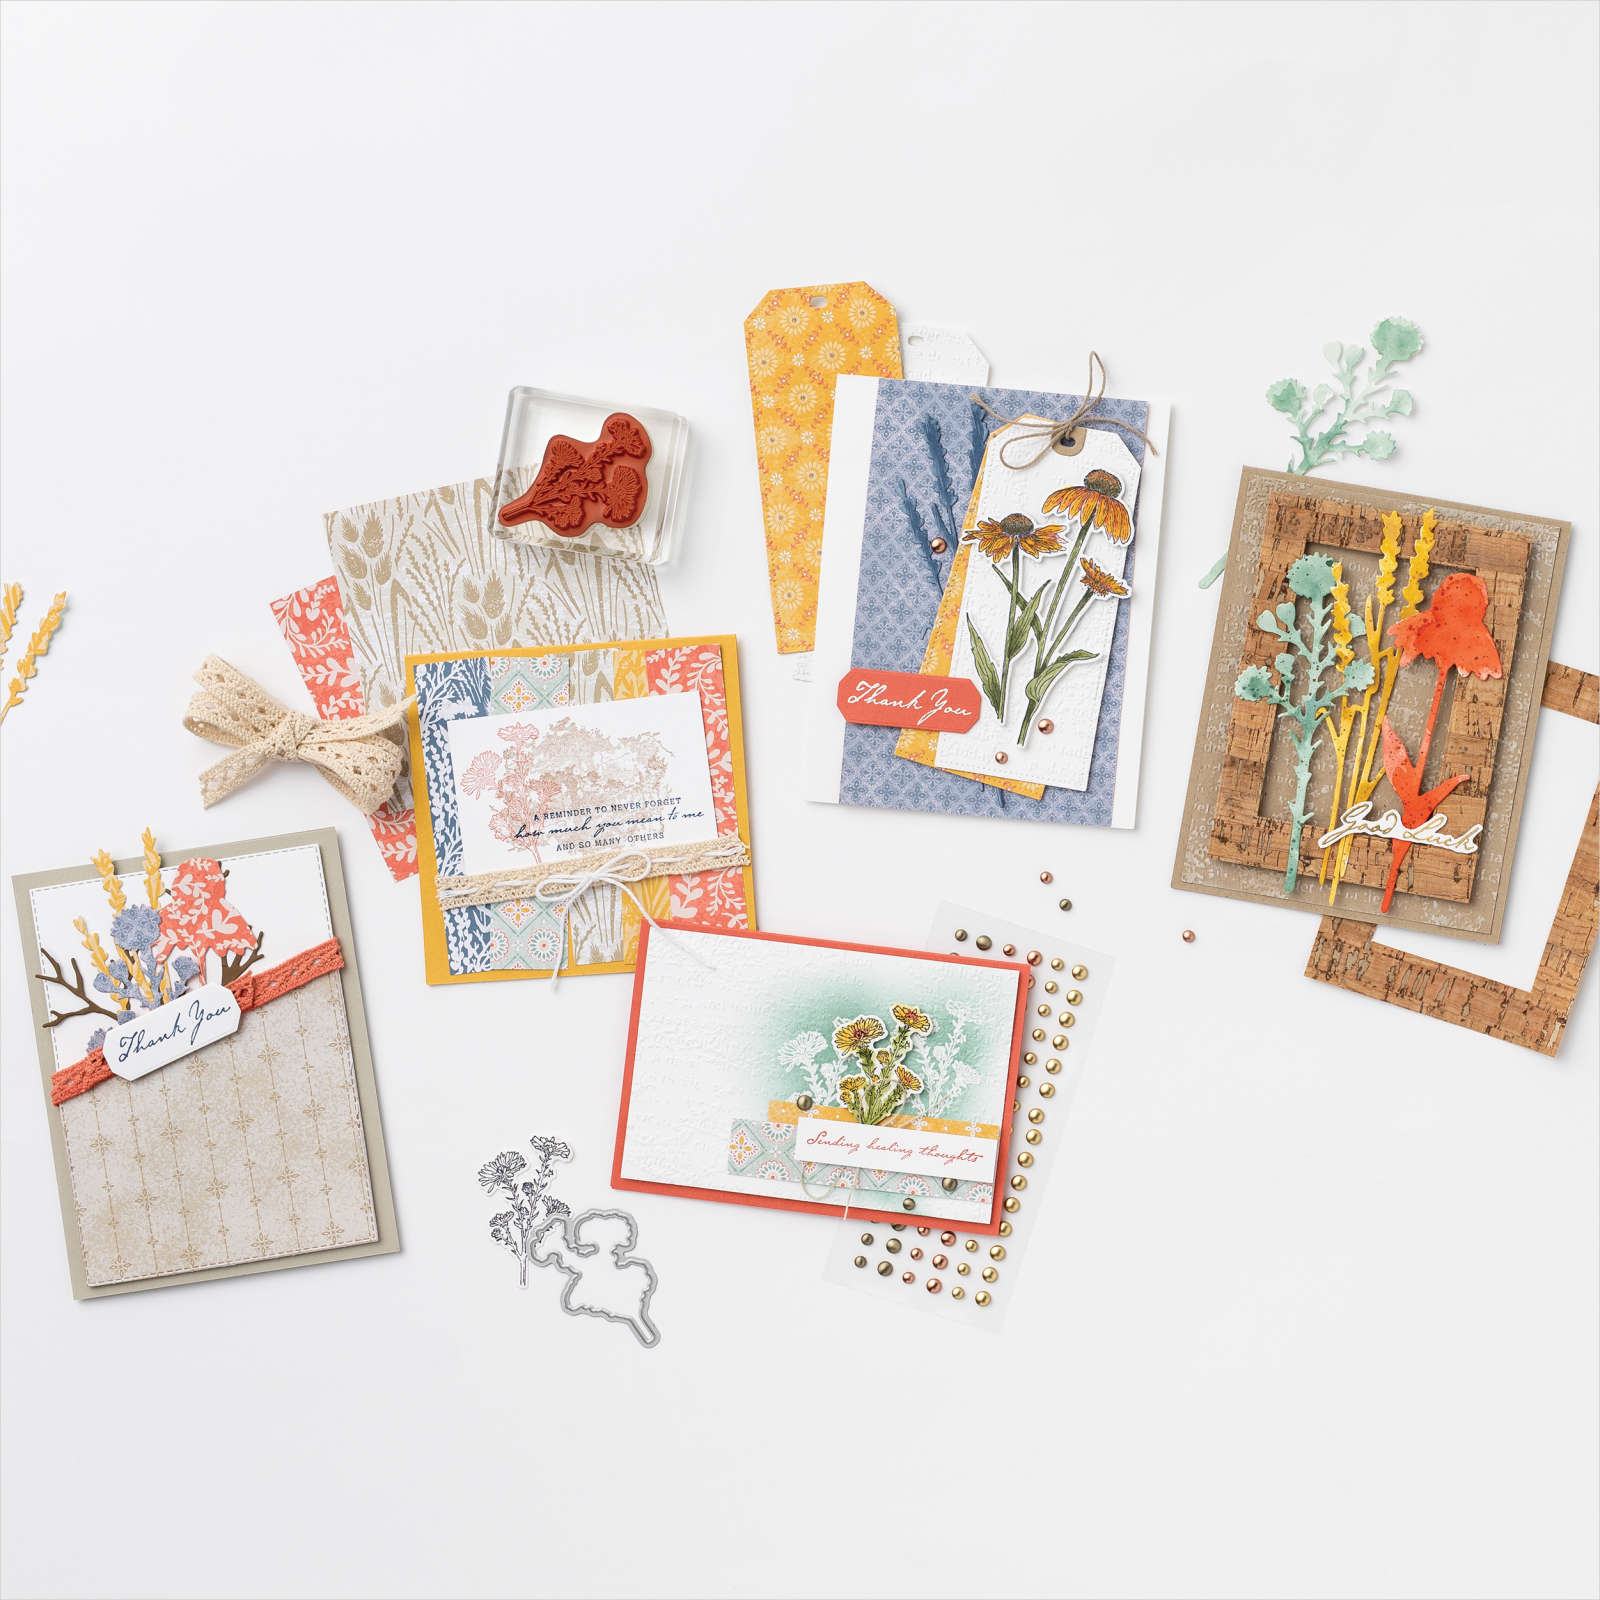
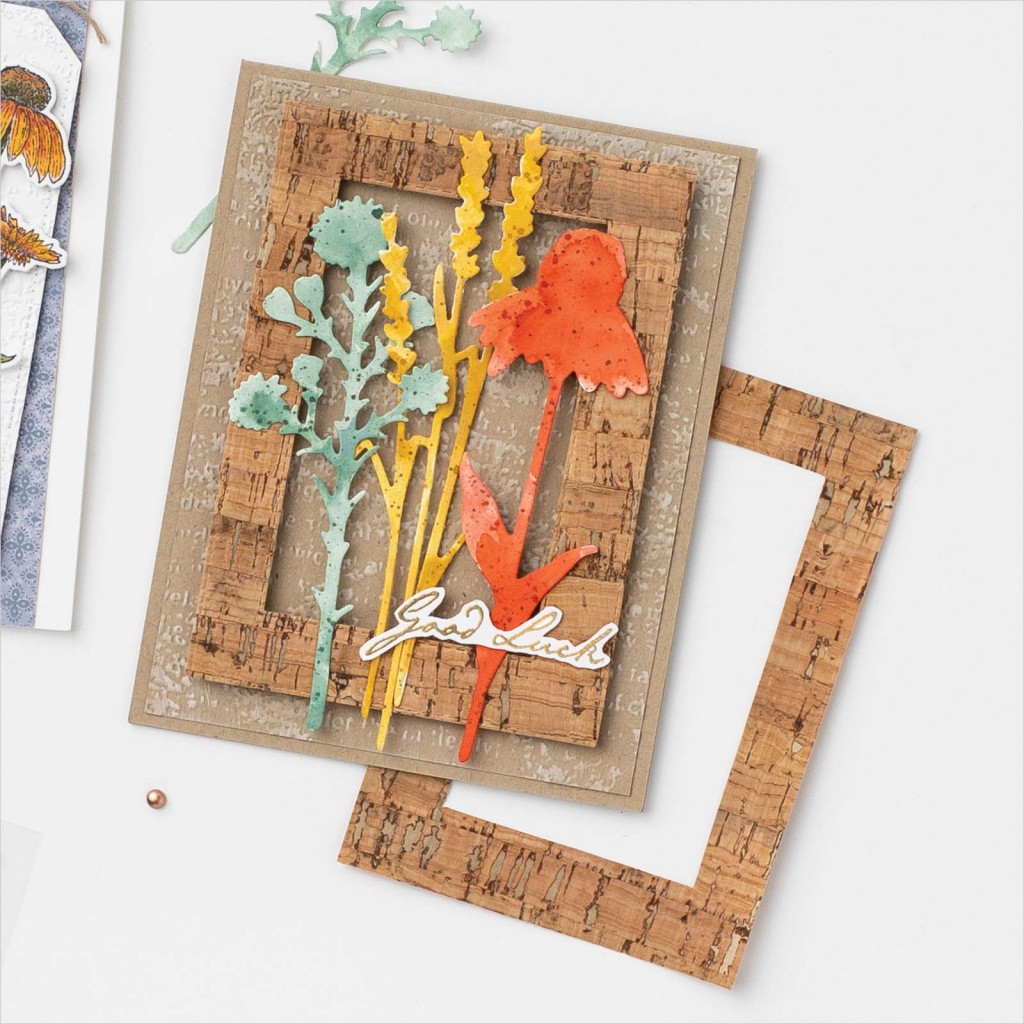
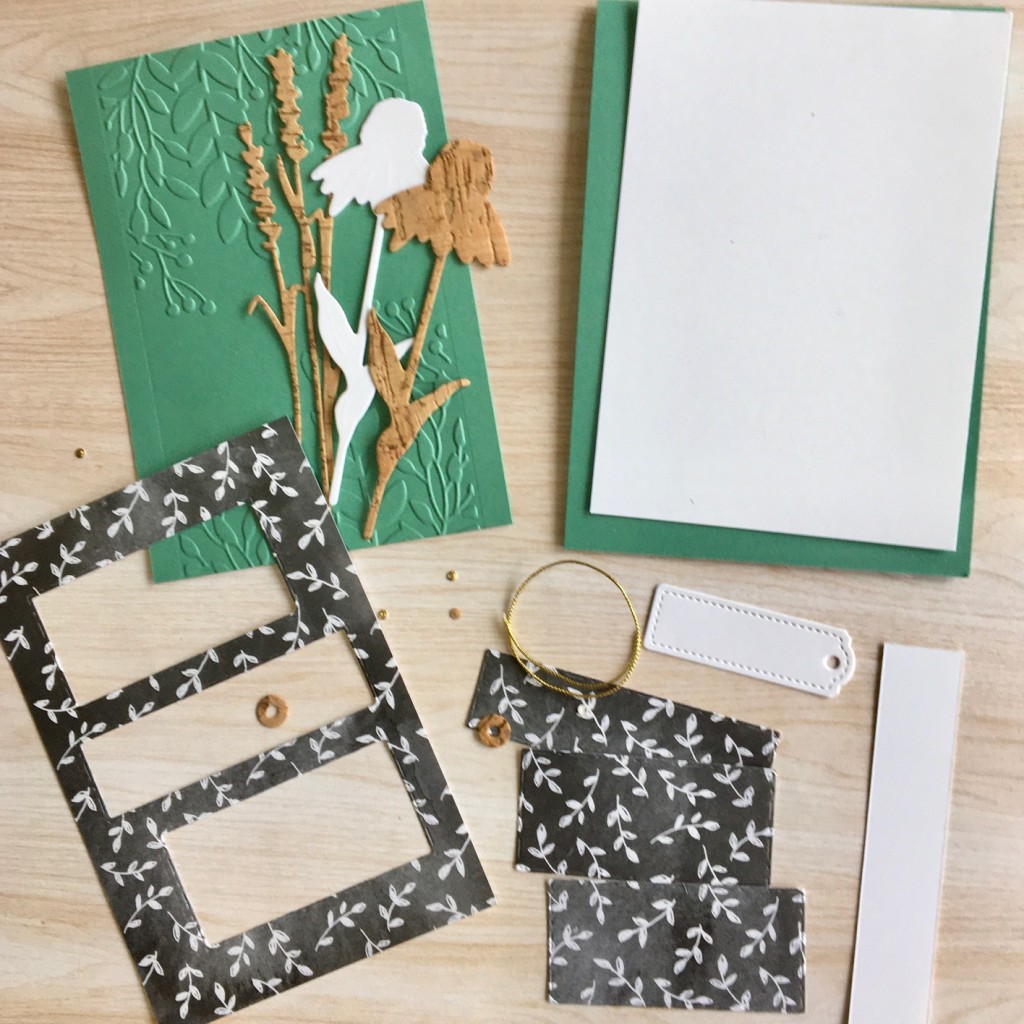
Picture This Dies, Nature’s Harvest Bundle and Beautifully Penned Designer Series Paper are a great combination and perfect for this masculine or general card design. In this class kit, we are pairing these elements with Cork Specialty Paper and Greenery Embossing Folder. The tag is from Tailor Made Tag dies. We will also use the resultant die cut ‘Picture This’ pieces to make our second card, so keep the bits!
If you’re not in my class groups, you are welcome to enjoy these designs and your own creativity. If you would like to join one of my groups (online – at the moment) and live in Australia, please contact me. I would love to hear from you.
Nature’s Harvest Bundle with Cork, Picture This Dies and Beautifully Penned Designer Series Paper. Card #1

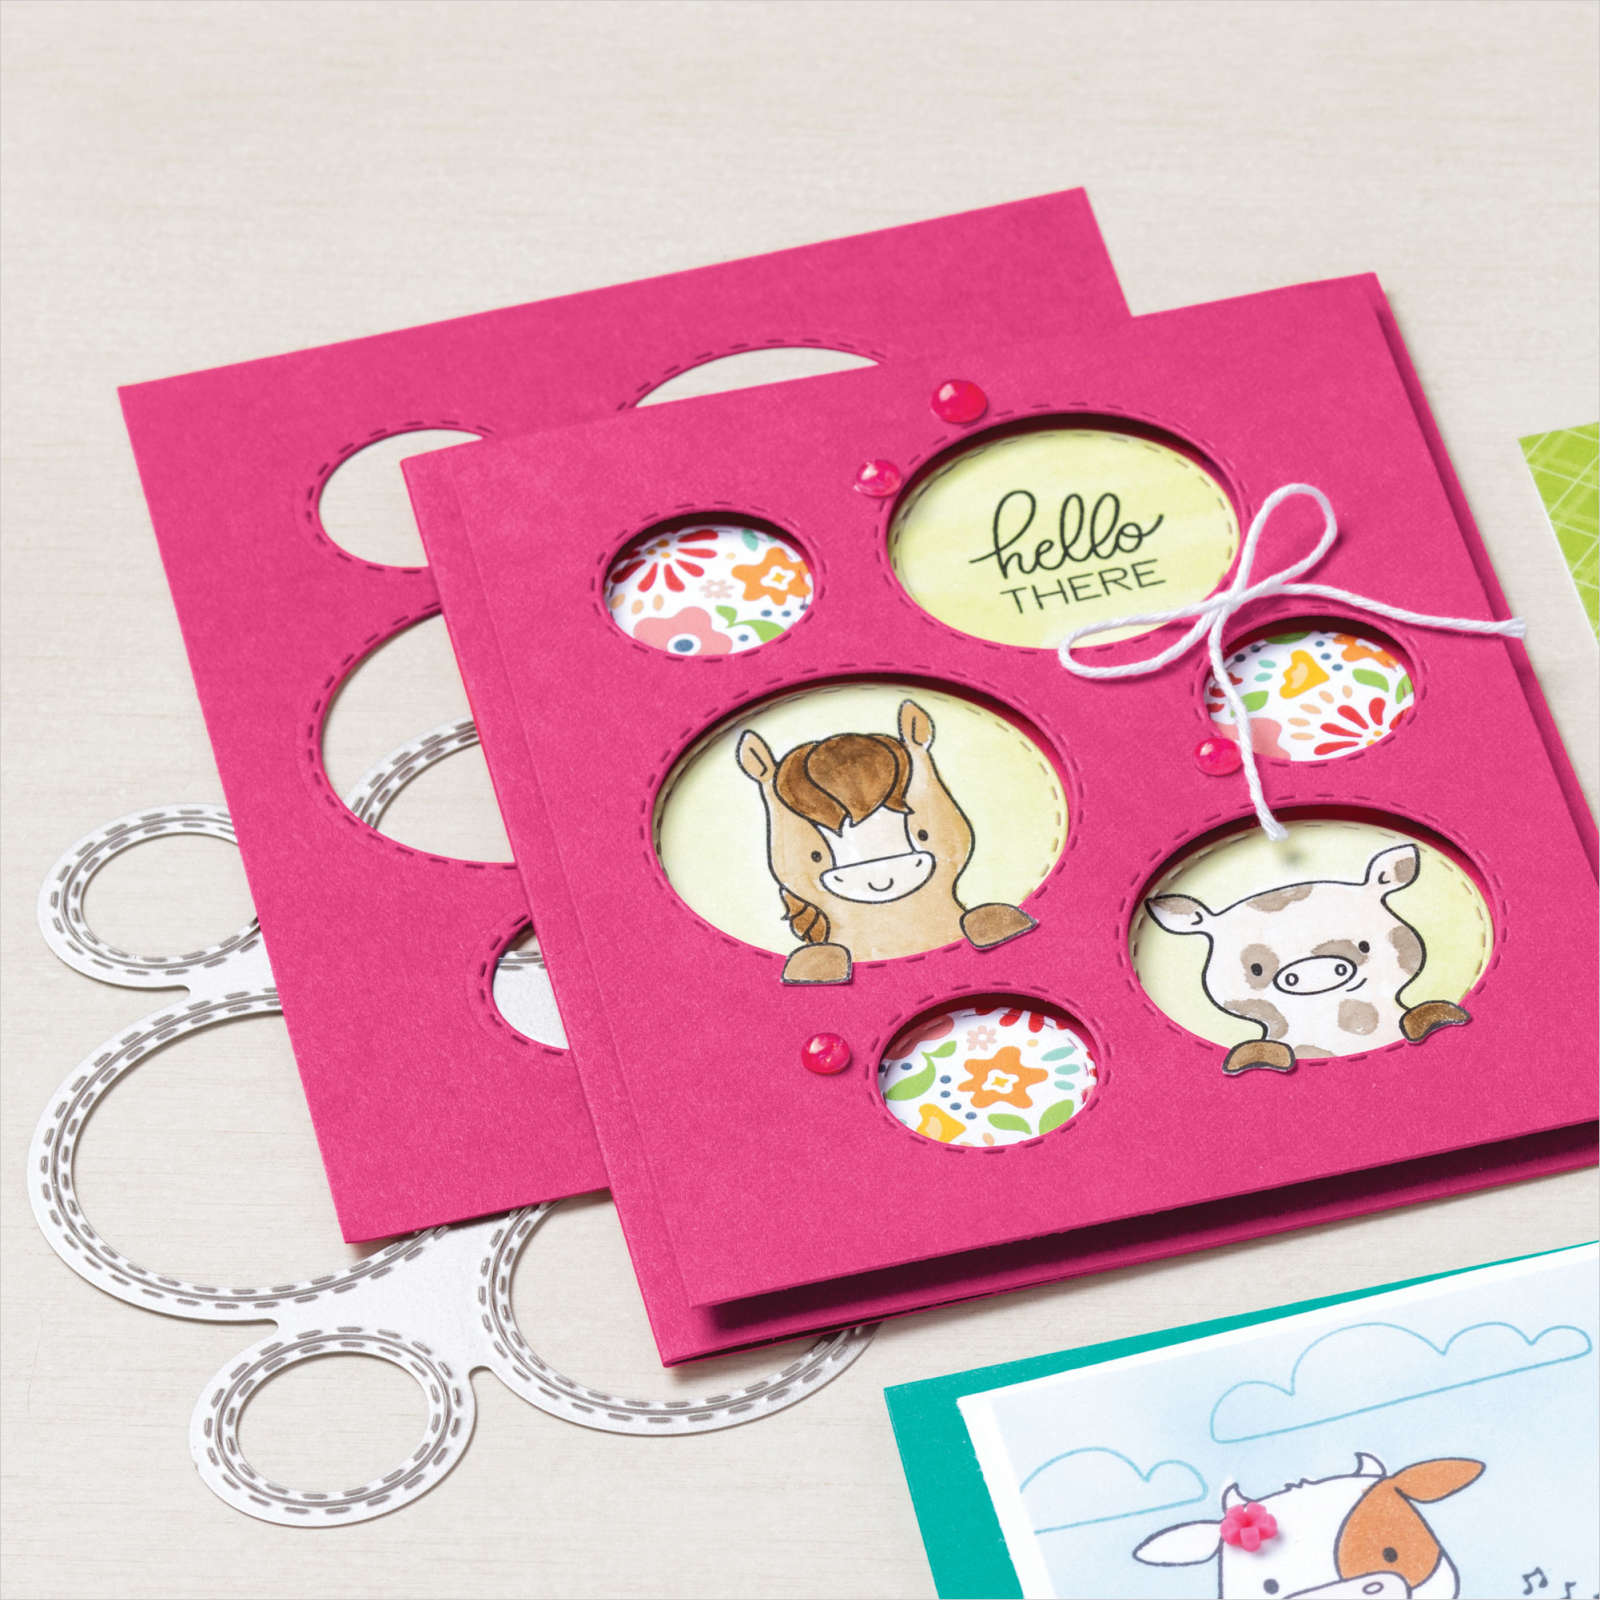
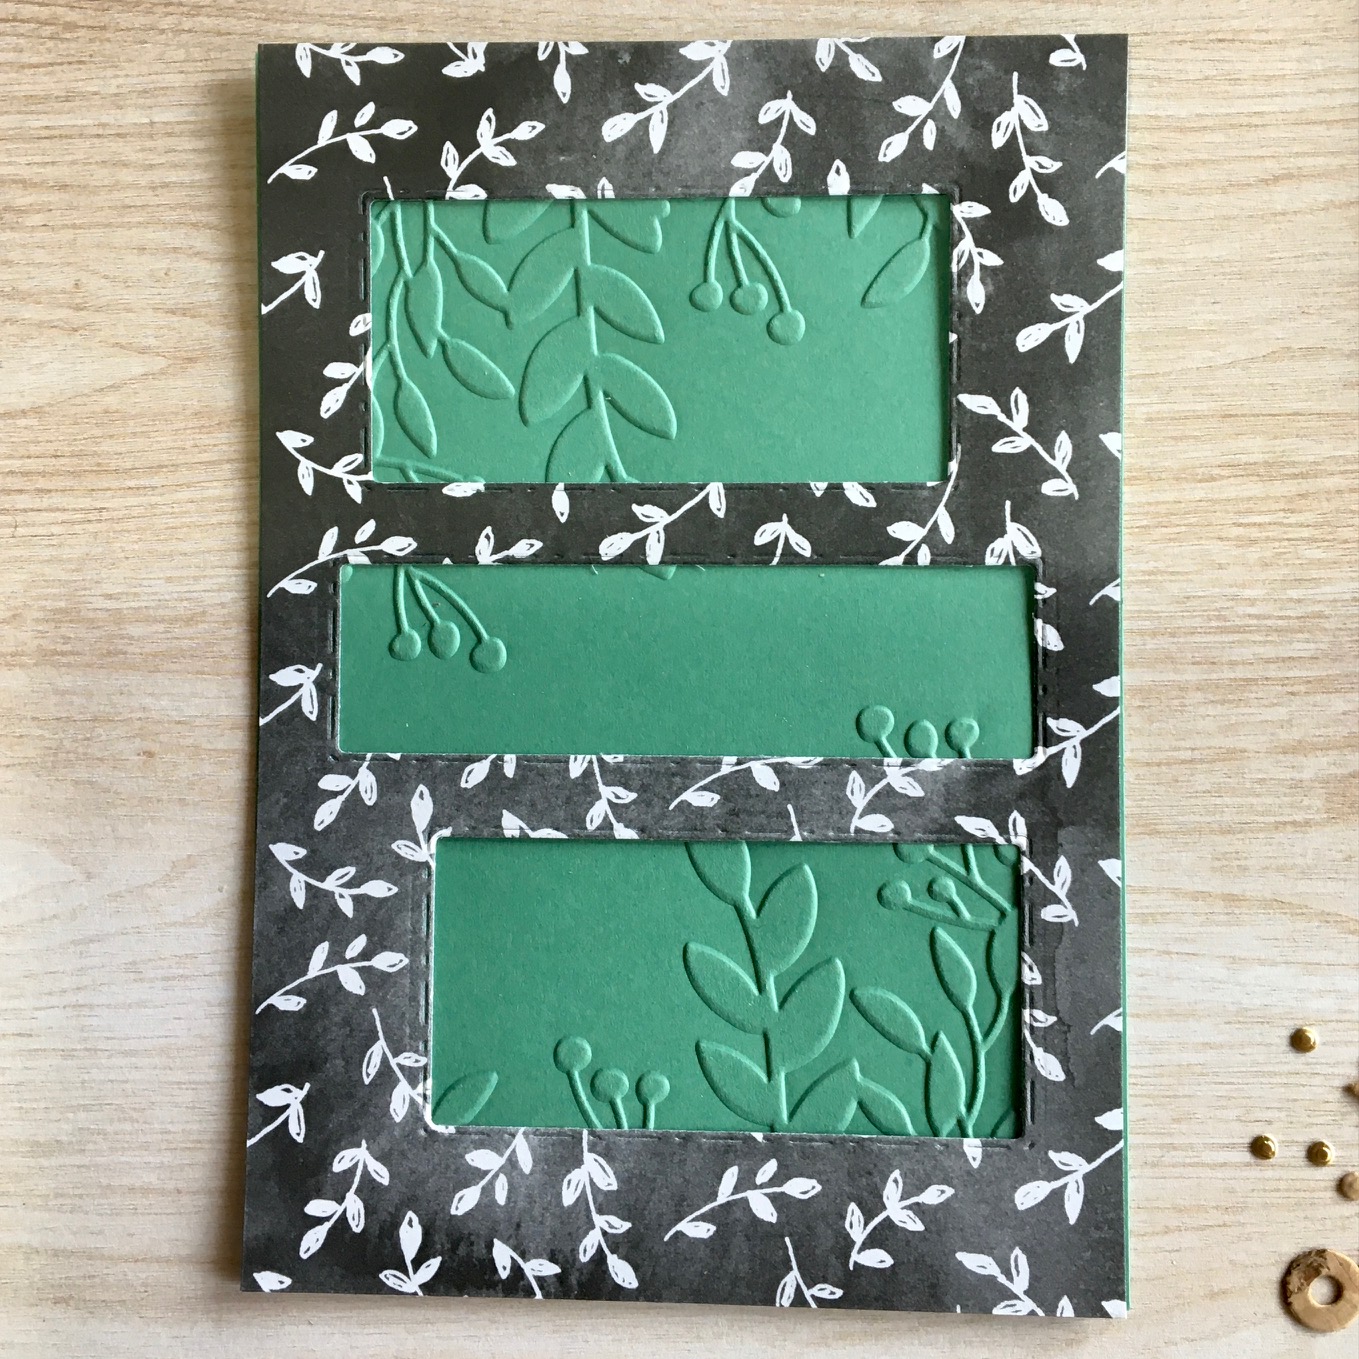
Card #2 Variations
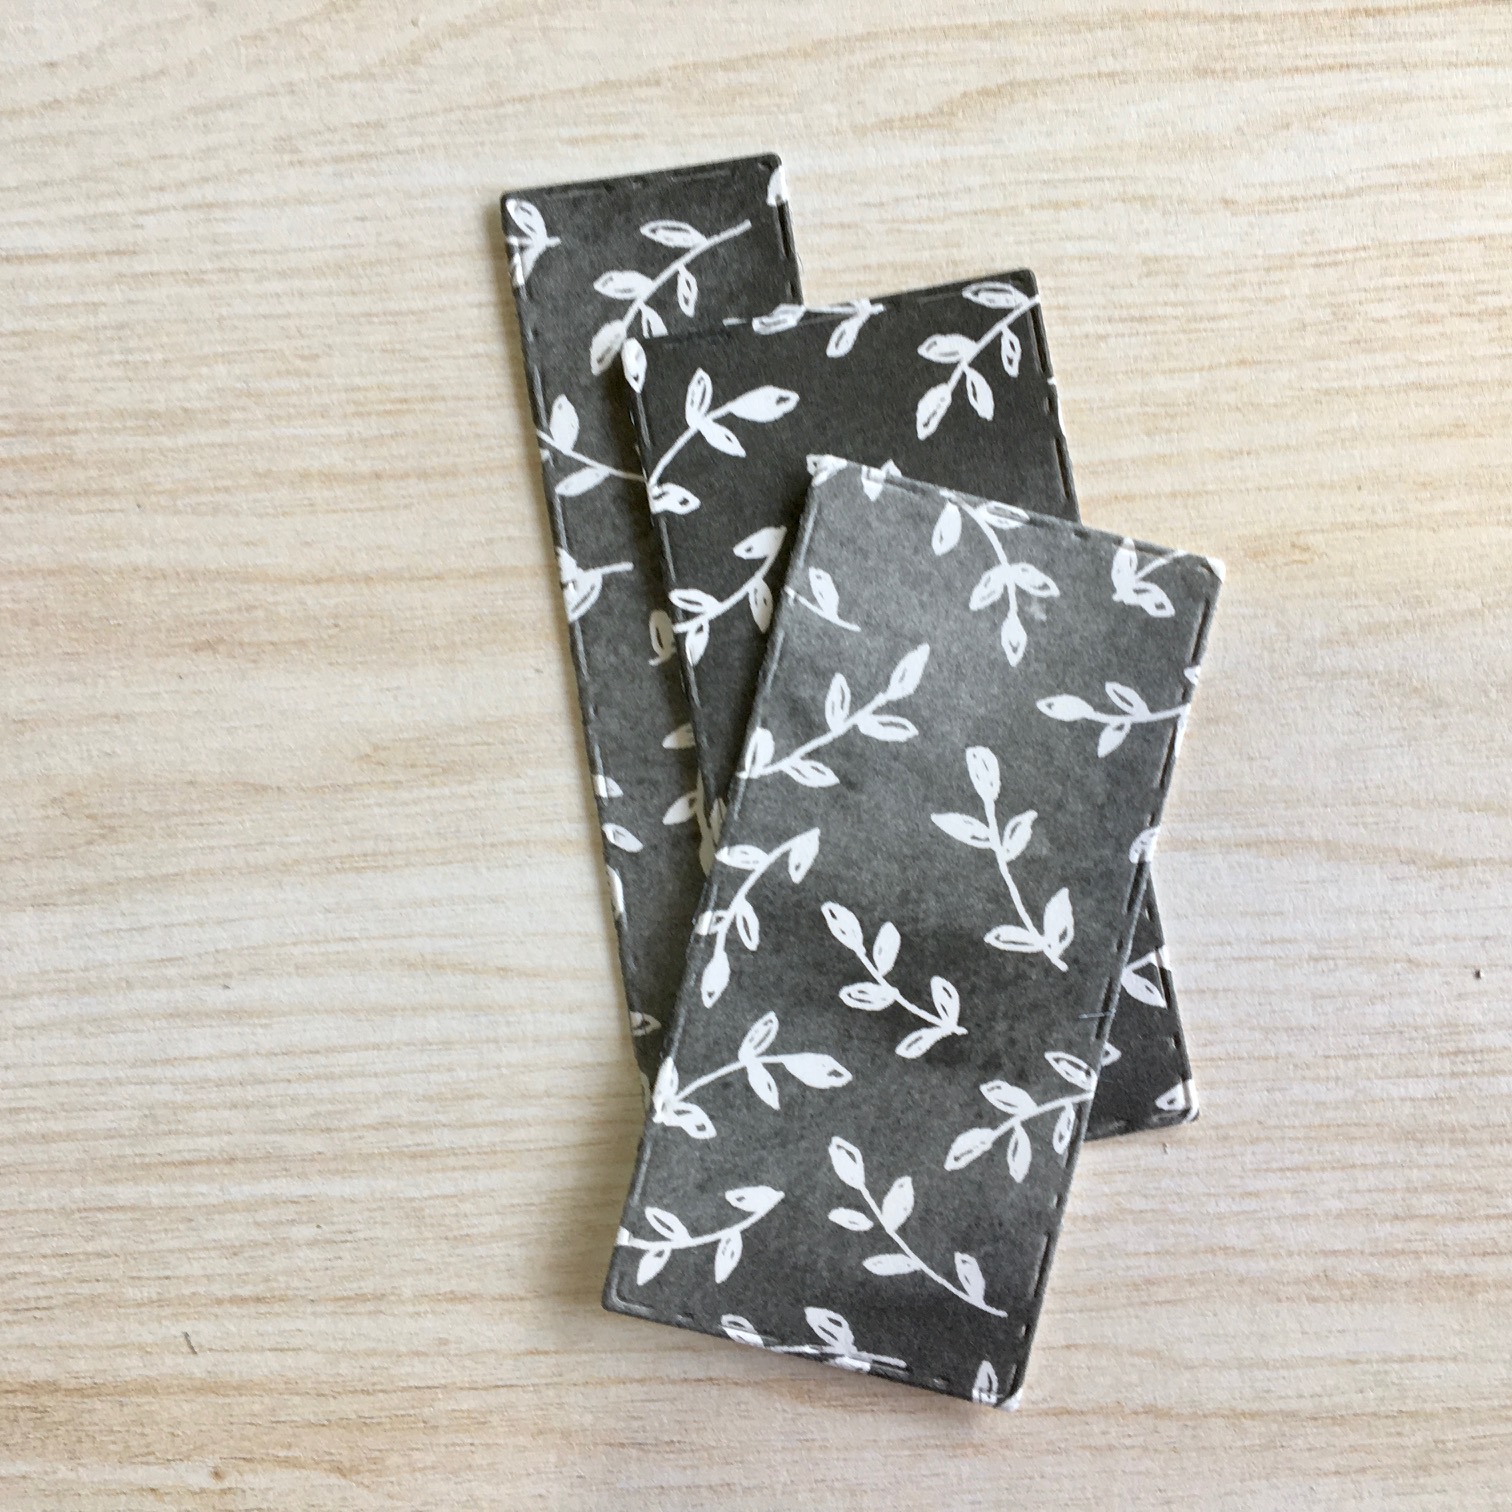
These are the two options for Card #2. Retain the 3 rectangle die cuts from Card #1 to make your Card # 2
HERE is the link to the tutorial for Card #2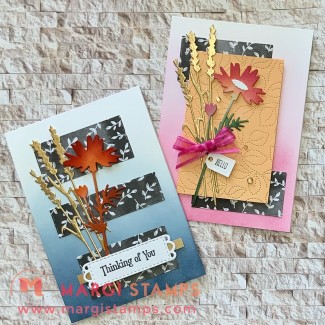
Ingredients for Nature’s Harvest & Beautifully Penned Card #1.
Lets step through the ingredients used for Card #1. Some are in the Annual Catalogue, some in the Mini and the paper is one of the Sale-a-Bration papers FREE with a qualifying $90 order.
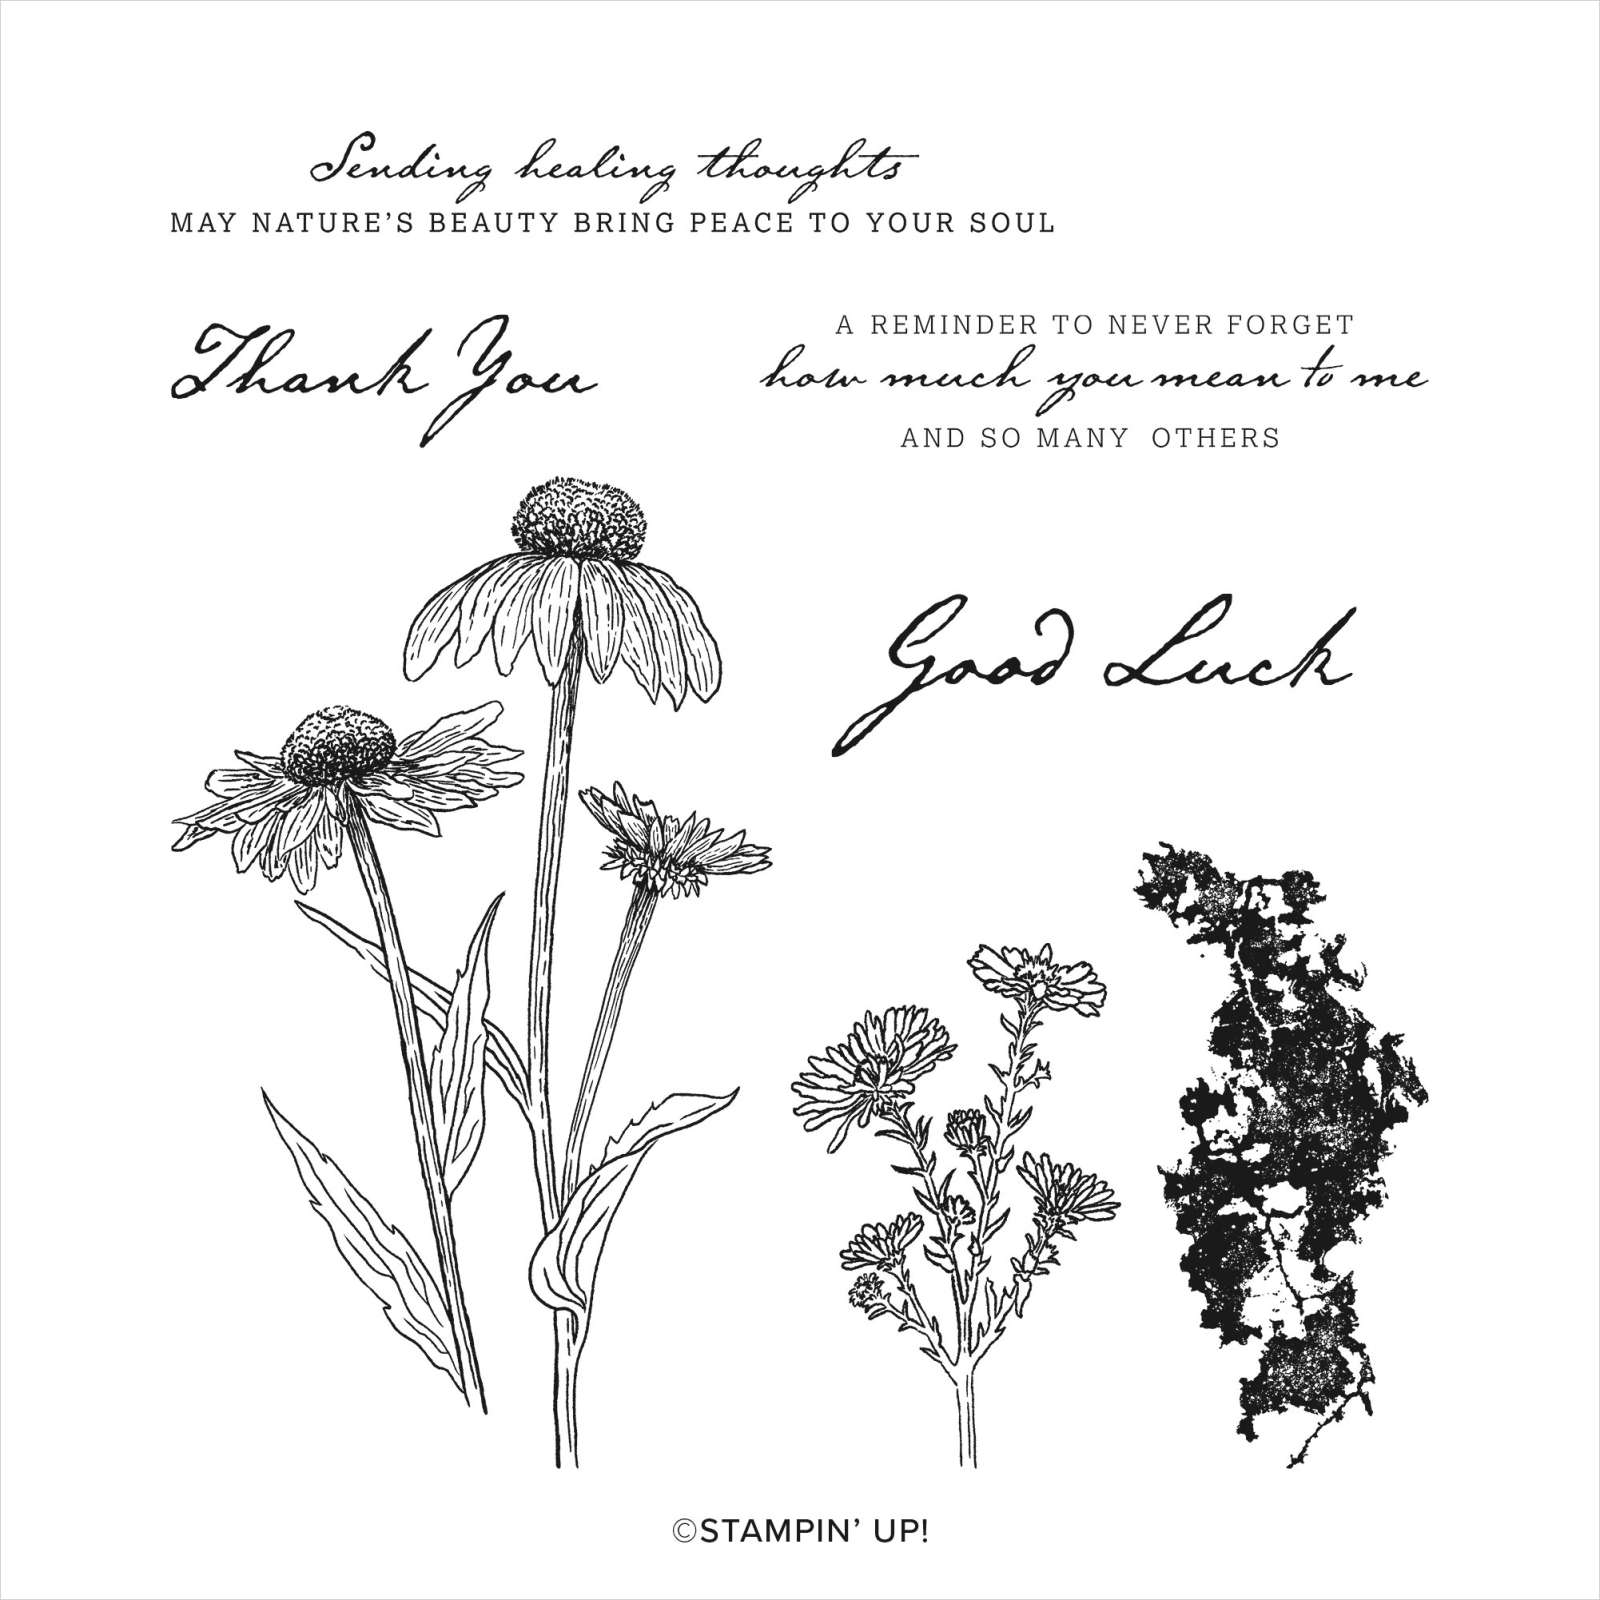
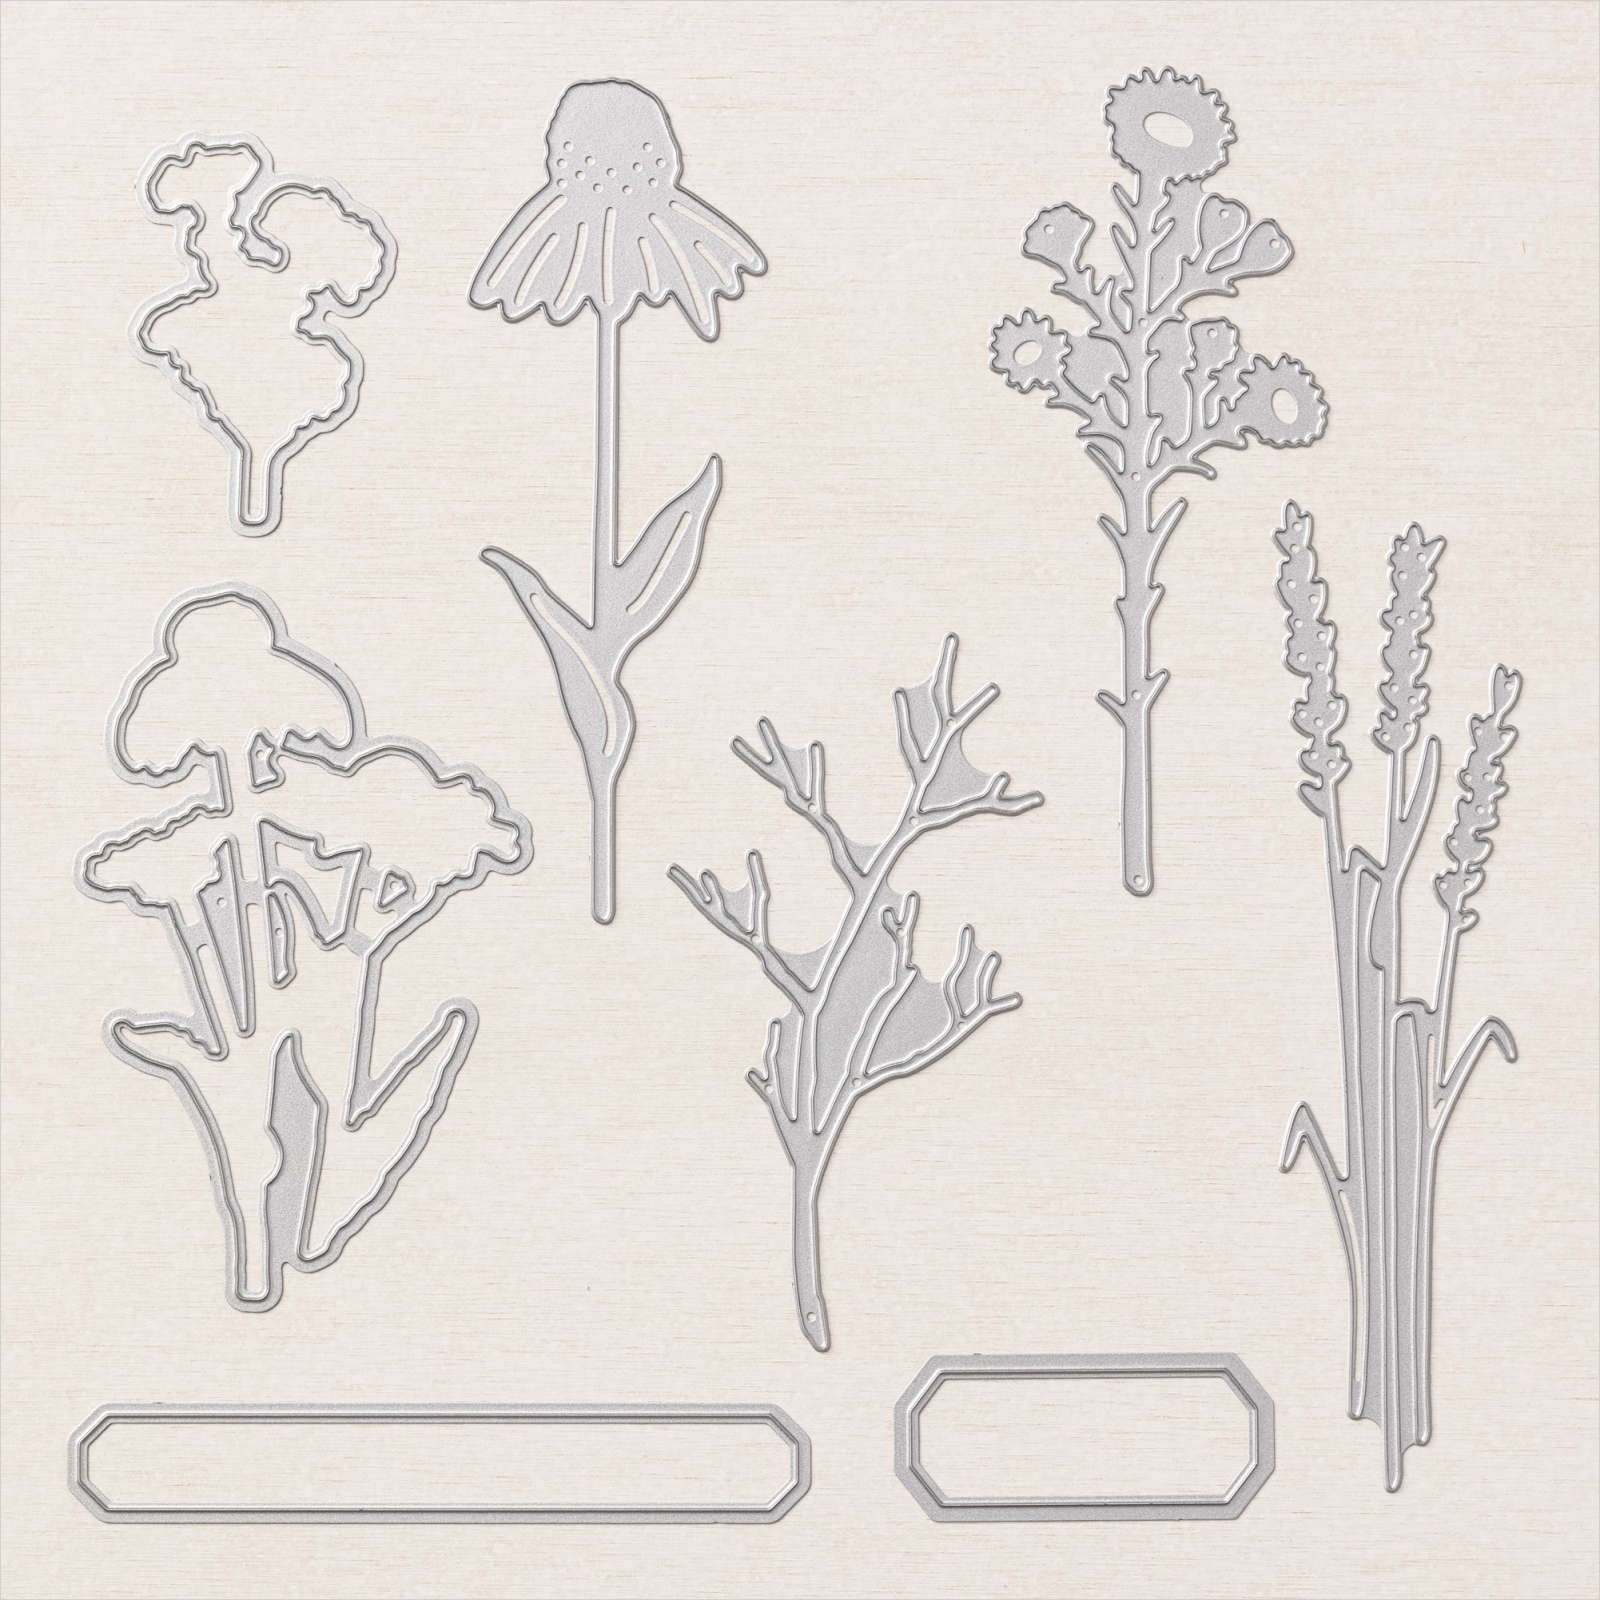
Nature’s Harvest Bundle
Nature’s Harvest Bundle includes the Nature’s Harvest Stamp Set and Harvest Dies. The timeless botanical images are versatile and can be used to reflect the colours of our garden in all seasons. The heartfelt messages fit the bill for many and varied occasions.
HERE is the link to the product in my 24/7 Online Store
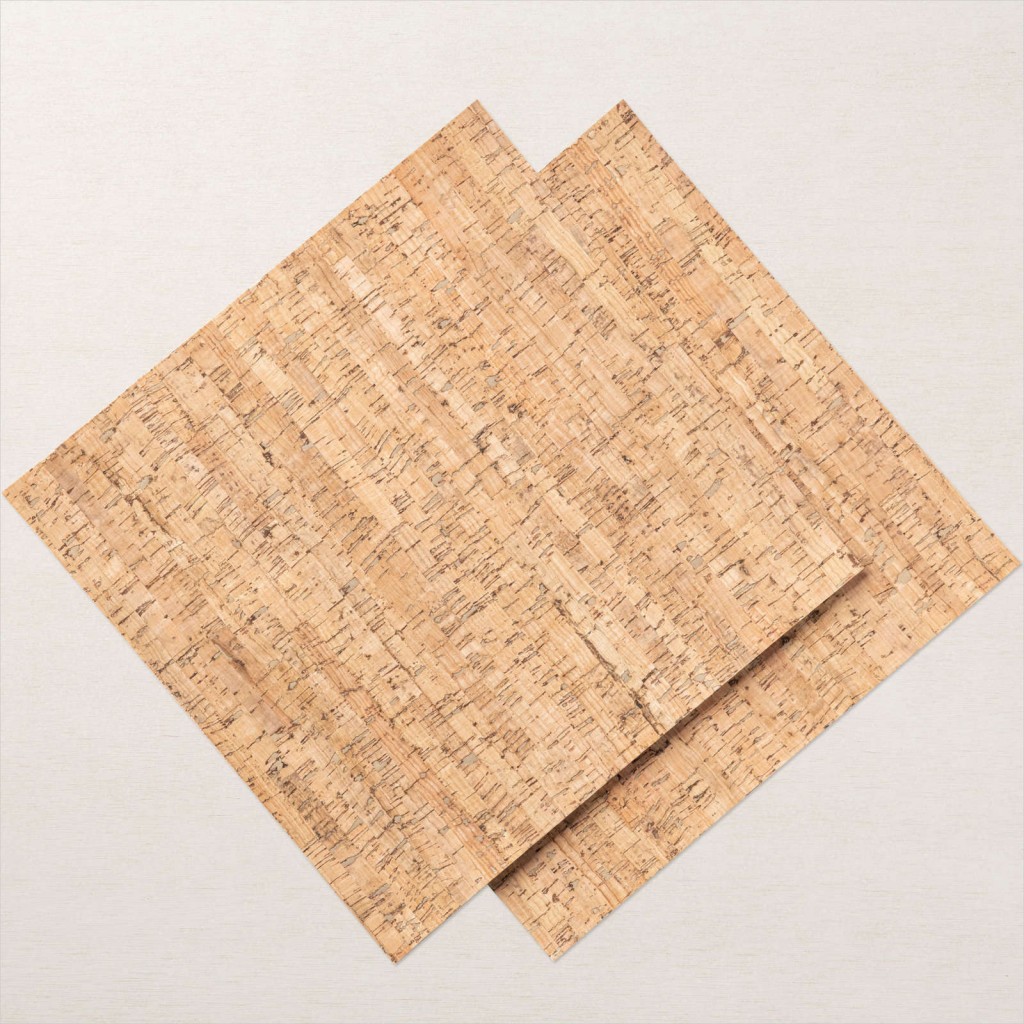
Cork Specialty Paper
We are using this beautiful Cork Specialty Paper for our botanical die cuts. It die cuts beautifully for our nature inspired card.
HERE is the link to the product in my 24/7 Online Store
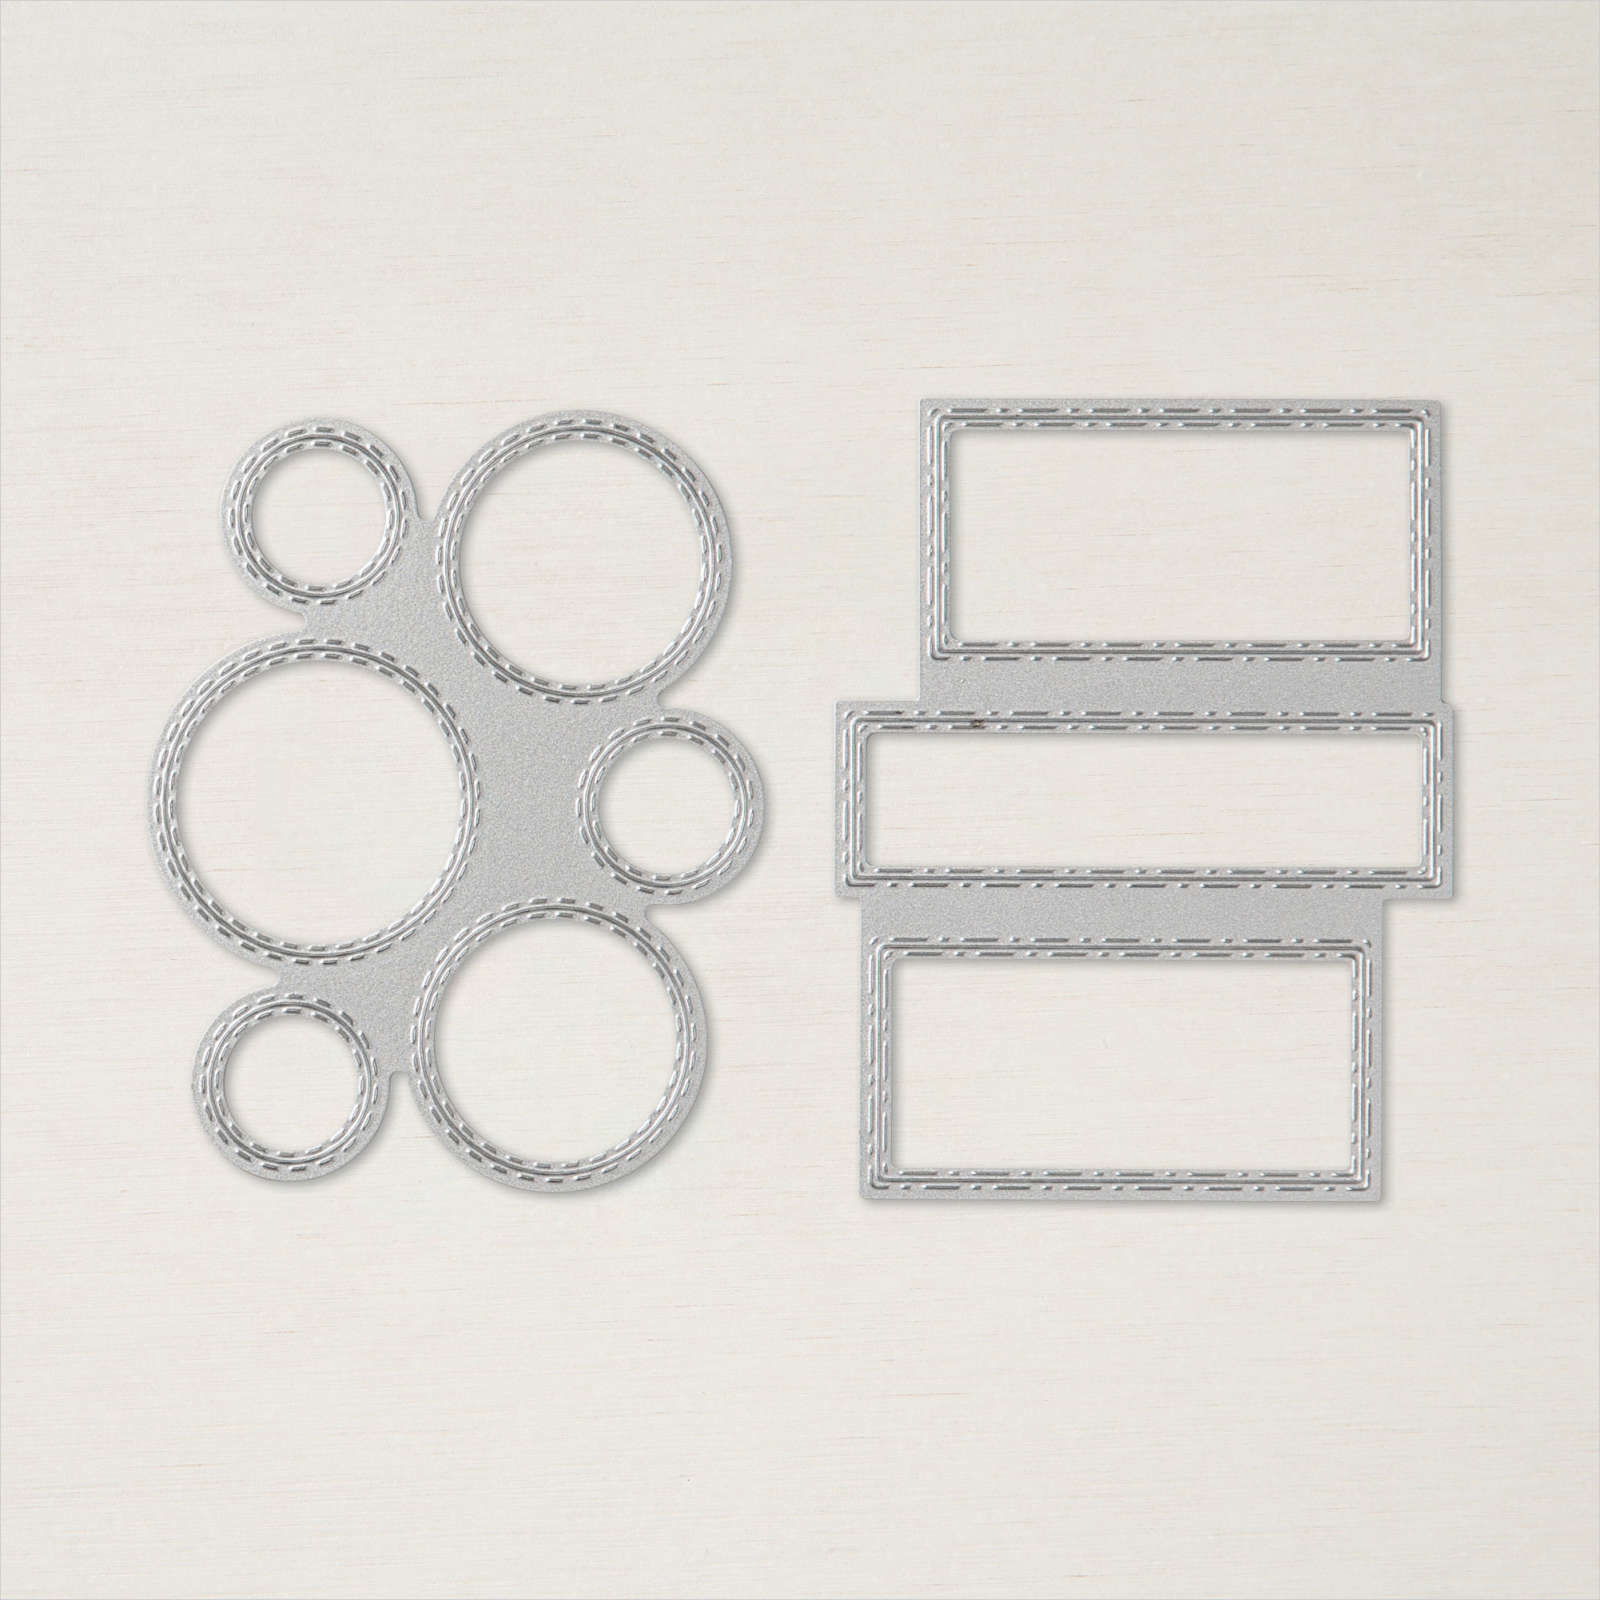
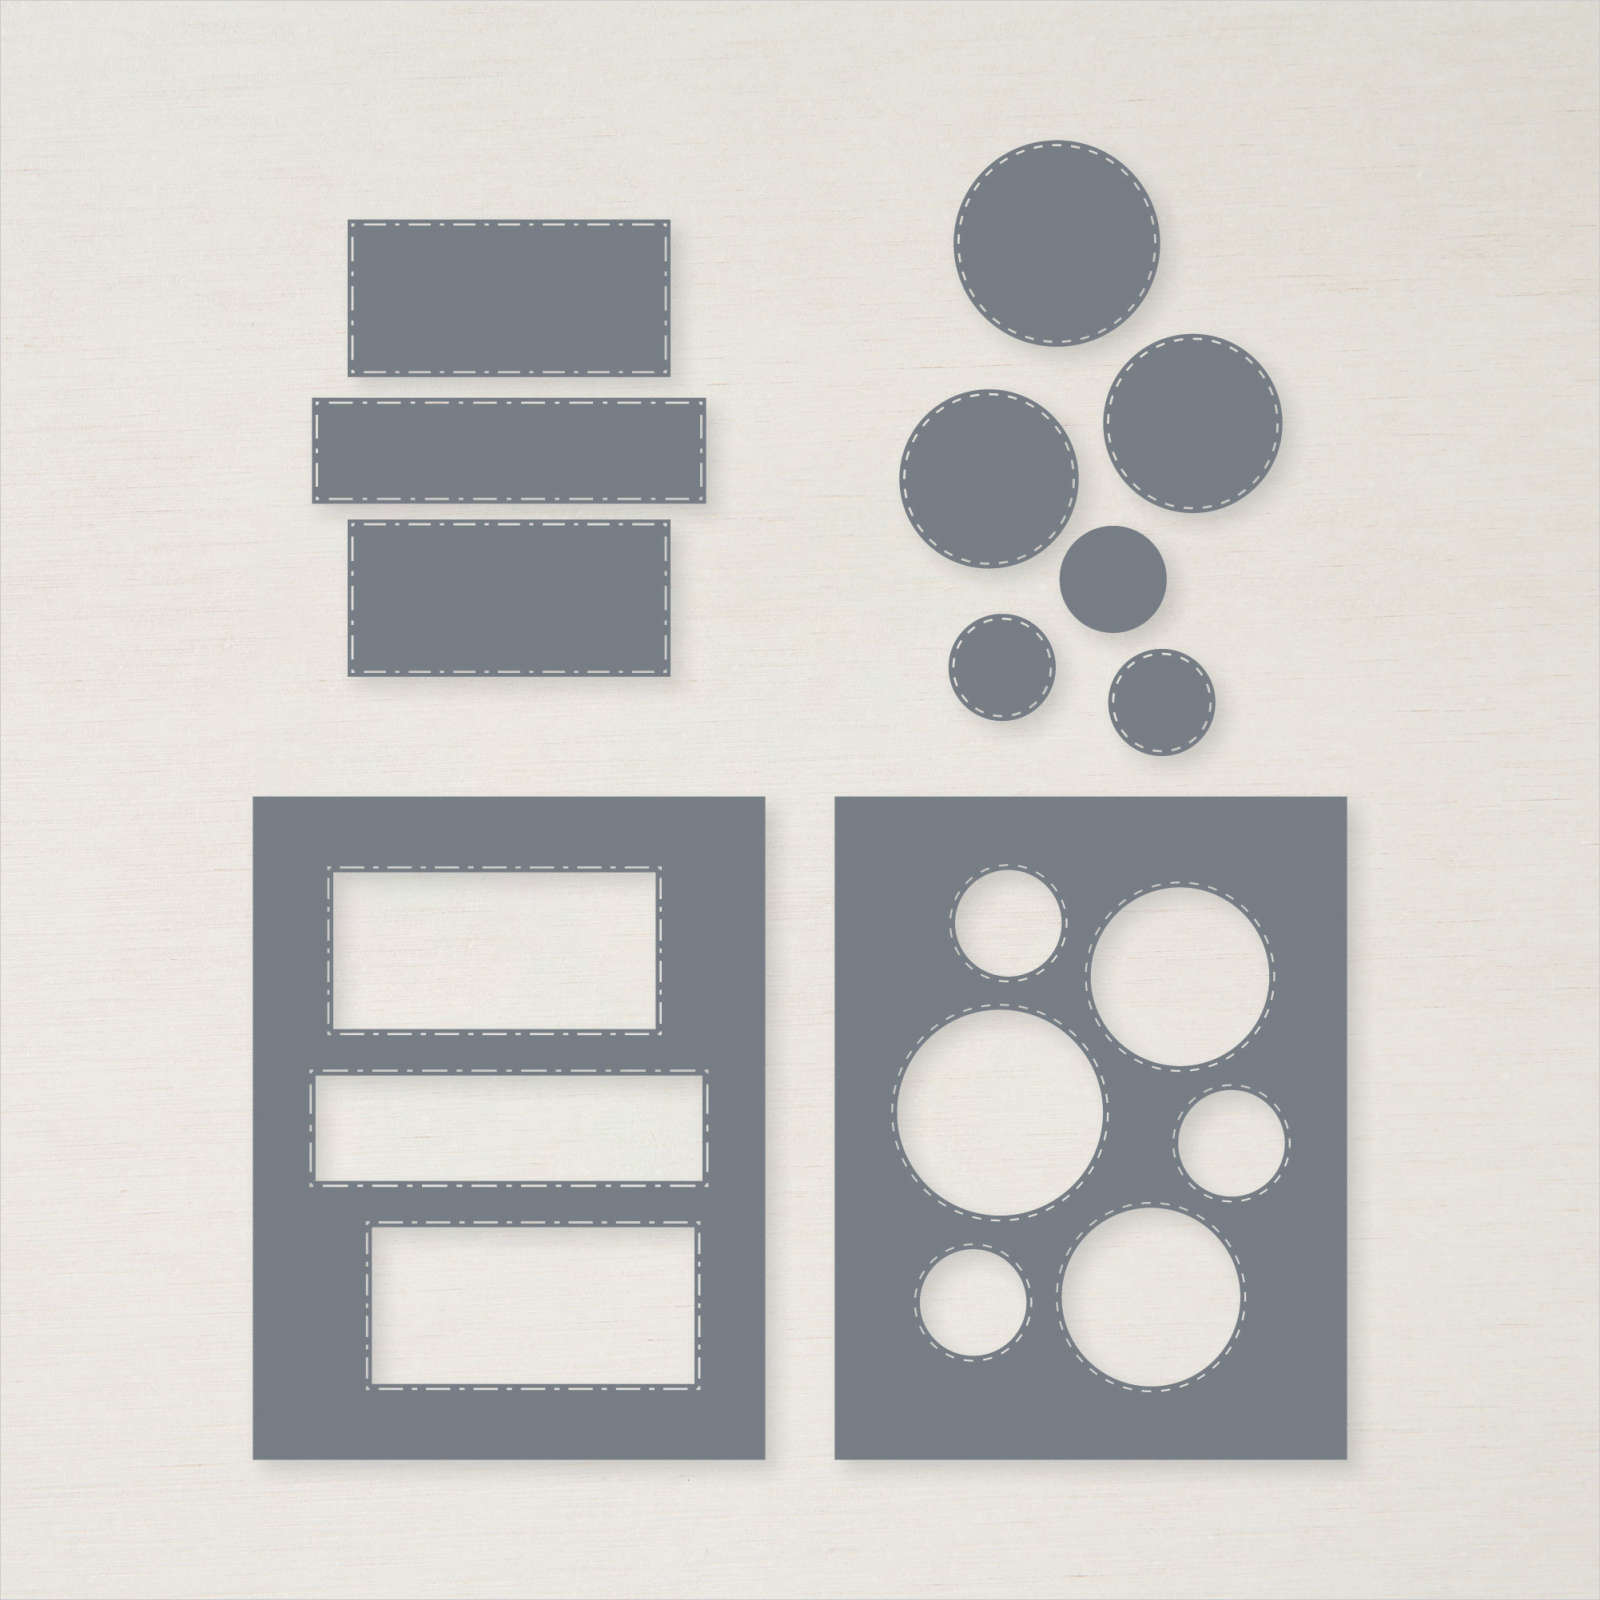
Picture This Dies
Here is quick refresh for you. There are two dies that both cut and stitch. We are using the rectangle one for this card.
HERE is the link to the product in my 24/7 Online Store
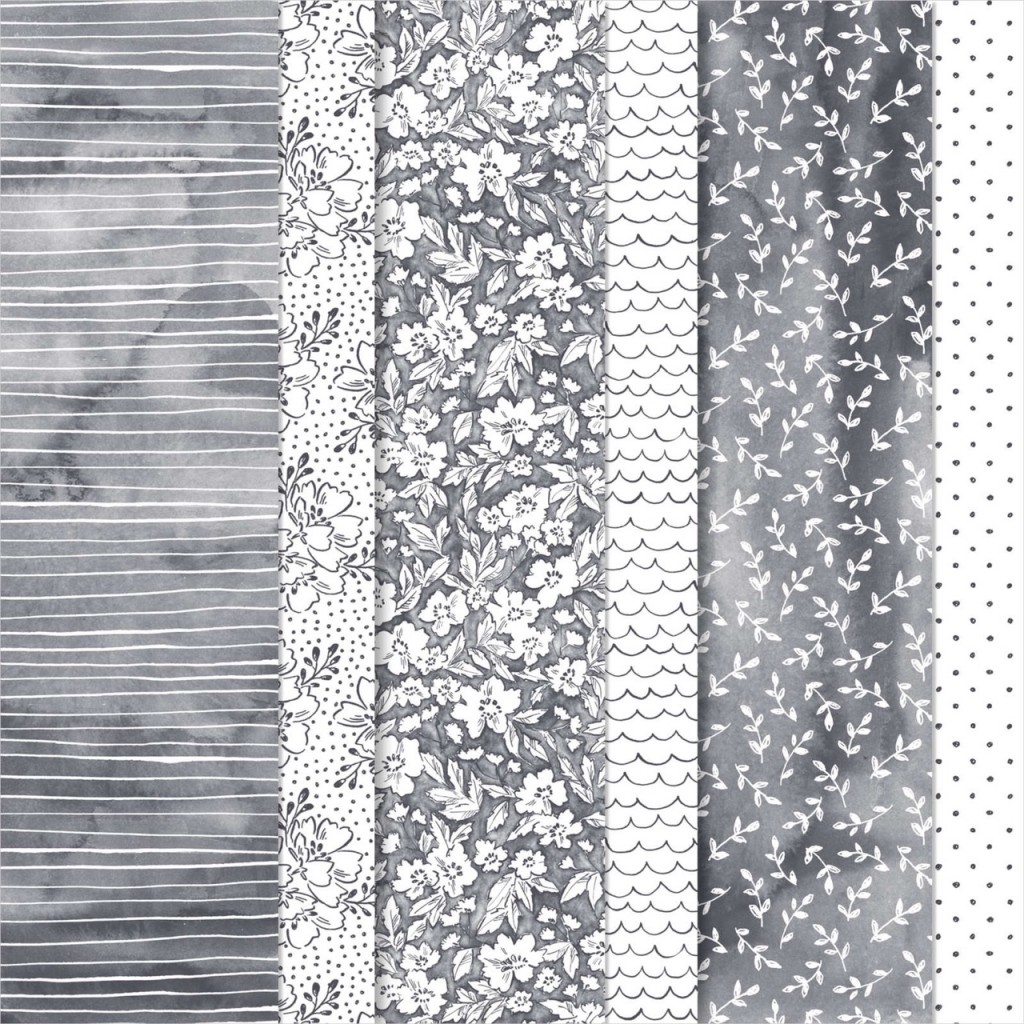
Beautifully Penned Designer Series Paper
It has a watercolour look in various black tones, making it easy to use with any colour or any style for our projects. While it can be coloured with Stampin’ Blends, Water Painters, and more, we are using it in it’s natural state.
HERE is the link to the product in my 24/7 Online Store
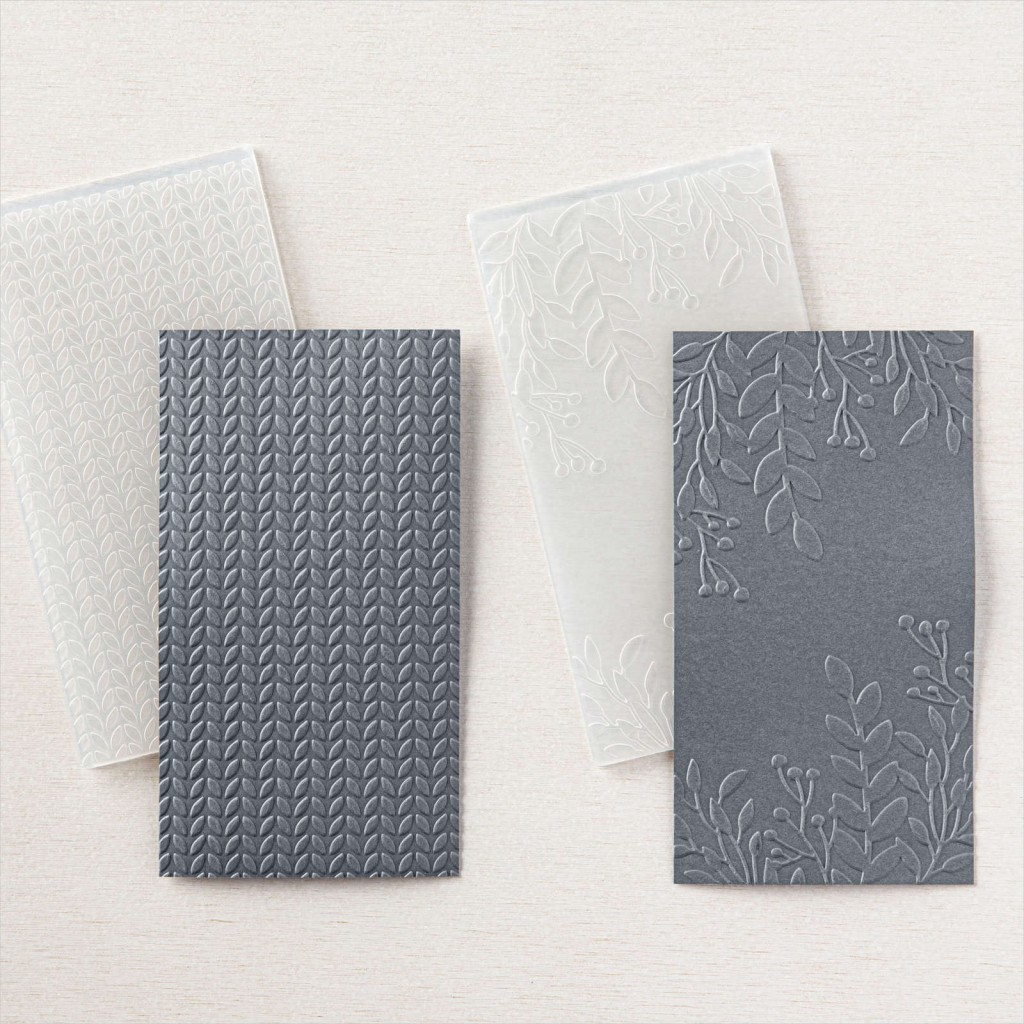
Greenery Embossing Folders
We are adding more ‘greenery’ and some additional texture to our card design with an embossed layer under the Picture This die cut and the solid Harvest die cuts.
HERE is the link to the product in my 24/7 Online Store
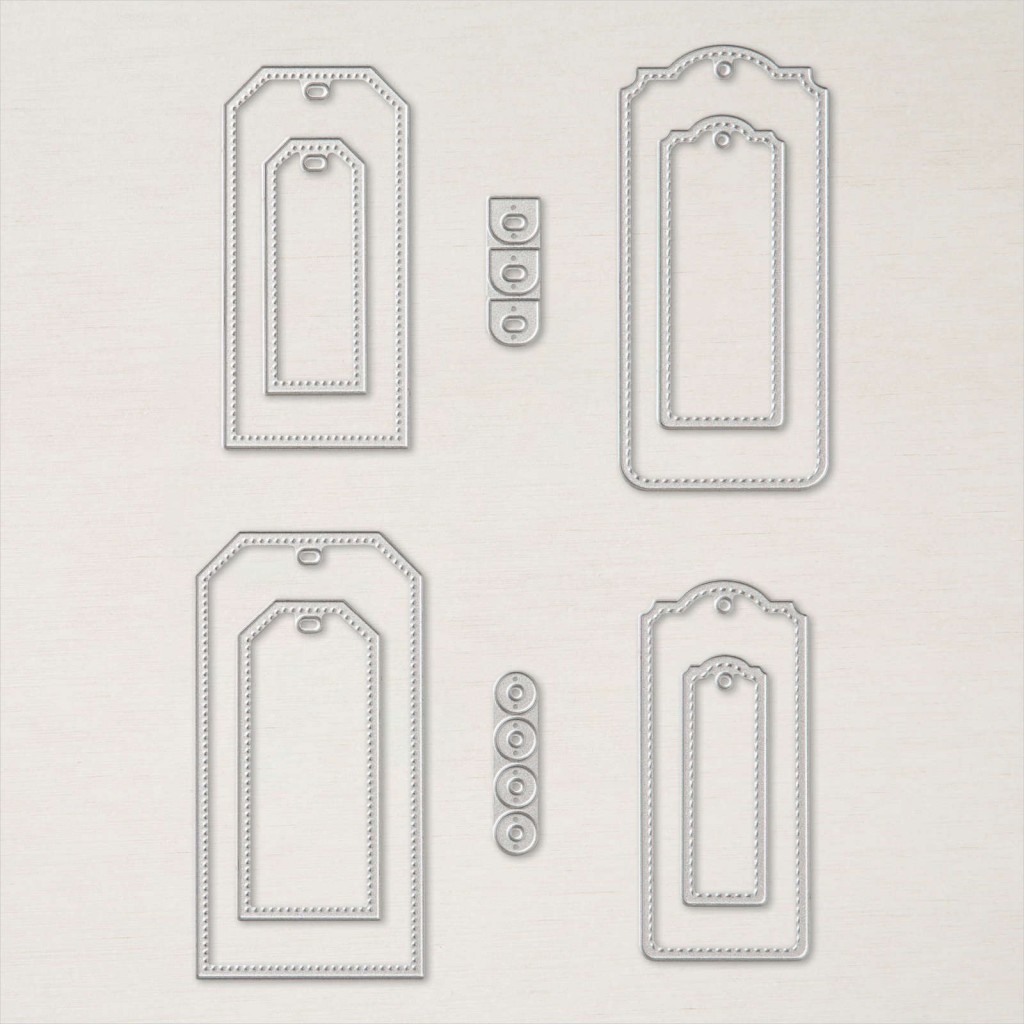
Tailor Made Tags Dies
These Tailor Made Tags add some extra pizzazz. They are a go-to for me!
HERE is the product link in my 24/7 Online Store
Now! Let’s get on to putting this card together!!!
Nature’s Harvest & Beautifully Penned Card #1
Here is your class kit. Please retain the 3 Picture This die cut rectangles for Card #2.
Supplies
- Stamp Sets, Dies & Embossing Folders: Nature’s Harvest Bundle. Picture This Dies, Tailor Made Tags Dies, Greenery Embossing Folders, Handsomely Suited Stamp Set (greeting), Christmas Cheers Dies (Brushed Metallic dots).
- Papers; Beautifully Penned DSP (SAB), Cork Specialty Paper, Brushed Metallic, Basic White and Just Jade card stock.
- Ink: Just Jade, Memento Tuxedo Black, Soft Suede.
- Other: Simply Elegant Trim (gold cord), Mini Dimensionals, Multipurpose Liquid Glue, Mini Glue Dots, Take your Pick Tool, Trimmer, Cut & Emboss Machine
Dimensions
- Card Base: Just Jade, 29.7 x 10.5 cm scored at 14.85 (I have done this for you),
- Greenery Embossed Layer: Just Jade 14.5 x 10.1 cm,
- Layering DSP: Beautifully Penned, 14.5 x 10.1cm, die cut with Picture This Die. (retain additional die cut pieces for the next card,
- Card Insert: Basic White, 13.9 x 9.5 cm,
- Other; scraps of Cork and Basic White for die cut botanical shapes and greeting label.
Step by Step Directions: (please see pictures below)
-
- Burnish card base score line,
- Adhere Beautifully Penned layer to Greener embossed layer. I used Multipurpose Liquid Glue. Retain the 3 rectangle pieces for Card #2.
- Adhere this section to the card front using Mini Dimensionals (or Dimensionals),
- Adhere small Cork die cut circle to Tailor Made Tag,
- Stamp your desired greeting. I used ‘You’re the Best’ from Handsomely Suited Stamp Set. Many different greetings will fit on this tag. I’ve also included an additional piece of Basis White card stock, just in case you need it.
- Attach Simply Elegant Trim (gold cord) to Tag
- Adhere Cork large flower die cut to the Basic White die cut, offsetting them.
- Adhere Cork ‘grass/seeds’ to card front with glue or Mini Glue Dots
- Adhere assembled ‘flower’ to card front with Mini Dimensionals.
- Adhere Tag to card front with Mini Dimensionals.
- Adhere Brushed Metallic die cut dots to card front with glue. (You wont need them all!) You could substitute the Brushed Metallic Adhesive Backed Dots for a bit more sparkle!

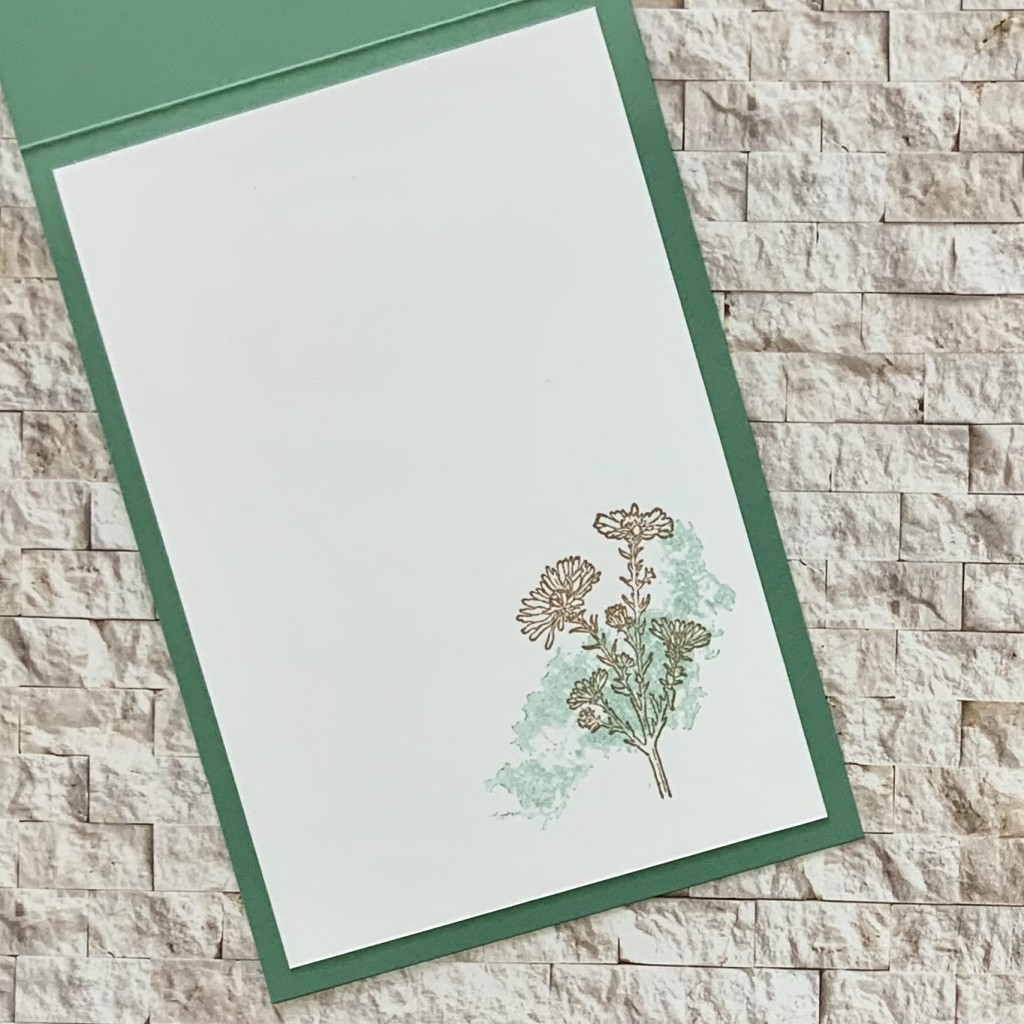
Inside of card
-
- Stamp greeting/and or botanical images on Basic White card stock.
- Adhere to card base
Here is an example for you. I used two of Nature’s Harvest botanical images.
Sale-a-Bration is Nearly Over!
Sale-a-Bration runs 3 August – 30 September 2021. There are three great extra reasons to celebrate; SHOP, HOST & JOIN
HERE the details in my previous post.
‘Expressions In Color’ Paper Pumpkin Available from 8 September.
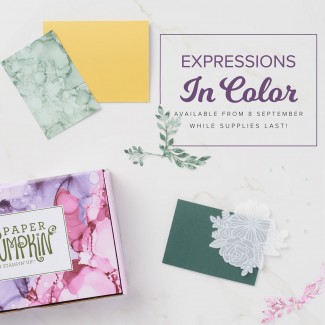
MAKE A SPLASH! – while stocks last!
HERE the details in my previous post.
Creative WOW Tutorial: Here is the September 2021 Sneak Peek
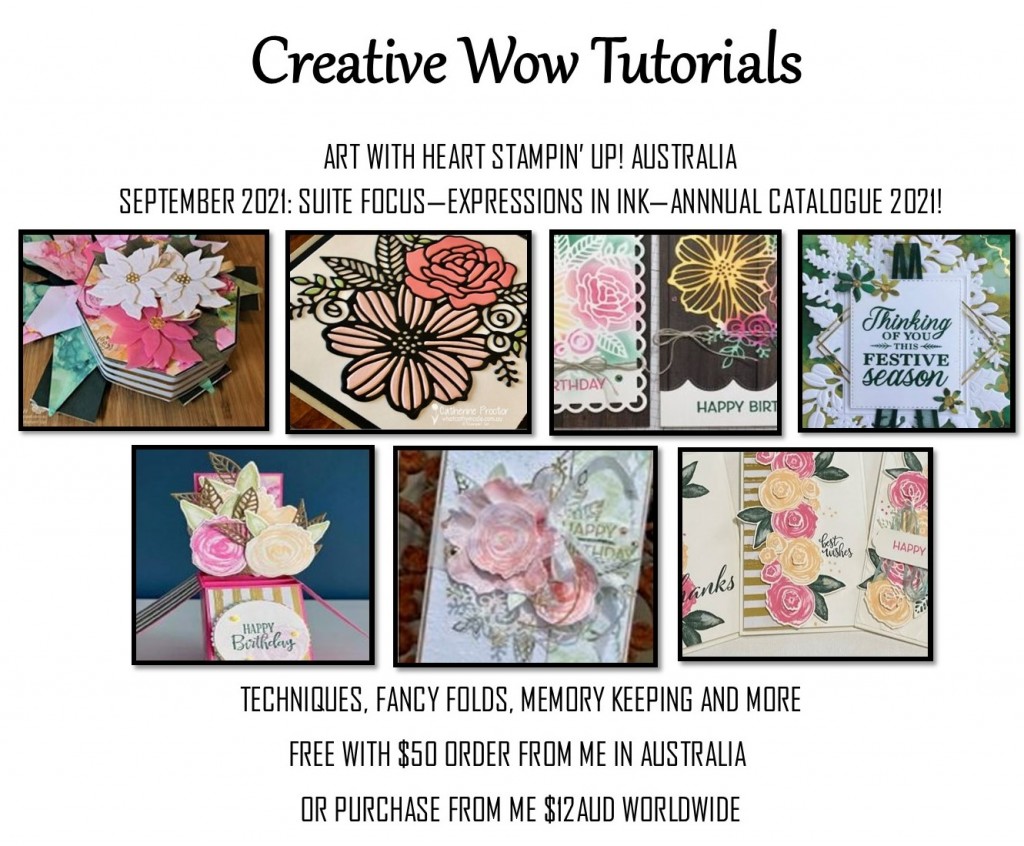
Can you spot my contribution this month?
This selection of Tutorials is based around our Expressions in Ink Specialty Designer Series Paper, Artistically Inked Bundle and links to the upcoming Expressions in Color Paper Pumpkin (see above).
There are stunning designs and many different ideas, from standard cards, fancy folds, 3D cards, ornaments, and gift packaging.
I have emailed all the Tutorials for the previous months. As the files are quite large, please let me know if you have not received your copy. Please be in touch if you would like to purchase back copies of previous Tutorials or, this current Tutorial.
Join my Classes:
Please contact me if you would like to join my paper-crafting classes. I run several class groups. You might like to arrange a private class for you and your friends, or you might like to join my online/virtual class with prepared class kits and PDF/web Tutorials.
Please chat to me about your ideas or queries.
Have Fun Crafting. Enjoy the samples and your own wonderful creativity.
My business Facebook page is:
https://www.facebook.com/margistamps/
My Pinterest site is:
https://www.pinterest.com.au/margisank/
My Stampin’ Up Online Store is HERE
My Stampin’ Up website is HERE
My blog website is:
http://www.margistamps.com/
……… till next time, stay safe, have fun!
![]()
LOVE IT. LIVE IT. SHARE IT.
