

Please enjoy my Tower Fancy Fold design with Peaceful Prints Designer Series Paper. The card folds flat to post in a standard C6 envelope. It’s a ‘special’ Christmas Card, but is great for any occasion. I have included both Metric and Imperial Measurements in the directions below.
If you’re not in my class groups, you are welcome to enjoy these designs and your own creativity. If you would like to join one of my groups (online – at the moment) and live in Australia, please contact me. I would love to hear from you.
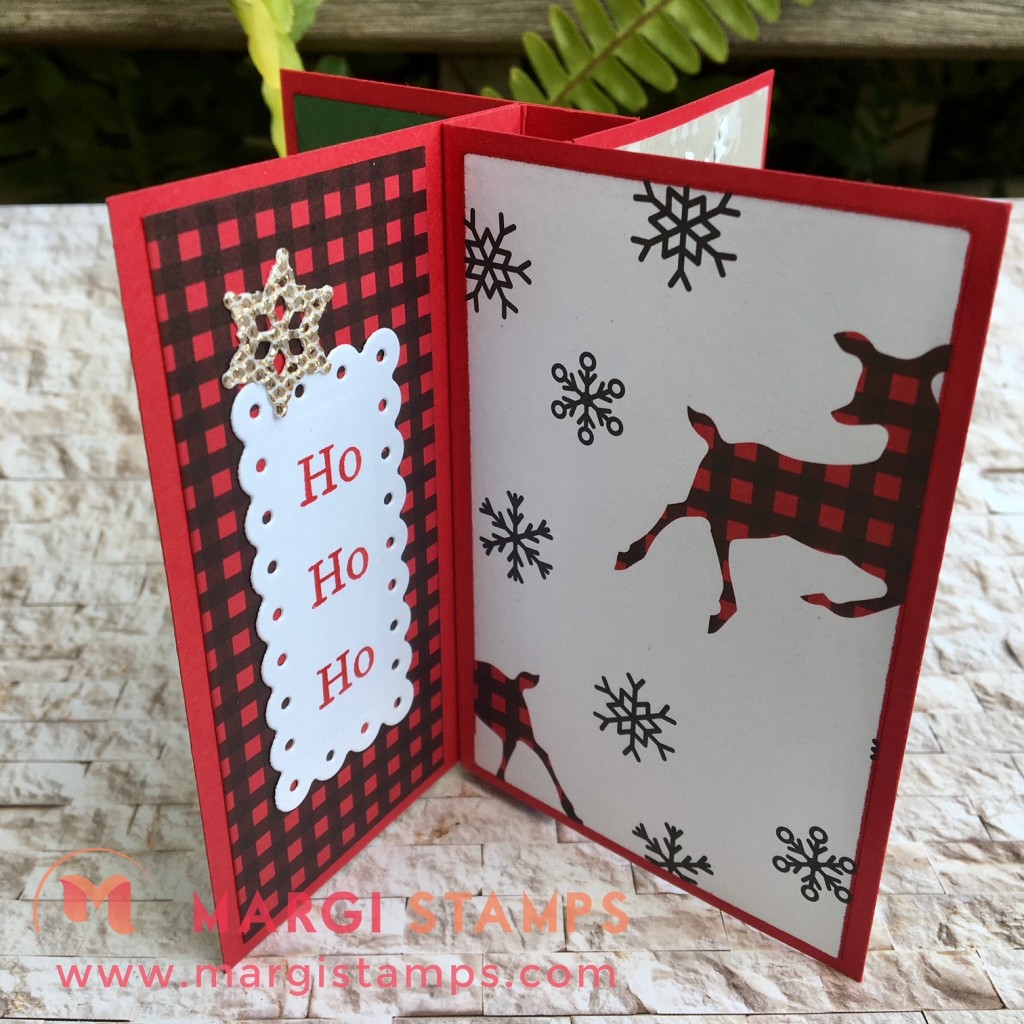
Tower Fancy Fold Card with Peaceful Prints DSP
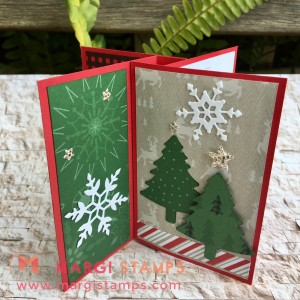
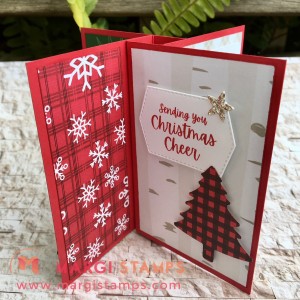
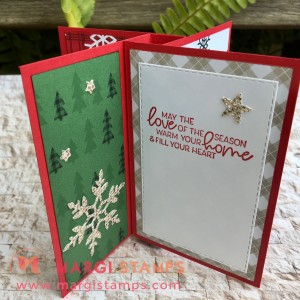
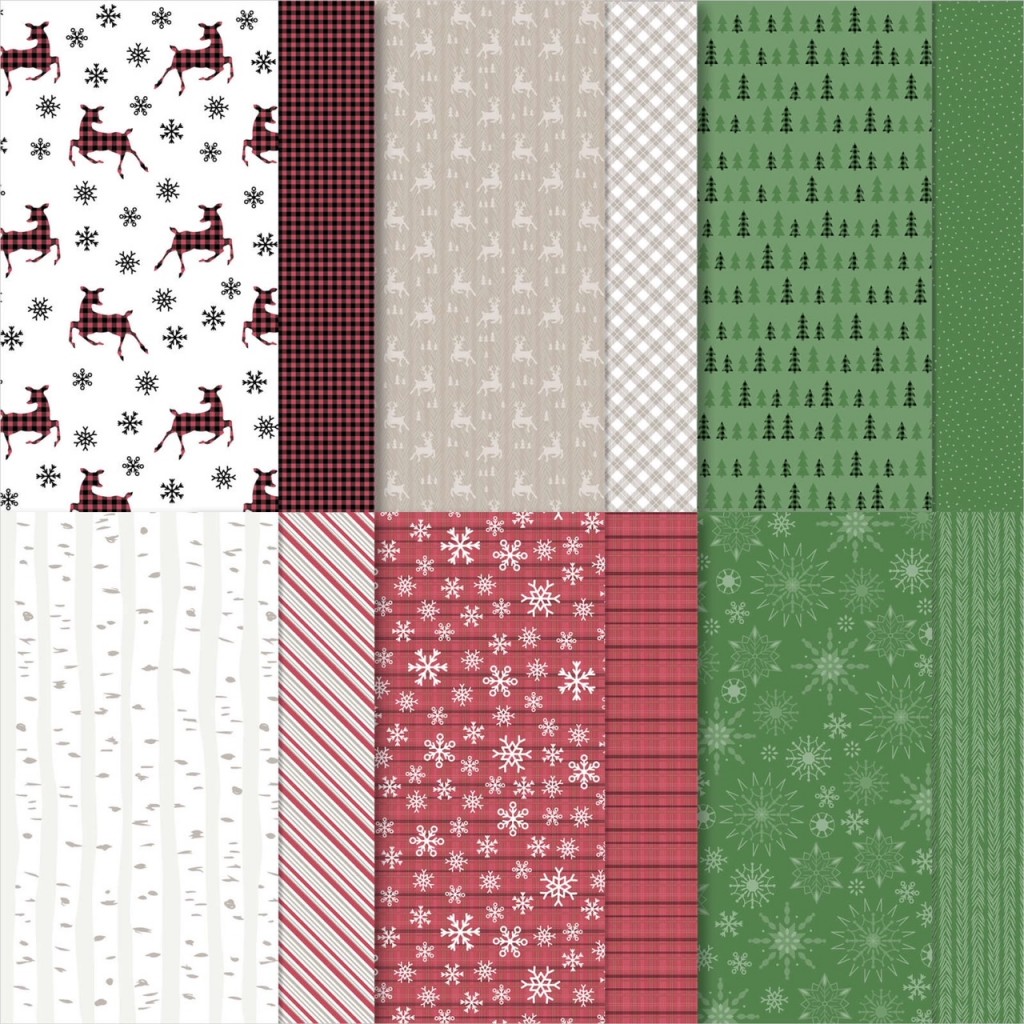
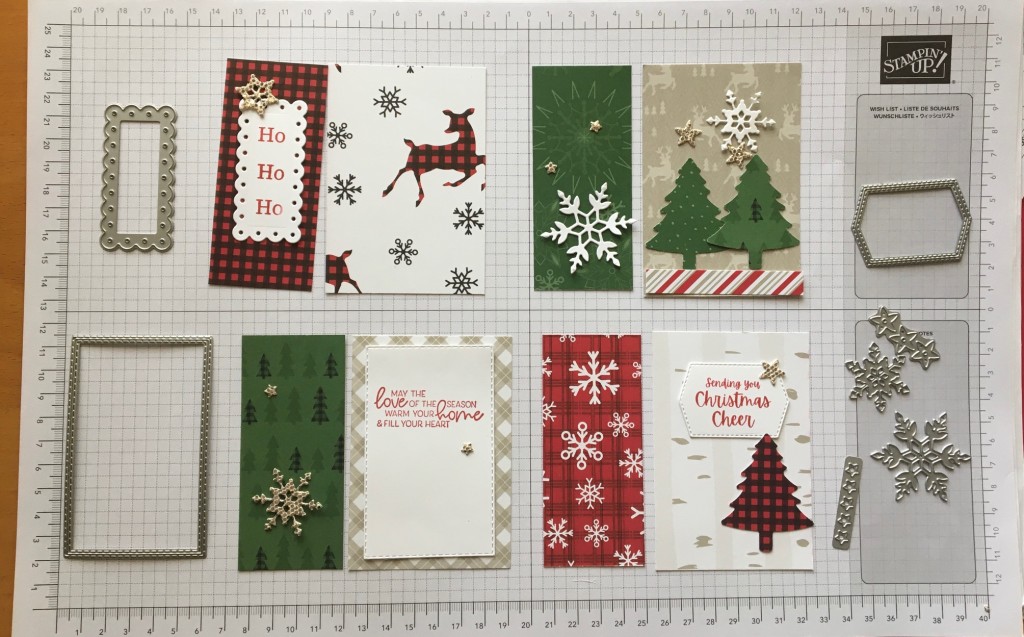
Can you see that there are FOUR separate card views and that each view leads to the next one? I picked a selection of DSP sheets so that RED and GREEN are alternating, with the Sahara Sand and White DSP as the neutral/supporting colours.
Your kits are packed in four ‘card views’ packets and one additional packet containing the card base components and the bling. Needless to say, you might like to change your card view designs. There is no end of possibilities!
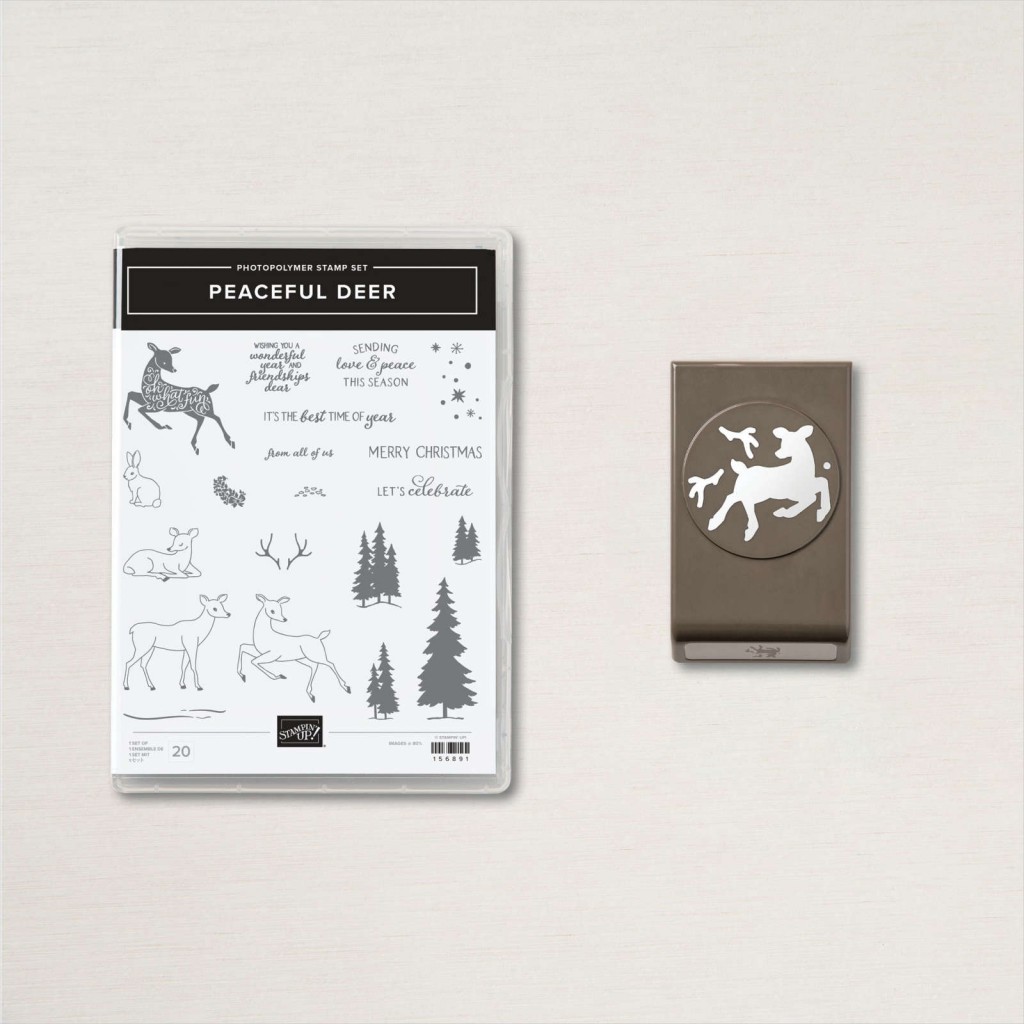
Peaceful Prints Designer Series Paper & Peaceful Deer Bundle
Peaceful Prints Designer Series Paper is one of the FREE options during Sale-a-Bration. It is a great choice for a Tower Card as the designs are relatively small and the sheets are designed to co-ordinate with each other. The other bonus is that it also co-ordinates with Peaceful Deer Bundle. I haven’t used the Bundle in your kits, but if you have it, you might like to incorporate elements into your card.
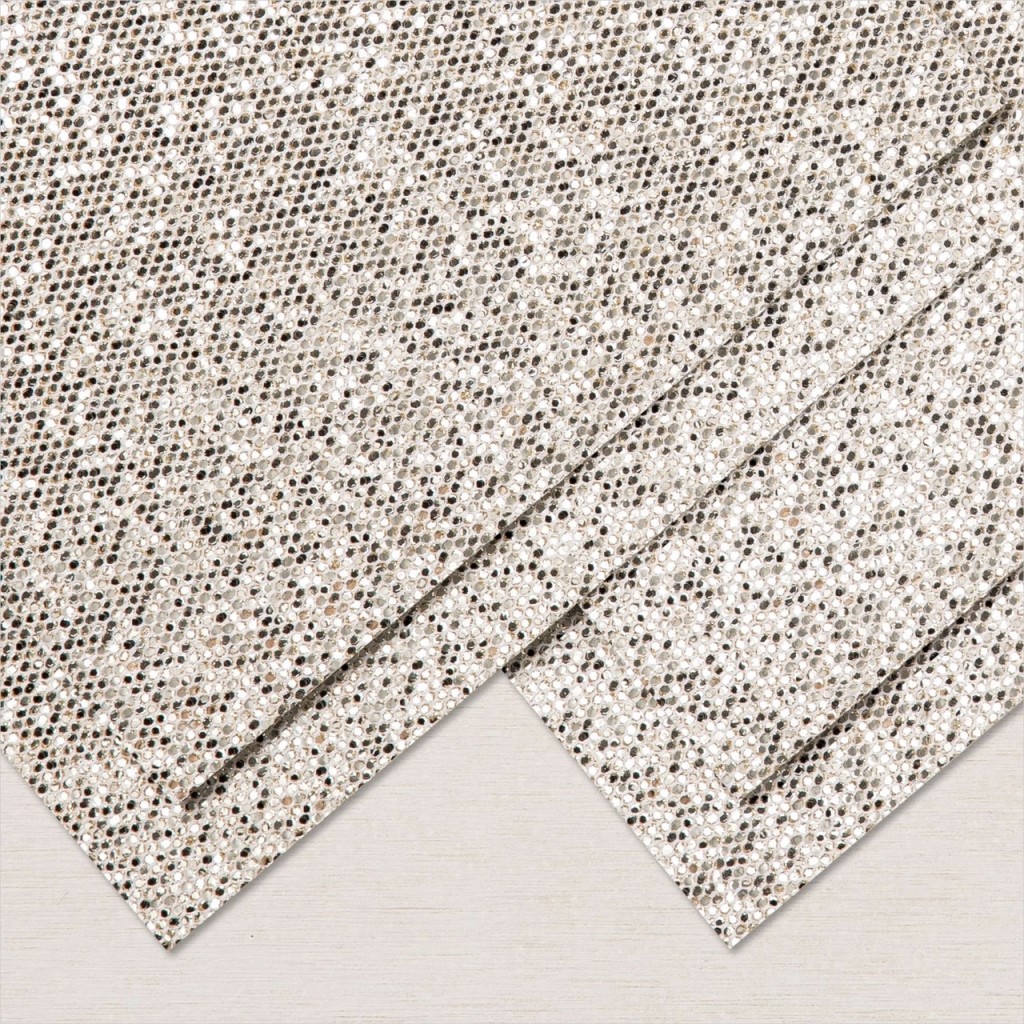
Your Kits include embellishments die cut from Basic White and Be Dazzling Specialty Paper. Be Dazzling is another of the Sale-a-Bration offerings FREE with a qualifying purchase of $90.
Peaceful Prints Designer Series Paper
HERE is the direct link in my 24/7 Online Store
Peaceful Deer Bundle.
HERE is the direct link in my 24/7 Online Store
Be Dazzling Specialty Paper
HERE is the direct link in my 24/7 Online Store
TOWER Fancy Fold Card with Peaceful Prints Paper
Here is your Peaceful Prints Tower Fancy Fold Card Kit – There are 5 packets in total. Please Enjoy!
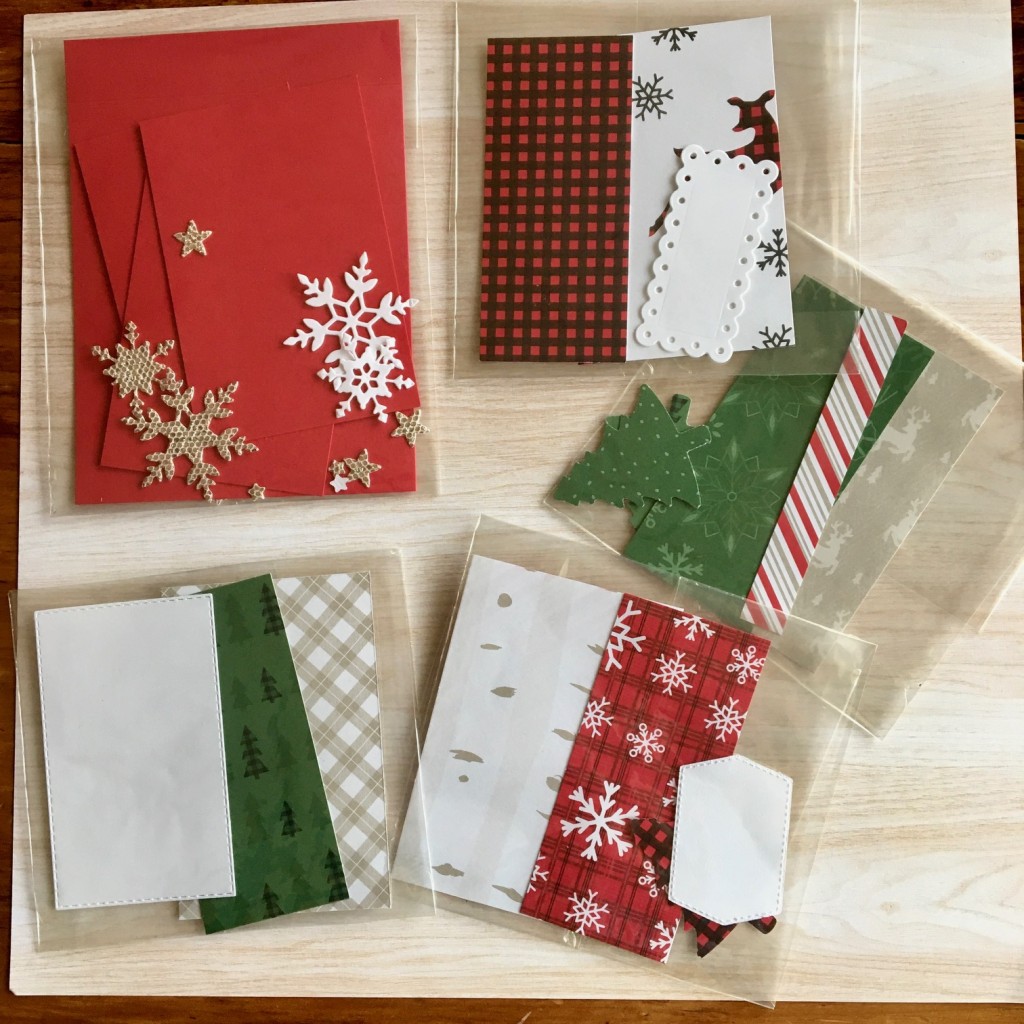
Your kit is comprised of five packets;
- Packet 1- Card Base and Bling ( 2 Be Dazzling Snowflakes, 2 White Snowflakes, 3 medium Be Dazzling stars, 5 small Be Dazzling stars.)
- Packet 2-5; each of the four card views.
Supplies
- Stamp Sets, Dies & Punches: Greetings (Perfectly Plaid, Whimsical Trees, Words of Cheer stamp Sets), Sentiment Layers (Scalloped Contour, Stitched Rectangle, Tasteful Labels Dies), Embellishments (Christmas Cheers, Christmas Trees, So Many Snowflakes and Pine Tree Punch for the Trees.
- Papers; Peaceful Prints DSP, Be Dazzling Specialty Paper, Basic White and Real Red card stock
- Ink: Garden Green and Real Red
- Other: Mini Dimensionals, Multipurpose Liquid Glue, Mini Glue Dots, Take your Pick Tool, Trimmer, Cut & Emboss Machine
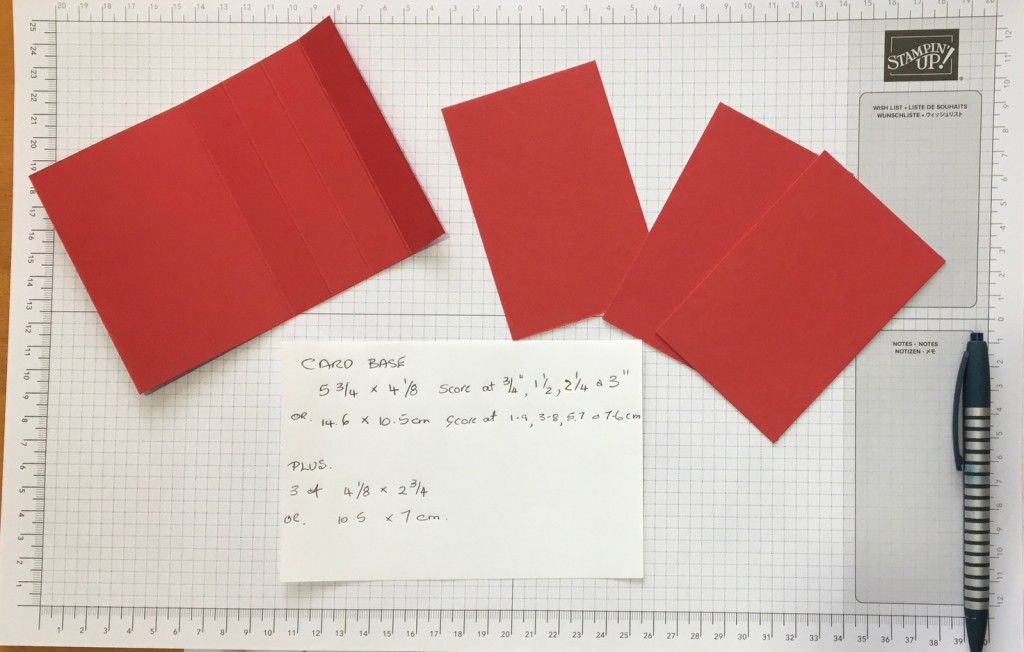
Dimensions
Your kits are in metric, but I have included both sets of measurements below.
Metric
- Card Base: 14.6 x 10.5 cm scored at 1.9, 3.8, 5.7 and 7.6 cm (I have done this for you), plus
- Blades/Panels: 3 each of 10.5 x7 cm.
- Layering DSP: 4 each of 10 x 6.5 cm and 4 each of 10 x 4.6 cm
Imperial
- Card Base: 5 3/4″ x 4 1/8″ scored at 3/4″, 1 1/2″, 2 1/4″ and 3″, plus
- Blades/Panels: 3 each of 4 1/8″ x 2 3/4″
- Layering DSP: 4 each of 3 7/8″ x 2 1/2 and 4 each of 3 7/8″ x 1 3/4″
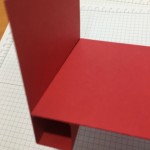
Packet 1- Tower Fancy Fold Card Base (& Bling)
Step by Step Directions: (please see pictures below)
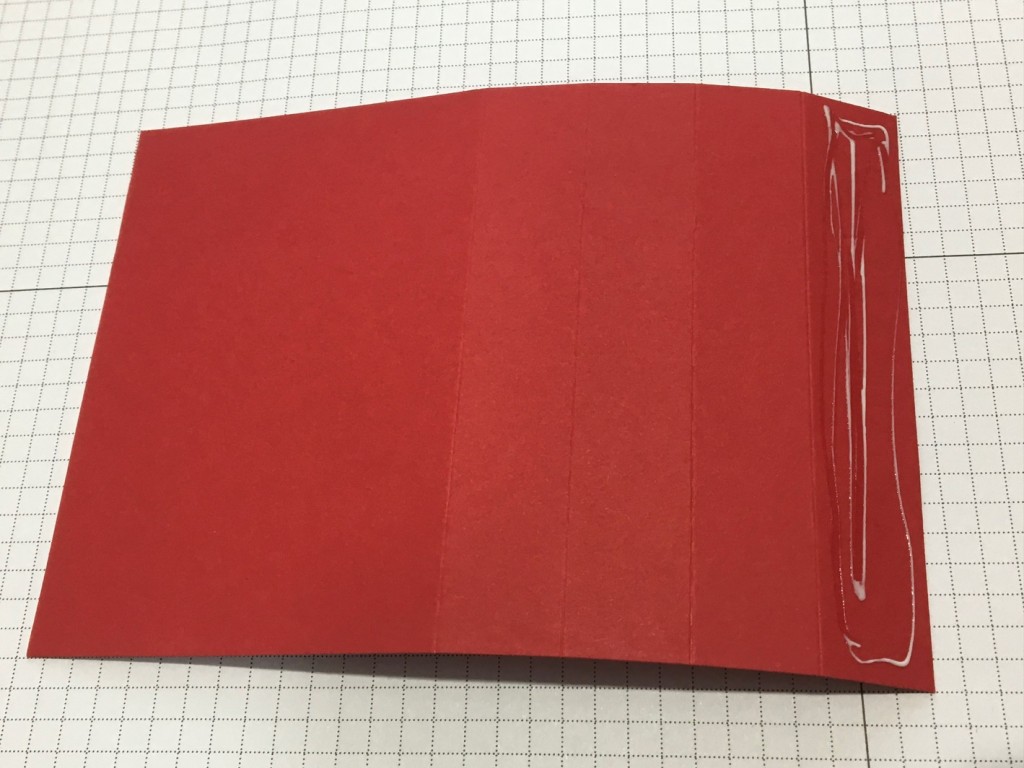
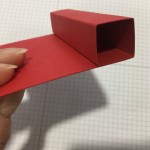
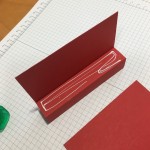
- Burnish all score lines
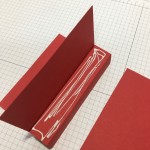
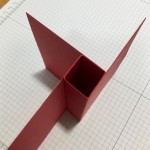
- Make your tower using multipurpose liquid glue (tombo). You now have your tower and one blade
- Use tombo to adhere the next blade. HINT: Ensure that all blades are adhered securely and square- test by folding the card flat and the blades will lie flat one of top each other without going off on an angle!
- Use tombo to adhere the next blade
- Use tombo to adhere the final blade
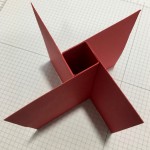
Arrange your Card Views
I found it easier to lay out my card view designs before adhering any DSP, greeting layers or bling. Here are my basic designs, including the dies that I used to prepare your kits.
And these are the preparation steps for you:
- Stamp your chosen greetings on the various die cuts. I used Ho Ho Ho from Perfectly Plaid, May the Love of the season….from Whimsical Trees and Sending you Christmas Cheer from Words of Cheer.
- Sponge the edges of all DSP layers and red Tree with Real Red ink, and the green Trees with Garden Green ink.
- Adhere DSP to panels, doing one ‘view’ at a time
- Adhere sentiment/greeting layers. (I used Mini Dimensionals under Christmas Cheer but all other greeting layers are glued onto the card base.) HINT: You don’t want the card to be too bulky to mail when folded flat.
- Adhere Red Tree using Mini Dimensionals, glue under one Green Tree and Mini Dimensionals under the other.
- Adhere Snowflakes and small stars with glue. (I trimmed down one of my Be Dazzling Snowflakes). I popped up two of the medium stars with Mini Dimensionals.
Naturally, please contact me if you have any queries, or need some more advice. ‘
Sale-a-Bration is Nearly Over!
Sale-a-Bration runs 3 August – 30 September 2021. There are three great extra reasons to celebrate; SHOP, HOST & JOIN
SHOP
How do you earn Sale-A-Bration products? It’s simple! During SAB, any orders you place, $90 or more, will qualify you for free products. For every $90 AUD and $180 AUD you spend, you’ll be able to take your pick of Sale-A-Bration products to add to your order—for free!
HOST
Earn even more free products by hosting a party . Place any party or personal order over $500 and receive the exclusive In Your Words Stamp Set for FREE. It’s included in the SAB photo above!
JOIN
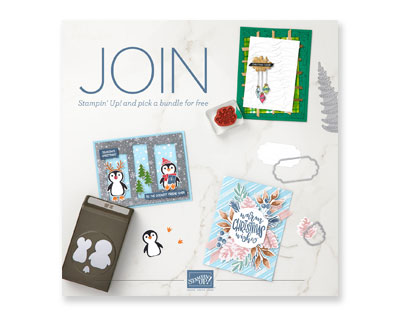
Join just for yourself to get a discount, and/or build a business, be part of my team and meet friends who love to craft. The choice is yours, and I’m only too happy to chat with you OR, you might like to hop on over to my JOINING PAGE
Here’s a quick look at the offer!
- Choose $235 product for a $169 spend ($66 for FREE) (incl. 2021-2022 Annual Catalogue and Mini {Christmas)}Catalogue), PLUS…
- FROM 3 August – 30 September- IN ADDITION, choose your FREE Bundle (valued up to $104.25)
- FREE Shipping
- FREE Business Kit, including current catalogues.
- And the opportunity to order from any existing catalogue at 20% discount.
Expressions In Color’ Paper Pumpkin Available from 8 September.
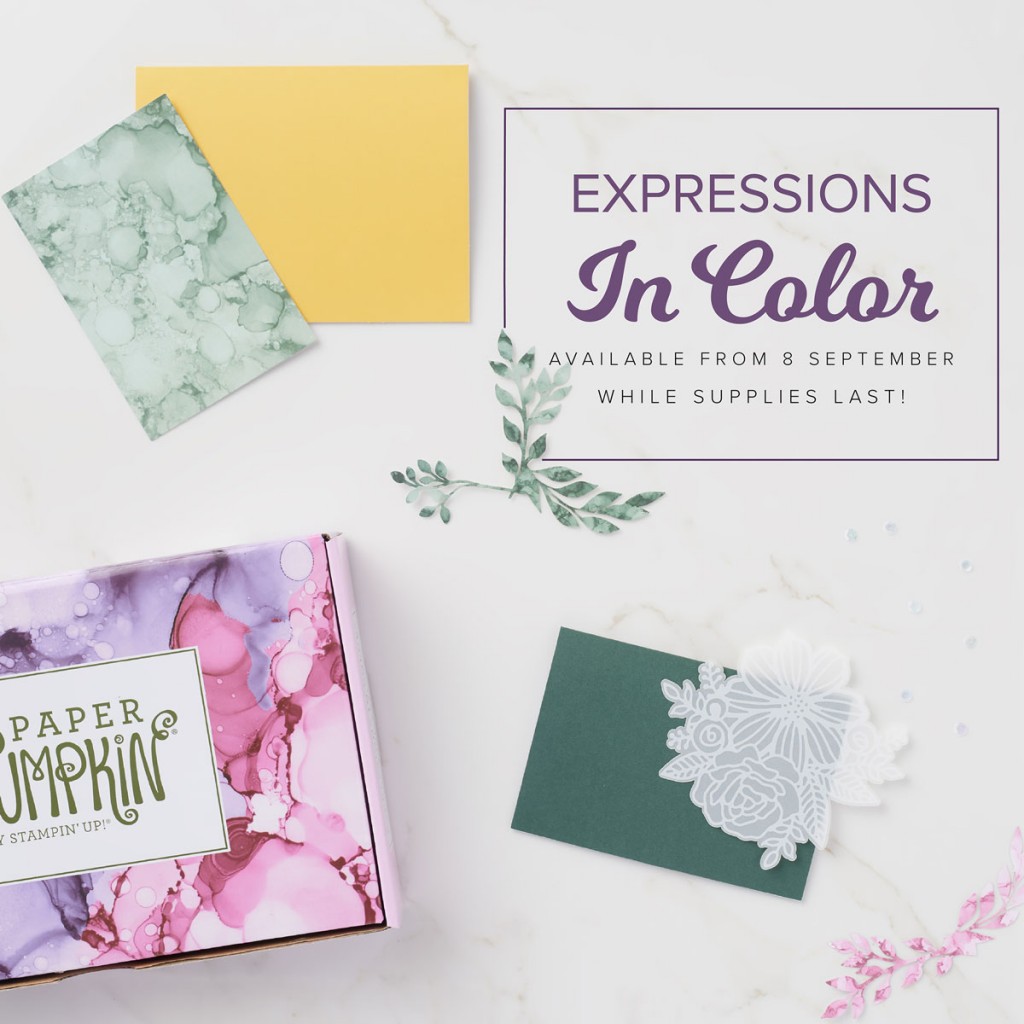
MAKE A SPLASH! – while stocks last!
Dream and discover In Color with this global Paper Pumpkin kit! With inspiring ink-stained elements and a stamp set with sentiments for any occasion, sending a splash of smiles is simple.
About the kit:
• Contains enough supplies to create nine cards and coordinating envelopes.
• Includes an exclusive stamp set and two Classic Stampin’ Spots.
• Features colours from our 2020–2022 and 2021–2023 In Color collections!
• Coordinates with products from our Expressions in Ink Suite.
• Comes in a cute, colourful, and collectible box!
HERE is the direct link in my 24/7 Online Store
Creative WOW Tutorial: Here is the September 2021 Sneak Peek
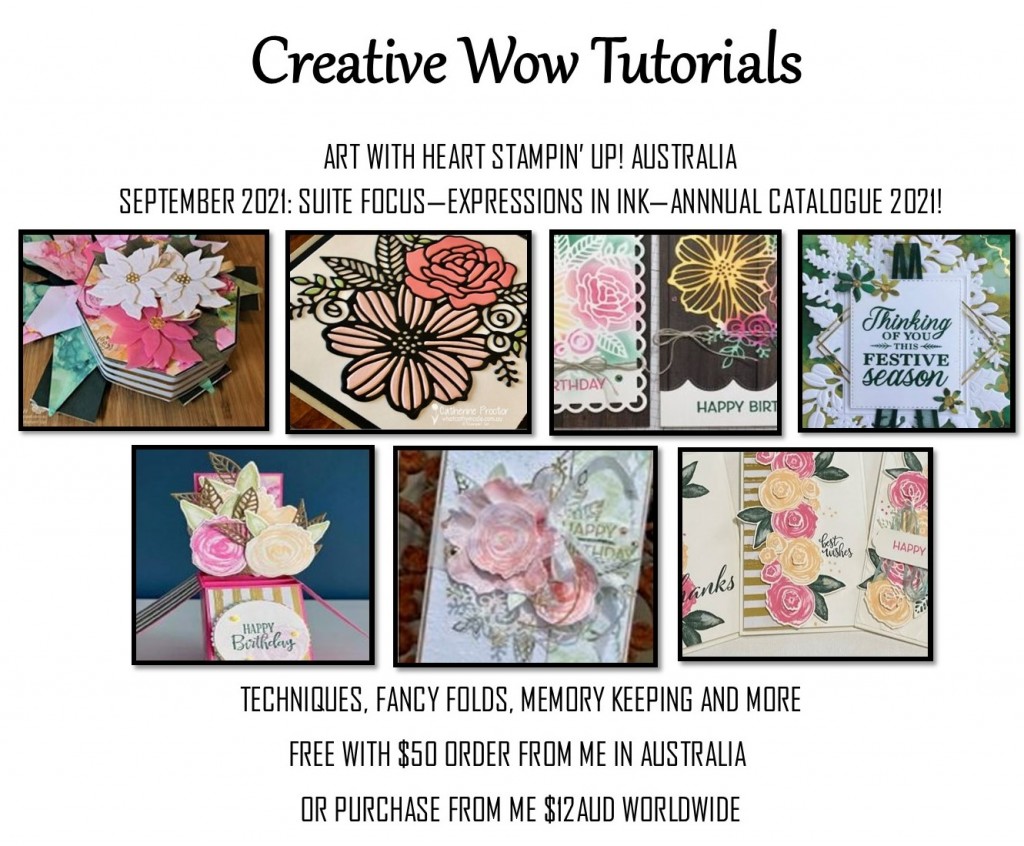
Can you spot my contribution this month?
This selection of Tutorials is based around our Expressions in Ink Specialty Designer Series Paper, Artistically Inked Bundle and links to the upcoming Expressions in Color Paper Pumpkin (see above).
There are stunning designs and many different ideas, from standard cards, fancy folds, 3D cards, ornaments, and gift packaging.
I have emailed all the Tutorials for the previous months. As the files are quite large, please let me know if you have not received your copy. Please be in touch if you would like to purchase back copies of previous Tutorials or, this current Tutorial.
Join my Classes:
Please contact me if you would like to join my paper-crafting classes. I run several class groups. You might like to arrange a private class for you and your friends, or you might like to join my online/virtual class with prepared class kits and PDF/web Tutorials.
Please chat to me about your ideas or queries.
Have Fun Crafting. Enjoy the samples and your own wonderful creativity.
My business Facebook page is:
https://www.facebook.com/margistamps/
My Pinterest site is:
https://www.pinterest.com.au/margisank/
My Stampin’ Up Online Store is HERE
My Stampin’ Up website is HERE
My blog website is:
http://www.margistamps.com/
……… till next time, stay safe, have fun!
![]()
LOVE IT. LIVE IT. SHARE IT.
